• There were many reasons for the change of the site software, the biggest was security. The age of the old software also meant no server updates for certain programs. There are many benefits to the new software, one of the biggest is the mobile functionality. Ill fix up some stuff in the coming days, we'll also try to get some of the old addons back or the data imported back into the site like the garage. To create a thread or to reply with a post is basically the same as it was in the prior software. The default style of the site is light colored, but i temporarily added a darker colored style, to change you can find a link at the bottom of the site.

What did you do to your Spyder today?

A couple of days ago, I took my ratty seat to a fellow that re-upholsters and re-covers seats. He called and said it would cost about the same to redo my seat as get a new one. Caught a sale on a comfort seat, and tried to install it my self.

Hardy har har.

Today, I rode through 6 feet of snow and sub-artic temps to get to the shop for them to fix it. I brought all the leftover parts. Apparently, it was some from my Spyder seat, some from my Honda that I had 10 years ago and maybe the kids erector sets.

I ordered what was missing and rode home. Temps had improved, to almost freezing. It was still snowing, but very little traffic.

Maybe I'll rent a trailer for the return trip.
 
Last edited by a moderator:
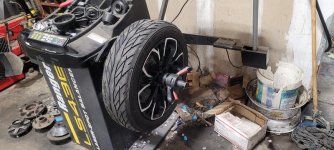
Balanced the front tires and tightened all of the fender mounting hardware... I can't feel the shake from my bike, but I noticed a little bit of a rattle from the front last trip when we used her bike to tour around small towns.

Was also a bit disappointed that they only static balance the tires at the factory, but pleasantly surprised that the tires did fit my automotive balancer shaft! Found them 1oz and 1.5oz out.

20241122_110733.jpg
 
Last edited by a moderator:
Installed the SE Performance LED Driving Light Bar. You cannot have enough lights if you drive on less than four wheels. I liked this one as it was a full 10" and lots of bright LEDs. The hardest part was getting the wire bundle from the front hole back to where I could bring it up without it being vulnerable to underside debris hits. This kit came with a voltage reverser harness as some RT's accessory plugs are wired backwards. Funny thing is the switch illumination worked but the light did not so I installed the reverser harness and the light worked but switch illumination did not. So I removed the reverser harness and just flipped the light bar harness and it all worked.
 
Last edited:
Last Wednesday I had a slow speed deer strike on my Honda NC750XD. The bike and I went down on the right side. I was "wearing all the gear" except for elbow pads in the jacket. They were removed because they interfered with putting on the coat while wearing heavier clothing like sweat shirts. Anyway, I was remarkably unhurt. Right big toe was sore and eventually a bruise showed up. My right elbow is badly bruised and has a minor amount of road rash. I was really lucky, The deer died and the bike was a total loss once they found evidence of the fork being bent. My Aerostich jacket did its job but now has a big hole in the right elbow and is abraded down the right side. The jacket needs to be replaced.

Progressive Insurance has been great to work with so far.

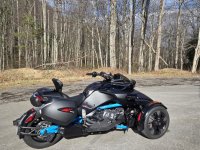
Yesterday I rode the Can Am up to the shop and removed the Denali driving lights, Garmin Zumo XT mount, and Knight Designs lowered foot pegs from the Honda. 15 total miles for the day.

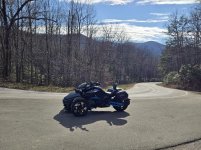
Today I'll do my weekly Polar Bear ride on the Can Am, estimated round trip of 76 miles.

Progressive has been great with both of my major accidents, not only have they paid for a reframe and replaced the whole swing arm assembly on my F3 but also replaced my damaged helmets after each accident.

They also assisted me with getting state farm (other car owners insurance) to pay for my medical bills after the second accident.
 
Installed the "Missing Belt Guard" from Lamonster Garage and the auxiliary driving light from Can-Am. Both very simple installs! I also purchased the Lamonster Belt Tensioner and found out my bike (2024 Sea To Sky) already has a factory-installed belt tensioner. Question - is Lamonster's version a significant upgrade or just leave it as is with the factory version?
 
Installed the "Missing Belt Guard" from Lamonster Garage and the auxiliary driving light from Can-Am. Both very simple installs! I also purchased the Lamonster Belt Tensioner and found out my bike (2024 Sea To Sky) already has a factory-installed belt tensioner. Question - is Lamonster's version a significant upgrade or just leave it as is with the factory version?

Big difference in quality. OEM belt tensioner is made out of plastic and has a small roller with light bearings. The Lamonster (and Spyder Extras) rollers are stout aluminum arms with larger rollers with stouter bearings. About to replace my OEM tension on my 2022 RT S2S with the Lamonster unit.
 
Rode into town, and ran some errands. Answered a bunch of questions about the F3S from a old guy that wanted to talk. Gotta be a spyder ambassador if people are present.

Same thing with getting approached when running errands.
I'm happy to have a conversation with genuine questions from older folk.
I usually say something like...I call it my Mobility Scooter, but its a little quicker than most other ones, which always gets a smile.
Then you can see them thinking ....himmmm.

himmm c9.net.jpg

Installed the new PedalBox Pro for my 2024 Spyder STS. What a difference! Also, installed a BajaRon's sway bar.

I have to say the PedalBox and the better sway-bar put a big grin on my face when I fitted them. :D
 
Added the Spyder Extras Dual horn kit. I typically mount Stebel horns to my bikes, but it looked like there was limited space where the stock horn is located. I tried them out BEFORE install and was happy with the difference from the stock single horn. I had some difficulty even getting them to fit as in the video when I realised the horn's orientation had changed. The bell mouth was inverted from the ones in the video (pointing back from the top vs. pointing back from the bottom. It was pretty simple to change the order of installation on the stock bracket to get the correct orientation.

I guess I do not like the yellow loctite that BRP uses either, as it was impossible to reach in with a wrench to undo the primary mounting bolt. Well not impossible, but I did not want to spend an hour just undoing one bolt. I went in through the Frunk battery hole with a long 10mm socket hooked to my air driven 3/8 ratchet. I spun away until I heard the original horn hit the ground. Went back under and to my joy the ratchet, socket, and 10 mm bolt were still together, and the bolt was still in the bike's bracket. Once I got the horns mounted correctly (see above) it was easy to get the wife on the air ratchet while I went in underneath with the new assembly. She ran the bolt all the way in and then it was just a matter of rigging the harness and hooking it up.

Another tip: The receptacles they used to receive the original horn spade terminals were shrouded and the original terminals would not fit, so they say to remove the plastic on the stock horn terminals, then use electrical tape after they are mated up. I found that if you slit the side of the new terminals, you can get the fully insulated stock terminals to mate up and no tape is required.

Also installed the mirror stabilizer bolts.
 
Back
Top