• There were many reasons for the change of the site software, the biggest was security. The age of the old software also meant no server updates for certain programs. There are many benefits to the new software, one of the biggest is the mobile functionality. Ill fix up some stuff in the coming days, we'll also try to get some of the old addons back or the data imported back into the site like the garage. To create a thread or to reply with a post is basically the same as it was in the prior software. The default style of the site is light colored, but i temporarily added a darker colored style, to change you can find a link at the bottom of the site.

What did you do to your Spyder today?

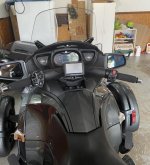
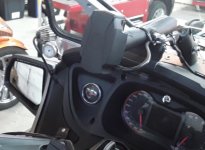
I installed the tri-axis adjustable handlebars on my Spyder today with the help of my buddy Mike. It was an all day adventure
but with the help of Finless Bob videos and the BRP online instructions we were able to get it done. They didn't say anything
about the GPS on my 2017 RTL so had to figure that one out myself. I did buy the new mount for the GPS for the new tri-axis
bars. I think it turned out great even if I do say so myself. Lol

AA0C66C6-9B6C-4015-869E-EC8BBCD142F3.jpg
 
Last edited:
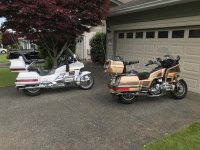
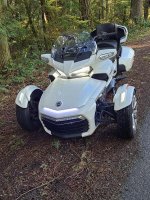
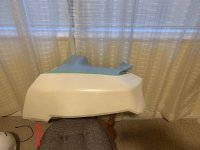
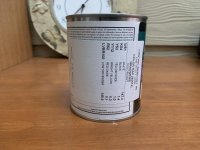
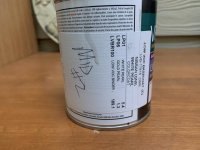
Touch up painting on Sonya's brother's 2018 F3 Limited. The left rear saddlebag door had a couple of dings, 1/8" by 1/2" through to the base plastic on the rear top section. His wife was going to touch these up with nail polish. I volunteered to paint the affected spots for him having finished last year a complete repaint of my ex-1500 Pearl Glacier White - over 100 pieces when fully disassembled and my '85 1200 Limited Edition two tone with pinstripe.

Figured this was going to be an easy fix, not. Would have been easier doing the complete door. The other issue is there is a paint code, but there is no formulation for it. Went through four iterations with my paint guy for the base colour. The 2018 F3 Limited is a pearl white; however, it has a beige/cream undertone, unlike my ex-1500 Pearl Glacier White that is a white. The initial pearl formulation was good, but would go a shade, shade and a half lighter on the final base colour formulation for future fixes.

My paint guy was very good. Only paid for one base colour and the changes were free. 1/2 pint of paint goes a long way using spray guns.

I've attached a few pictures to support.

Cheers

Video Goldwings.jpg - 2018 Spyder.jpg - Left Side Saddlebag Door.jpg

Basecoat Colour.jpg - Mid Coat Pearl.jpg
 
installed the SpyderPops Mirror/Side Vent Turn Signal Combo today. Happy with the results, but have a few of comments.

1. Once you break the seal on the promoter apply to both sides immediately. I installed one side then went to do the other and the promoter was dried out and couldn't use on the second side.

2. The instructions they include tell how to fix hyper flash did not work on my 2018 F3L.

3. The wire the instructions say to use (customer accessory power under left service panel) is only hot when the motor is running. So the use of the hazard flashers does not use the new lights when the motor is off, such as when parked on side of road with motor off.
 
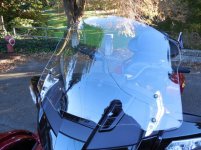
Last week new windshield from 7jurock 25", Fantastic service from these folks. This week new backrest from SmoothSpyder.

IMG_20210531_175729352_HDR.jpg - IMG_20210531_175719774_HDR.jpg - IMG_20210531_175625859_HDR.jpg
 
Installed the Drinks2Go cup holders on the left side handlebar and left passenger hand rail.
Then washed and waxed the Spyder.
 
Last week new windshield from 7jurock 25" , Fantastic service from these folks .
I have purchased many windshields from 7Jurock and always get a good product and good service at a good price. I currently have two of theirs; a 17" and an 18" extra wide. Never paid more than $170 shipped.
 
Lil mouse with a big house

I spent most of the morning pulling this out between the latch on my trunk and the inner liner. When I bought this it was from an estate sale and I knew it sat outside for a while, But I didn’t know it was home to a little mouse with a big house.

BEEBEBBC-E4BC-4B06-9A42-A537AB9A1CC3.jpeg
 
Well, it wasn't today exactly, but I did finish up fixing a series of electrical problems, some of which I've posted about, plus wrapped up replacing my stock windshield with one from Calsci (see separate lengthy post)

Electrical;
Replaced dying battery
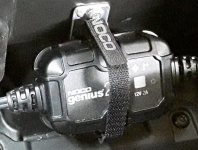
Installed onboard battery maintainers (both bikes) just above battery compartment in frunk
Repaired broken wiring harness that connects to trailer
Replaced both headlights, which inexplicably died at the same time
Repaired, rerouted the power wire feeding my accessory GPS mount on the dashboard (intermittent open in the accessory fuse box)
Installed phone mount and provided it with USB outlet

And, extended the arm on the GPS mount to bring it closer to me.

20210604_194027.jpg

20210604_194104.jpg
 
Changed oil & filter in preparation for our 'Annual Guy Trip'. This year we are headed to the Black Hills, and wherever we decide on our way back. The oil change is easy, but a slow process, as it takes forever for it to drain.
 
Well then mine is different because I just got back from an hour long ride. First thing I did was take out the dip stick, then loosen oil filter lid, and then removed drain plug. It dripped pretty good for almost 20 minutes. So in my mind that is a slow process.

Not if the oil is operating temperature hot.
 
Well then mine is different because I just got back from an hour long ride. First thing I did was take out the dip stick, then loosen oil filter lid, and then removed drain plug. It dripped pretty good for almost 20 minutes. So in my mind that is a slow process.

Not really trying to teach anyone to suck eggs.... but did you take the oil filler cap right off? :dontknow:

If you don't do that, there won't be much if any air getting into the top of the engine, so the oil hasta sloooowly gurgle it's way out of the drain hole &/or filter cap/s, letting gulps of air bubble back up thru the drain plug & draining oil to reach the top of the engine & equalise the pressure as it sloooowly drains out.... By opening the oil filler cap (where you normally add oil), you let that air get in easily & quickly, so the oil should drain out the bottom a lot easier & quicker! :ohyea:

And you don't really hafta wait until it completely stops dripping oil, just let it stop running out & then wait for the drips to slow a little. If you're draining stirred up & warm oil, anything left in the engine once the flow slows to 'just drips' is going to be pretty tiny and of no real consequence! So you can safely put the plugs back in, new filters & their caps back on, and start re-filling with oil once the 'old oil' has stopped running out & what's left in the way of drips escaping has started to slow. :thumbup:

There again, if you've raised the Spyder/Ryker, secured it, removed the necessary tupperware & under-body trays, then opened the filler cap, pulled the drain plugs, let the bulk of the oil drain, and finally loosened the filter covers, surely it's about time for a brew?? :rolleyes: So go have one, then when you come back, more than enough oil will have drained out so that you can swap out the filters, finish the job, & re-fill with oil worry free! Don't forget that if you are doing this yourself, then unlike the poor tech who hasta get thru so many oil changes a day or lose his job, YOU aren't on the clock, so relax a bit, take your time; it's meant to be therapeutic & satisfying, maybe even calming and enjoyable, this 'doing your own servicing thing'! So enjoy it, take your time, and then get out there and...... yep, you know what's coming...


Ryde More, Worry Less! :yes:
 
Last edited:
Not really trying to teach anyone to suck eggs.... but did you take the oil filler cap right off? :dontknow:
It was hanging loose off to the side so it was not hindering the draining.

If you don't do that, there won't be much if any air getting into the top of the engine, so the oil hasta sloooowly gurgle it's way out of the drain hole &/or filter cap/s, letting gulps of air bubble back up thru the drain plug & draining oil to reach the top of the engine & equalise the pressure as it sloooowly drains out.... By opening the oil filler cap (where you normally add oil), you let that air get in easily & quickly, so the oil should drain out the bottom a lot easier & quicker! :ohyea:

And you don't really hafta wait until it completely stops dripping oil, just let it stop running out & then wait for the drips to slow a little. If you're draining stirred up & warm oil, anything left in the engine once the flow slows to 'just drips' is going to be pretty tiny and of no real consequence! So you can safely put the plugs back in, new filters & their caps back on, and start re-filling with oil once the 'old oil' has stopped running out & what's left in the way of drips escaping has started to slow. :thumbup:

There again, if you've raised the Spyder/Ryker, secured it, removed the necessary tupperware & under-body trays, then opened the filler cap, pulled the drain plugs, let the bulk of the oil drain, and finally loosened the filter covers, surely it's about time for a brew?? :rolleyes: So go have one,
Can't stand beer, but even if I did not that early in the day. LOL

then when you come back, more than enough oil will have drained out so that you can swap out the filters, finish the job, & re-fill with oil worry free! Don't forget that if you are doing this yourself, then unlike the poor tech who hasta get thru so many oil changes a day or lose his job, YOU aren't on the clock, so relax a bit, take your time; it's meant to be therapeutic & satisfying, maybe even calming and enjoyable, this 'doing your own servicing thing'! So enjoy it, take your time, and then get out there and...... yep, you know what's coming...

Not and issue, just a comment on the time it takes. This week is mowing week so was just hoping it wouldn't have taken quite so long
 
I went to the site for 7jurock 25. It says no mounting hard ware would be sent. How did you mount it? I have a 2019 F3s
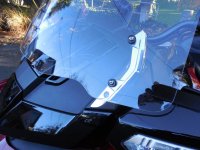
When I ordered a custom windshield from 7Jurock, made to my specs, that is wider than the stock mounting brackets, I knew that they provide no hardware. So I asked them to drill holes where the mounting screws go. I installed it placing spacers between the w/s and the bracket. Looks clean, works great. I never did care for those dorky looking black aftermarket brackets.

DSCN2870.jpg

DSCN2869.jpg
 
......

Can't stand beer, but even if I did not that early in the day. LOL

.....

:D Here in Oz, we've got ALL SORTS of different 'brews' - there's the beer type, sure, in all its varieties;
but there's also the 'brew' that you get by boiling the billy over a campfire & adding a handful of tea leaves ( :thumbup: ) which you can sugar to taste if you're not sweet enough already, or even use coffee in lieu of tea leaves if that's you're preference ( :shocked: ); then there's the 'brew' that you make with a coffee press or espresso with hot frothy milk (much nicer'n that other stuff - but us Ozzies are all coffee snobs! ;) ); and amongst others, there's also that green or other weird coloured goop of a 'brew' that some people make in a blender or juicer with all sorts of horribly incompatible yukky stuff ( :barf: )

So clearly, 'Brew' is really just a term for 'a drink of your personal choice of poison' that is often used as an alternative to the older & now not so politically acceptable term of 'smoko', cos we don't smoke any more, do we?!? :rolleyes: Or if you're more of British extraction or just an Anglophile, another alternative is 'cuppa', or even 'morning tea', 'elevenses', 'afternoon tea', or possibly even 'tiffin' (altho that's probably too long of a break! :p ); and those who are Tolkein fans might even use the term 'second breakfast' :roflblack:

But it really doesn't matter what you do, eat, or drink when you have or take a 'brew break' when it comes to motorcycle maintenance, it's much more important that you simply take the time to ponder the whatness of the why and enjoy the break while you pause during the maintenance process. :ohyea:
 
Last edited:
Installed the Lamonster upgraded belt dampener bearing and replaced the BRP logos with black and red spider logos from Slingmods. Looks better and probably makes the trike go faster. Will include photos as soon as I'm able to resize them to comply with forum requirements. I'm computer illiterate and I lost my IT support when my daughter moved out and got married.
 
Back
Top