• There were many reasons for the change of the site software, the biggest was security. The age of the old software also meant no server updates for certain programs. There are many benefits to the new software, one of the biggest is the mobile functionality. Ill fix up some stuff in the coming days, we'll also try to get some of the old addons back or the data imported back into the site like the garage. To create a thread or to reply with a post is basically the same as it was in the prior software. The default style of the site is light colored, but i temporarily added a darker colored style, to change you can find a link at the bottom of the site.

What did you do to your Spyder today?

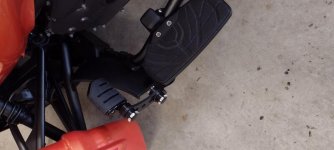
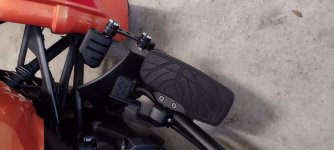
I must be slow but i dont understand what to do.

Ok, let's try this then. You are now in the "What did you do to your Spyder today" thread. Go to the section linked below and Post a New Thread asking for help, and someone will tell you how to do it. Click on the red writing below, then on the red '+Post New Thread' just above the top left of the list of threads that comes up on that page.

https://www.spyderlovers.com/forums/forumdisplay.php?132-RT-Shop-Talk
 
Last edited by a moderator:
Instead of posting a bunch of messages over many weeks, I decided to just complete as many of my changes and post them together.
From first to latest:

- Revivify Self Healing Nano Coating applied immediately upon delivery. https://revivifycoatings.com/
- Carbon fiber applique from Wrap My Spyder to hide the piano black
- BRP Driver floorboard lights.
- Awesome Flasher and shifter buttons mod from our friends FrogmanDave and TCBoone.
- Show Chrome Fender and mirror flasher mods with custom made plug & play harness.
- Zumo XT with BRP mount on centre of handlebar. Didn’t’ like having to look down at GPS, relocated GPS on upper dash. Much better position and no sky reflection on the display.
- BayaRon Ultra bar and Spring adjusters. Best Mod so far! Excellent handling improvement.
- BRP Passenger armrests. Happy wife, happy life.

Purchased but need to install:
- Show Chrome Saddle Bag Red LED Lights
- B1M Motorcycle Dashcam with dual cameras and GPS

20230707_210253[1].jpg 20230707_210307[1].jpg 20230707_210204[1].jpg 20230526_204410.jpg
 
Last edited:
Instead of posting a bunch of messages over many weeks, I decided to just complete as many of my changes and post them together.
From first to latest:

- Revivify Self Healing Nano Coating applied immediately upon delivery. https://revivifycoatings.com/
- Carbon fiber applique from Wrap My Spyder to hide the piano black
- BRP Driver floorboard lights.
- Awesome Flasher and shifter buttons mod from our friends FrogmanDave and TCBoone.
- Show Chrome Fender and mirror flasher mods with custom made plug & play harness.
- Zumo XT with BRP mount on centre of handlebar. Didn’t’ like having to look down at GPS, relocated GPS on upper dash. Much better position and no sky reflection on the display.
- BayaRon Ultra bar and Spring adjusters. Best Mod so far! Excellent handling improvement.
- BRP Passenger armrests. Happy wife, happy life.

Purchased but need to install:
- Show Chrome Saddle Bag Red LED Lights
- B1M Motorcycle Dashcam with dual cameras and GPS

View attachment 203779 View attachment 203780 View attachment 203781 View attachment 203782

How did you mount your RT up there?
 
Cleaned behind windshield mount.

Removed the windshield and thoroughly cleaned the areas that can't be reached otherwise. Looks SOOOO much better.

Lew L
 
Last edited by a moderator:
How did you mount your RT up there?
Hi Ollicat,

I assume that you meant XT in your question.

I used almost everything in the Zumo XT box except for a 1 inch Ram ball with a circular base that was purchased from Amazon for $10.
Ram Mount.jpg

The Ram base is held in place by 2 small strips of 3M double sided moulding tape.
3M double sided Tape.jpg

Running the Garmin power cable to the small slit on the dash is a bit of a PITA. Because of the obstructions under the dash, routing the Power Adapter cable needs to be done in two steps.

Step 1 - Remove the right side Tupperware

Remove the right side Tupperware, remove the upper and lower right speaker covers; and remove the upper right speaker.

Step 2 - Drop fishing line/cable

To fish the Garmin Power adapter I used a 2 foot length piece of scrap 3 wire electrical cable. I inserted the fishing cable into the right dash slit towards the upper right speaker. With the upper right speaker removed, I was able to grab the fishing cable and pull out a 6 – 8 inch length.
Then route the 6-8 inch length from the upper speaker, down to the left side of the lower right speaker.
Right Side Speakers.jpg

Step 3 - Secure and Retrieve Power Adapter

At the lower speaker, using electrical tape, secure the fish cable to the Power adapter cable. Carefully pull the fishing cable back up to the top right speaker first.
Then carefully pull the fishing cable from the dash slit until the Power Adapter is at the slit.
Power Cable.png

Step 4 - Expand the slit and pull Power Adapter out

The Garmin Power Adapter is a bit bigger than the slit opening. I used a small round piece of wood that I inserted in the slit to expand the slit enough to pull the power adapter through the slit.

Step 5+ Wrap-up

The worst part is over. Now just attach the power adapter to the motorcycle mount as per the Zumo XT user manual page 6.

GPS Mount.jpg

Connect the Garmin power cable to the BRP GPS adapter.

Secure any loose wires.
Lwr Right Speaker.jpg

The finished product
Mounted GPS.jpg


If you run into issues, feel free to contact me.

Good luck

PS: For the admins, if this wasn't the right place to post this, feel free to move it to a better spot.
 
Last edited:
Took mine up to Roan Mountain, TN, and on the ride back I decided to stop at the can am shop and inform them about handlebar vibration. Not engine vibration, but from the front end. It's been going on since I rode it home new 700 miles ago. Feels like wheels are out of balance, or maybe tires or wheels are out of round. Didn't want to bring it to them, but it's brand new.
They took it for 2 rides, and confirmed it. Now they want me to drop it off, and they'll work it in. Oh joy. So I guess I might bring it in tomorrow. Vibration starts at 50 mph, and by 65 the bars and fenders are shaking. The tire wear is perfect, wheel weights intact, lug nuts torqued at 80 ftlbs.
 
I have to put on my hitch and trunk rack I recently purchased. Then I have to modify my cooler rack I bought for my golf clubs. Might install the hitch over the weekend if I have time. Lots to do at the house due to all the rain we've gotten.
 
Took mine up to Roan Mountain, TN, and on the ride back I decided to stop at the can am shop and inform them about handlebar vibration. Not engine vibration, but from the front end. It's been going on since I rode it home new 700 miles ago. Feels like wheels are out of balance, or maybe tires or wheels are out of round. Didn't want to bring it to them, but it's brand new.
They took it for 2 rides, and confirmed it. Now they want me to drop it off, and they'll work it in. Oh joy. So I guess I might bring it in tomorrow. Vibration starts at 50 mph, and by 65 the bars and fenders are shaking. The tire wear is perfect, wheel weights intact, lug nuts torqued at 80 ftlbs.

Why not just stop by a tire shop and have them check them out? Might just save you a couple of days down time.
 
Thank you for the input. That was actually my first thing I thought of. However, if indeed the tires or wheels are bad, I'm under warranty, and BRP would have to correct it, and I wouldn't be out any money. The dealership said they had a bunch of bad tires that they've had to deal with so IDK. I'm leaning towards your suggestion . The dealership is always 3 weeks behind.
 
I wanted more ways to place my feet on my F3-L so I installed new brackets and Kuryakyn foot pegs that I bought from Lamonster. These worked great and now I have many comfortable options. One thing though. When I installed them as they're designed to be, I felt like I was doing the splits, so I turned the pegs inward. I was afraid that on the right side that this may interfere with the brake pedal, but it does not the way I have it adjusted.
 

Attachments

  • Road Pegs LH.jpg
    Road Pegs LH.jpg
    30.7 KB · Views: 21
  • Road Pegs RH.jpg
    Road Pegs RH.jpg
    35.6 KB · Views: 21
Last edited by a moderator:
After having some awesome people on this forum send me instructions for mounting air scoops on my 2012 RTS, I spent six hours in the garage trying to get it installed.
The part I did not look forward to was cutting the panels, but it was not as difficult as I feared.
I also took the opportunity to replace the rear brake pads while it was up on the lift. So now I will ride the rest of the season instead of tinkering in the garage!:ohyea:


20230714_133849.jpg 20230714_172534.jpg 20230714_172549.jpg
 
Last edited by a moderator:
Back
Top