• There were many reasons for the change of the site software, the biggest was security. The age of the old software also meant no server updates for certain programs. There are many benefits to the new software, one of the biggest is the mobile functionality. Ill fix up some stuff in the coming days, we'll also try to get some of the old addons back or the data imported back into the site like the garage. To create a thread or to reply with a post is basically the same as it was in the prior software. The default style of the site is light colored, but i temporarily added a darker colored style, to change you can find a link at the bottom of the site.

What did you do to your Spyder today?

Adjusted the alignment of the drive belt, and the tension of same. I now have .084" clearance to the flange, between
5/64" and 3/32". The spec says 1/32" to 3/16". I've test ridden it and it seems to be holding position through some
aggressive corners and 75+ speeds.

I also reset the tension to 180 lbs. sitting on the ground and 160 lbs. in the air. It was at 205 lbs. sitting on the ground
and 180 lbs. in the air. Very smooooooth now, with no vibration whatsoever up to around 80. It had a bit of a buzz before,
not bad, but you could feel a little vibration. Now it's smooth as glass. Even the mirrors are clearer. Seems to feel a bit
snappier, but that's using the butt-dyno, and we all know how reliable those are. LOL
 
Changed the oil in both RT's yesterday, 2016 and 2019. Probably not going to get too many more miles this season, so I got it done while the weather was nice. By Nov 1st I'm sure there will have been some salt spread on the roads, and once that happens, it's over, til spring. Warm this week though.....
 
Fitted my new Spyder Extras belt tensioner. Bought it a few weeks ago to fit before my last trip but didnt get to it..

And used my Big Bear Ezylift for the task. Doesn't fit under my '17 RTL, so I have to use my ATV lift to get it onto bricks, then get the Big Blue under the RTL and jack it up. Has anyone got a source on say Amazon for a 1/2" Square drive to hex spindle that will fit a 1/2" drill chuck? I had to resort to using a speed brace and while awesome exercise for my arms i'd rather use the power drill.
 
Earlier in the week, installed Lamonster Mirror locks and belt tensioner.

2020 RT mirrors are solid as a rock (for $23 delivered - not worth the 3+ hours riding and waiting to have dealer do it). Smooth riding at all RPMs and speed.
 
Fitted my new Spyder Extras belt tensioner. Bought it a few weeks ago to fit before my last trip but didnt get to it..

And used my Big Bear Ezylift for the task. Doesn't fit under my '17 RTL, so I have to use my ATV lift to get it onto bricks, then get the Big Blue under the RTL and jack it up. Has anyone got a source on say Amazon for a 1/2" Square drive to hex spindle that will fit a 1/2" drill chuck? I had to resort to using a speed brace and while awesome exercise for my arms i'd rather use the power drill.
You can find a full set of hex drive to 1/4", 3/8", and 1/2" drive at Harbor Freight, that's where I got mine.
 
I put a new Comfort seat on the old girl, and I have to say so far the butt likes it!!!! I have to give a happy shout out to Bob on this site that sold it to me!!!!:cheers: Thank You !!!
 
Actually it started last week but yesterday I finished replacing the OEM fog lights on my 2015 RT-S with a pair of LED bulbs. Here's is what I learned.

First, beware of seemingly innocent pauses during even the best "how to" videos. They can mask the tricky bits and make them appear easy. Second, replacing the right side bulb is not difficult, however, replacing the left side is downright impossible if your hands are anything larger than extra-small. The designer who located the cold air intake in close proximity to the left side fog lamp weather-proof cap should receive the cruel and unusual design punishment award.

No matter what I tried I could not manage to install the left side bulb and then re-attach the weather-proof cap. There just isn't enough room to for anyone with normal sized hands. The result is that it looks like I tried to beat back a rogue cactus with the back of both hands. And here's a bear your soul confession- all I managed to do is snap off the locating tabs on the LED lamp! The saving grace is that I bought two sets (the other being for my bride's RTL.) So, after a day to calm down and convince myself I'm not a complete idiot, I decided the best approach was the complicated way - disassemble the front of the machine.

Which brings me to yesterday. I had a good part of the day to myself (wife being occupied with a tele-conference) so I ran the RT-S up on ramps and removed all the bits and pieces that need to be removed so the frunk could then be extracted from the machine. Another confession: I was very reluctant to tackle that. As it happens, the process actually wasn't as horrible as I expected - six bolts, six electrical connectors, some push pins, a couple of Torx screws, one hose clamp (cold air intake) and trunk opening cable. And even with the frunk sitting on a cushion of the floor it was still a fiddly process to install the weather proof cap on the left side.

Added benefits of removing the frunk included cleaning the radiators and correctly attaching the battery hold down bracket. Much to my surprise, as well, was that the reassembly process was reasonably easy. One worthwhile tip: "lubricate" the inside of the cold air duct with a little dishwashing foam to make the re-connecting process less irritating. The bottom line is that it's all back together and, what' s more, everything works.

When the new LED bulb arrives I won't have as many reservations attacking my wife's 2012 RTL. And I'll replace the horn while I'm at it, It's buried deep in the bowls of the machine unlike the you-can-actually-reach-it location on my 2015.

Oh yeah, here's proof it actually happened.

Frunk Removal 02.jpg
 
Actually it started last week but yesterday I finished replacing the OEM fog lights on my 2015 RT-S with a pair of LED bulbs. Here's is what I learned.

First, beware of seemingly innocent pauses during even the best "how to" videos. They can mask the tricky bits and make them appear easy. Second, replacing the right side bulb is not difficult, however, replacing the left side is downright impossible if your hands are anything larger than extra-small. The designer who located the cold air intake in close proximity to the left side fog lamp weather-proof cap should receive the cruel and unusual design punishment award.

No matter what I tried I could not manage to install the left side bulb and then re-attach the weather-proof cap. There just isn't enough room to for anyone with normal sized hands. The result is that it looks like I tried to beat back a rogue cactus with the back of both hands. And here's a bear your soul confession- all I managed to do is snap off the locating tabs on the LED lamp! The saving grace is that I bought two sets (the other being for my bride's RTL.) So, after a day to calm down and convince myself I'm not a complete idiot, I decided the best approach was the complicated way - disassemble the front of the machine.

Which brings me to yesterday. I had a good part of the day to myself (wife being occupied with a tele-conference) so I ran the RT-S up on ramps and removed all the bits and pieces that need to be removed so the frunk could then be extracted from the machine. Another confession: I was very reluctant to tackle that. As it happens, the process actually wasn't as horrible as I expected - six bolts, six electrical connectors, some push pins, a couple of Torx screws, one hose clamp (cold air intake) and trunk opening cable. And even with the frunk sitting on a cushion of the floor it was still a fiddly process to install the weather proof cap on the left side.

Added benefits of removing the frunk included cleaning the radiators and correctly attaching the battery hold down bracket. Much to my surprise, as well, was that the reassembly process was reasonably easy. One worthwhile tip: "lubricate" the inside of the cold air duct with a little dishwashing foam to make the re-connecting process less irritating. The bottom line is that it's all back together and, what' s more, everything works.

When the new LED bulb arrives I won't have as many reservations attacking my wife's 2012 RTL. And I'll replace the horn while I'm at it, It's buried deep in the bowls of the machine unlike the you-can-actually-reach-it location on my 2015.

Oh yeah, here's proof it actually happened.

View attachment 185310
You have my condolences on trying the "ol left light bulb on an RT" - the last time I did it I weighed up the possibility that if it blows again i'll trade it in - maybe, and similar to you I did lose weight - but only the skin from my hands :)

I haven't had the testicular fortitude to remove the frunk, started down the road of doing it a few times and chickened out for fear I'd need to balance the RT on one shoulder, hold the frunk in one hand, the bolts in another and steer some stupidly designed reverse locating lug all at the same time - but your notes give me confidence.
 
Put the Wick-it Performance stage 1 flashed ECU back into 2017 Spyder RTL (10 day turn around with priority mail taking 4 days now instead of 2 Florida to Louisiana and back), then added a Wolo Bad Boy air horn.

Still to be added: 6 outlet accessory bus, dual usb port in empty space between switches, add the K&N air filter, add the La monster idler pulley, driver highway extended foot rests, LED head, fog and driving lights, magic mirror magnetic mounts and drink holders. Have all already. Will be busy every day for the next month or so.

Eager to hear how the ECU remap goes. I am keen to look at this for mine once the warranty expires on my 17 RTL
 
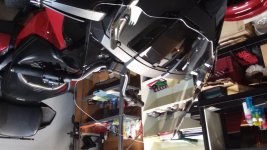
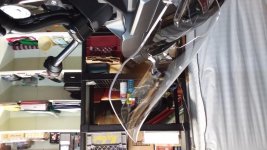
I needed a higher and wider windshield that utilizes the stock brackets and has a flip, so I called my go-to w/s maker, 7Jurock and they made one to my specs and only charges what a stock one would cost. It works great for me - all is calm in the rider's seat.
Sorry about the upside down pics. I wish I knew how to correct this.

20201018_200053.jpg

20201018_200111.jpg
 
Added two handlebar bar end cap weights - didn't need washers on right side - throttle works as before.

Took a short ride - Doesn't do much if anything but looks good.

Since that took all of 5 minutes - I decided to clean her up a bit - used old brand of Honda clean and polish spray almost everywhere.

ON a few of my past two wheelers I filled the handle bars (handlebars being long one piece) with buckshot and added heavy insert bar end weights - all but eliminated handlebar vibration.
 
Moving Spyder to storage unit today. Snow in forecast for the weekend. Hopefully we will get some decent weather after next weeks cold and wet so I can get in another ride or two. Storage unit is only 5 minuets from home.
 
End of season oil/filter change. However, the season doesn't really end until salt hits the roads.
 
Back
Top