• There were many reasons for the change of the site software, the biggest was security. The age of the old software also meant no server updates for certain programs. There are many benefits to the new software, one of the biggest is the mobile functionality. Ill fix up some stuff in the coming days, we'll also try to get some of the old addons back or the data imported back into the site like the garage. To create a thread or to reply with a post is basically the same as it was in the prior software. The default style of the site is light colored, but i temporarily added a darker colored style, to change you can find a link at the bottom of the site.

Initial Maintenance and Work

Have been reading the owner's manual to find out about the fuse blocks, specifically if there is an accessory connection. My 1500 had this, 5 amp circuit that you connect to. Would like this for a trigger wire for the accessory fuse block I intend to install. I will find a suitable wire.

Looked at maintenance intervals. The HCM filter every 30K Kms, going to be a while for this, only at just over 10K Kms. Put some 1K Kms on the Spyder in the past two weeks, like riding it, so does the Mrs. HCM filter on order and will be changed when I do the oil/oil filter.

Recommendation is to replace brake fluid every two years. I mentioned in my previous post that the B.U.D.S. diagnostic software arrived yesterday, will be using it soon. Have to order Speedbleeders to do this, being a one man DIY. Good time to have a look at the brake calipers and maybe a servicing.

Coolant is to be changed every 5 years, been 7.

Do the brakes, coolant, HCM filter and oil/oil filter change for the first baseline work/maintenance period. HCM filter on order, maybe end April. Thinking that changing the HCM filter is a spring maintenance issue, Bertremington instigated this.:2thumbs:

Still waiting on the 2013 OEM service manual - in transit, and will order the 2014 supplement ,from the dealer - haven't been able to find a used one.
 
Ernest -- roger all. Let us know what you find in caliper service kits. I think old pistons seals might be part of the long pedal travel (or I could be spoiled by motorcycles and track cars). The front Brembos look straight-forward but the rear looks to be a real challenge. I have an extra rear (damaged piston retraction threads) to practice on but I don't see where to start.

BTW I too like the FZ-1s. I've used them several times, latest on the MG. And ditto on using OEM connectors -- allows me to add/remove farkles without wiring modifications. Can-Am seems to use ordinary AMP weathertight connectors in most circuits of interest.

The switch panel is kinda sucky so will be ergonomic-engineering it for better glove access and status lighting shortly.
 
The reason I want to use a separate accessory fuse block is that I read that the Spyder has a CanBus. The FZ-1 with the integral relay is a bonus - keeps the install very clean and neat. OEM style (Hitachi) connectors are the way to go. Can get these in single to multiple pin connectors. Will look into the AMP connectors, but I do have a good inventory of connectors on hand. I also use the expandable wiring sleeve to run wires in, again makes for a clean and neat install.

The only wiring that will have to be cut into is for the trailer connection. Researched this and looked at the various trailer wiring harness that are being sold. Pretty straight forward with a 5 to 4 pin adaptor. The issue with the aftermarket plug and play connector is that the new connector has all the wire from the OEM connector in the pigtail, whereas I will only splice into the lighting wires needed. Contacted the dealer regarding a trailer module for the Spyder. The parts fellow could only find the combined unit, trailer hitch and harness. Won't be using the BRP kit as it wants approximately $900.00 CDN for this.

The Brembo calipers are going to be a new adventure. The calipers on the Goldwing are quite simple and inexpensive to service. Most times it's a good clean and lube of the external parts. Hoping the Brembo calipers are similar. Won't hurt to have a set of pads on hand. Debating on checking the brake disc run out with a dial indicator. My '85 Goldwing front/rear rotors were just shy of $1K CDN when I replaced these 5 years ago. The front rotors that I have found on line for my Spyder - EBC rotors, are approximately $250.00 CDN for the pair. If the rotors are out of tolerance, need to replace pads as well.

Will have the Spyder with a new maintenance baseline by end year.

I'm finding that the parts desk at the dealer is not as well versed in looking up parts for the Spyder as I would like, not a lot of choice here on the Vancouver Island. Don't know if it's because most people are taking their Can-Am into the dealer when an issue comes up and the service department does the looking or what. Will look for a parts manual, think I saw one on line.
 
When you buy the CD version of the service manual (offered by several vendors on eBay and Amazon) it usually includes the part manual.

Can-Am's site: https://can-am-shop.brp.com/on-road/us/en/electronic-parts-catalog-intro.html

Many members recommend this site: https://www.canampartshouse.com/

By AMP I mean the Superseal connectors like this: https://www.amazon.com/Waterproof-Motorcycle-Electrical-Connector-Assortment/dp/B07KP369MF/

I'm a fan of adhesive heat shrink: https://www.amazon.com/Pointool-Electrical-Waterproof-Automotive-Assortment/dp/B07TX7KG16/

And PET expandable braided sleeving: https://www.amazon.com/100ft-Expandable-Braided-Sleeving-braided/dp/B074GMNW7T/
 
Last edited:
Taking a break from kitchen reno - replacing the drywall that was damaged during old backsplash removal and Spyder maintenance.

One of my C-19 keep me busy projects last year was a complete paint job of my since sold GL1500 Goldwing. Part of the project was to install 3M Scotchguard paint protection film (PPF) on the parts/pieces that would be in a high traffic area such as boot placement, road crud and such. Never got around to doing this.

My Spyder has the white pearl finish - same as my since sold GL1500 Goldwing, and I notice that everything shows such as boot marks, seat rubbing, and road crud. Thinking that high traffic areas could benefit from an application of PPF, started my first Spyder project this morning doing the right side panel that the seat fits over, see attached. The seat rubs against the finish and over time will wear away the protective clear coat. This is the first time ever that I have used a PPF product. I know where to look, but others don't. Had my neighbour come over to view, gave him the area and asked if he could identify the panel I did. He chose the wrong panel. Good to know that I did a not too bad job. Will do the left side panel this afternoon.

Had to use a heat gun, water/Johnson baby shampoo mixture, the squeegee from the PPF package and a good dose of patience. The PPF is 12" by 10' so lots to use, but the 18" wide PPF would be better. This PPF is removable and if needs be, can be replaced at a later date.

Intend to do the front cowling and various other bits to protect the finish. Would like to protect and keep the paint job nice, painting a white pearl colour is a major project - BTDT. Should get better at applying PPF as I progress.
 

Attachments

  • PPF Side Panel 1.jpg
    PPF Side Panel 1.jpg
    42.6 KB · Views: 23
Looks very well done, Rednax. :thumbup: As you suspected might occur, my Pearl White 2013 RT is beginning to show signs of wear exactly where the seat (& my knees :rolleyes: 
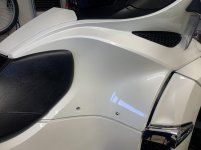
) rub against the panel the front of the seat closes on to; so once I've fixed the wear, I could really use some 'extra protection' there.... just haven't found the right product yet. Everything I've tried so far looks bloody obvious, and a number of people have suggested I try 3M, but no-one seems to know exactly WHICH 3M Product to use!! :p

So, is there any chance you could share more in the way of product detail on that 3M PPF?? :dontknow: I'm pretty sure I'll hafta find a different supplier than who-ever you used, and the more specific info I can provide, the more likely I am to get a product that can look as good as yours! :ohyea: However, what with my damaged hands & fingers, I might hafta arrange a time for you to come visit and fit it tho! :cheers:
 
Thanks - I like Fosters. Will post pic of product. Took the advice of my paint guy and it was what was on the shelf.

Tried the left side panel, it was a no go. No matter what I tried/did, just could not make it work. Scrapped that piece and will have another go at it. It will get done. Going to measure up the other areas and buy sizes that will make install easier. Definitely would not like to pay someone to do what I want. May consider it for the more difficult and larger parts such as the front trunk lid. Installing this PPF will try your patience.
 
Took a pic of the PPF package - attached. Going to be a long term project, very finicky stuff to work with, not to mention the panel curves and such.

Picked up the transmission filter and 2014 Roadster Shop Manual supplement today - waiting on the 2013 shop manual, it's in transit. Committed to a heated comfort seat. Going to call the N-Line trailer dealer tomorrow and get the trailer hitch on the go. Going to make some lifts to put under the wheels so I can get the Spyder off the floor for the oil/filter change.

Plan is coming together.
 

Attachments

  • PPF.jpg
    PPF.jpg
    70 KB · Views: 36
2013 Service manual arrived Friday. Everything is coming together.

Time for first oil change since purchase 4 weeks ago. Had to wait for the tranny filter. Took the plastic off, shades of a Goldwing, and lifted it with my floor jack. Have to decide tomorrow what blocking is required under the wheels. Estimate this oil change will be approximately $210.00 CDN, major expense is the tranny filter at approximately $150.00 CDN. Sonya came into the garage and commented that I should not betaking the Spyder apart. Mentioned that this was just for the oil change. Wait until she sees the front off to change the coolant. Bringing the Spyder to a baseline that I know.
 

Attachments

  • Oil Change 1.jpg
    Oil Change 1.jpg
    71.2 KB · Views: 26
  • Oil Change 2.jpg
    Oil Change 2.jpg
    72.2 KB · Views: 25
  • Oil Change 3.jpg
    Oil Change 3.jpg
    74 KB · Views: 27
Spent the day doing the oil/filter and tranny filter change and in between, putting flooring into the kitchen for the kitchen reno.

To get the Spyder to an acceptable height, used the Big Blue Lift that I bought a few years back, and almost sold last year. Used the brackets designed for the Goldwing, oriented these brackets the same distance apart as the small floor jack. Got the balance right and got the Spyder up to have it another 6 inches off the ground. Once I get the Spyder RT mount for the Big Blue Lift will take it higher when doing maintenance.

Watched some videos on line and I read the OEM service supplement. Draining the left side was a long issue, only loosened the drain plug. Took the right side magnetic plug out and after draining, new crush/sealing washer. Moved on to the tranny filter, thought there might not be a lot of oil when removed - wrong. Made a mess on the garage floor, and the lower panels. Took the rest of the panels off, washed, and put back on. Note to self, next tranny filter change, remove all the panels and use a small catch basin. Not a bad experience, but need a two day rotten weather window to do this - not in a hurray anymore.

The OEM oil filter is a steel mesh filter. The filter I used was the HF566 - paper version. Thought it might be a K&N filter, but it is definitely a BRP product.

Next work/maintenance issue will be bleeding/flushing the brake system and checking the front brake rotors for warpage.

Will have it back together tomorrow for a ride to the local coffee shop.
 
Good ride up island today, had to get the Spyder out of the garage. My 1200 Goldwing is feeling a bit neglected. Going to be doing some maintenance on it soon, new Hagon rear shocks and checking the shim adjustment of the hydraulic lifters.

I had a look at the sway bar that was installed on the Spyder. It is from BajaRon and the end links as well.

Checked for a drive belt tensioner, not installed. Was at the Island dealer this morning and queried this. I was told that this is normal for an early 2014 RT to come from the factory without one installed - cost/benefit ratio. It was mentioned that there can be a slight vibration in the 100 to 130 KPH range, but most of its customers aren't fussed about it. The shop does a drive belt tension adjustment to lessen this vibration, but a belt tensioner is the best way to go. On the list for a future maintenance period.

Thought about the oil change on the ride up island. My 2014 RT LE had 9100 Kms on the clock when I bought it. Probably only had one oil change, and the oil that I drained has been in the engine probably for several years. This is not doing the engine any good regardless of what the OEM maintenance recommendation is. Oil should be changed at least once a year regardless of Kms/miles. Oil left sitting in bearings gets acidic and needs to be changed. Is a low mileage engine a good selling/buying point, definitely; however, recommend adjusting the maintenance schedule to suit the Spyder usage.

Have decided that the HCM filter will get changed every two years instead of the OEM recommended 48K Kms.

Will continue to use the HF556 filter with each oil/filter change. The OEM oil filter is $30.00 CDN, and I was told it is not reusable. I have been using the HF (High Flow) oil filters in my Goldwings for the past 6 years and have had no issues to date.

The oil I used in the Spyder engine is the same oil I have used in my Goldwings for the past 5 years.

Have thought about the similarities between my Goldwings - 1800 (sold)/1500 (sold)/1200, and the Spyder. Thinking another thread in a couple of more months regarding this issue will be appropriate.

Enough reminiscing, time to think about the next Spyder work/maintenance, and the work/maintenance on the 1200.
 
Have been working on my '85 Goldwing Limited Edition of late. New Hagon shocks coming this week, and doing a shim check for the hydraulic lifters - engine is not cooperating, but since I am higher on the food chain it will capitulate.

Ordered a belt tensioner, front rotors and brake pads (EBC brand), and a trailer wiring harness. Was going to fabricate my own trailer wiring harness, but decided that I can use my time and energy better with other aspects of baselining the Spyder.

Have been considering Bert Remington's gauge change, installation of an oil pressure gauge and voltmeter. Will do a test and disconnect the fuel and engine temp gauges to make sure it defaults to the digital indication on the dash. Thinking I'll visit the local marine chandlery to look at gauges.

Have noticed that the handling of the Spyder is quite good, but the shock rebound is not as good as I would expect. The OEM shocks feel soft and shock rebound, no adjustment, is less than adequate - just my opinion. I can also affect the steering of the Spyder by shifting my weight to one side, see the suspension compress, and the Spyder will move in the opposite direction without moving the steering. Have experienced this with some of the cars I have owned. I understand the complexity of the issue especially with the weight of the Spyder RT LE, BRP trying to keep the ride of the RT LE like a "Cadillac" and the varying riding styles. Going to adjust the tire pressure to the maximum for the tire when cold to minimize tire roll. Front/rear shock replacement is on the agenda.

Doing a little at a time so that I can experience the difference a change makes.
 
Update.

Have received the trailer wiring harness. To be installed. Went with a plug and play harness.

Heated comfort seat arrived and seat installed. Like the added space and it is more comfortable than the stock seat from the factory. Looked into how it operates. Controlled by the heated grip switches. Heated grip on low - seat on low, same for the high setting.

Loaded the B.U.D.S. software onto my laptop. Took a few tries to get the license number accepted.

Want to replace the fuel filter, a WIX33095. Read up on the change out in the manual. Recommends using B.U.D.S. to depressurize the fuel system. Hook up B.U.D.S. to the Spyder, start engine, use B.U.D.S. to shut off the fuel pump, let the engine stall. Fuel system pressure should be gone, change filter, back in business. Thinking that I won't have to turn the fuel pump on in B.U.D.S. after the change, fuel pump should be on - will check the setting in B.U.D.S..

Had read about changing out the fuel and engine temp gauges for voltmeter and oil pressure gauges. BertRemington has done this: https://www.spyderlovers.com/forums...-622-trailer&p=1562238&viewfull=1#post1562238 Have this on the agenda for down the road. When you disconnect the fuel and engine temp gauges, the readouts default to the LED dash - fuel on the right side, engine temp on the left side, opposite of the gauge placement.
Checked this this afternoon, and wanted to see what happens when I adjust the air pressure in the rear chock. This pressure indication is displayed on the left side of the LED dash. When you adjust the air pressure in the rear shock the air pressure LED readout is displayed, the engine temp readout is not displayed. When you are finished with the air pressure adjustment, the dash display reverts to the engine temp.
 
You have been very busy! Our new RT hasn't been out of the garage since last week - mainly weather. But, I did get the RD400c out today and did 50 miles on it. I have the Garmin 396 mounted on the Spyder and a Utopia seat receptacle mounted in the seat pan waiting for the rest of it to be made. I bought an Amazon trailer hitch and have a Uni-go adapter ordered for it. Will use a Big Bike Parts plug-n-play wiring kit unless I can get Lewis at Electrical Connection to whip me up one.
 
Trying to keep busy. Waiting for the shocks for my 1200, so I need to switch my attention to the Spyder.

Thinking next week would be good to do a coolant change. Have to take off the front trunk and such, should be a good experience. One thing at a time and I'll learn more. Drive belt tensioner should be here soon, eBay sent an email to update shipping info.

The company I bought the trailer wiring harness from is Trailer Etc. They have a plug and play for the newer Spyders. Cost is $99.00 USD plus shipping. Company is in Quebec, but its prices are in USD. Guess the company does more business in the US then Canada. Interesting part is that the company charged me provincial tax, but on the US price. Came out to about $144.00 CDN, not too bad, but probably a better solution than doing my own wiring.

Here's the company web site page for the harness, 2018 and later: https://traileretc.com/product/2018-up-can-am-spyder-rt-rts-rt-limited-trailer-wiring-harness/
 
Don't remove frunk just to change coolant

RN60 -- you do need to lift the front of the RT and oil-change quantity of body panels to change the coolant but you don't need to remove the frunk. I backed my RT up a pair of car ramps which leaves more room to work but your BBL is probably the better choice. Apparently everyone drains from the right-side radiator. The previous owner (actually I believe it was dealer-serviced) removed the hose from the ABS manifold rather than the radiator. ABS is tough but I was still concerned by the amount of force required to loosen the hose on the manifold. Before you start make sure you have the proper clamp. The PO/dealer used worm gear but I used constant torque. Refilling the expansion tank is ... not easy. I rigged up a funnel with a hose and poured slowly. An LED flashlight makes it easier to view the fill level.

WRT fuel filter, the pressure will probably bleed off overnight without BUDS assistance. You will get more fuel spill from the filter itself than residual pressure. At 8 years you might have to replace some hoses. Pressure is larger than return so two sizes needed.

WRT brake pads, fronts are easy. Make sure you remove the small spring clip before unscrewing the retainer bolt -- easy to miss. For the rear you really should use the BajaRon tool to retract the piston. I think the PO/dealer damaged the parking brake threads so piston wouldn't retract and I had to buy another caliper (lucked into an inexpensive used one) because rear pads were almost gone while fronts were pretty good implying failed attempted replacement.

WRT analog meters, the voltmeter is pretty boring here in SoCal but might be more interesting in your neighborhood. The oil pressure for my 77K (now 80K) RT-S is entertaining from 58psi relief pressure when cold to about 12psi idle on a hot day. I mostly shift at 3500rpm and above where oil pressure is about 50psi although I'm seeing it slip to about 48psi at 3K miles on BRP's 5W40 semi-synthetic -- maybe the viscosity breakdown BajaRon and others have described? I'll be changing to Lamonster 5W40 synthetic next week and then will enter a 5K oil/filter/HCM change cycle. I'm not much worried about the Rotax engine (it's really smooth and well-behaved) but the clutch is a wear part I'd like to leave for the next owner. BTW I was suspicious of the "dry sump" gearbox oil level so cut the top off a 1.9L orange juice bottle and put it under the drain. Yep filled it almost to the top. Your garage floor must have been messy and maybe Sonya had to cover her ears?

The RT-S us fulfilling the function I purchased it for: safely and comfortably commuting to a friend's workshop about an hour away. He's running an SCTA roadster and dynos motors to pay for his hobby (addiction). I've rewired the roadster and the tow trailer. Now doing the dyno room instrumentation (fun) and the tow truck (ugh -- Bonneville Salt Flats are nasty to truck undersides). Then I have to assemble my hot rod Royal Enfield Classic 500 in my workshop which is also an hour away. So I grok your project backlog.
 
Last edited:
Bert - Thanks for the info. Will be reading your post again to better understand everything. For the rear caliper piston, will be taking the caliper off and measuring the distance between the pin holes for turning the piston. Might be able to find a suitable tool at our Princess Auto - HF equivalent. If not, time being of the essence once I start the job - nothing gets into and through Canada Post quickly, needle nose pliers should do the trick, then order the proper tool for the next time.

Installed the wiring for the heated comfort seat. The instructions indicate that the install time from start to finish, remove old - install new, with wiring hookup, is approximately 1 1/2 hours. This is if you know where everything is. Took my time, figured it out. Works well.

Inspected the air filter, in good shape, put back in. Had a good look at where I will be installing the belt tensioner. Looks straight forward. Watched a video on replacing the rear brake pads, understand why I read that you have to turn the caliper piston in - clockwise direction.

Had an issue while riding today. It has happened before, almost like the engine was loosing power. Corrected itself and I kept going. No error codes and such were displayed. Happened again today, twice. Second time I saw an "E" in the gearshift indicator when I shifted into 5th. The "E" went away, the "5" was indicated and I carried on. The road I was riding on reminded me of a snowmobile motocross track, into and out of a corner, shift, speed up, slow down, good bumps in between corners, maxed the suspension travel - bottomed a few times, more than I wanted to regardless of how I set the rear shock (soft suspension) - not an enjoyable ride. Think I might stick to my Goldwing on this road, ride is better.

Had time to think about the "E" that was indicated and surmised that it was the system telling me I had not got the shift correct.

Did a search of this forum and found a couple of threads specific to this issue. Apparently the gearbox position sensor could be the culprit. Will check it to make sure it is secured well, and the wiring is properly connected. Checked the replacement procedure in the 2014 Supplement, changing this part will not be an issue; however, I will be sitting down when I contact the dealer for a price. Have two numbers, first one I found is 420266167 that looks like it has been superseded by 420266168.
 
Update on post #39. Took the left side panels off and inspected the gearbox position sensor. The GBPS and wiring connection is secure. It was mentioned in another thread that this is a hall sensor, not a potentiometer. This makes sense to me in that there is no adjustment of the GBPS. Have a few hall sensors on my '85 Goldwing as well. Looked on line to prepare myself for the call to the local dealer. Going to be some $200.00 CDN I think. I have the B.U.D.S. software and as such, wondering if I hook into the Spyder, will I be able to determine if the GBPS sensor is faulty? More to follow.
 
Back
Top