Lew L
Well-known member
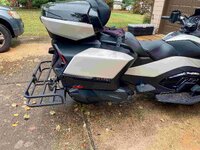
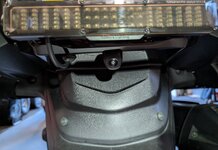
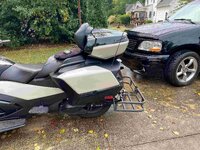
Put my Magic Mirror Mounts on today. Now on to oil change.
Magic mirror mounts are GREAT!!! Be sure to use the retention straps, don't ask me how I know...
Lew L
Put my Magic Mirror Mounts on today. Now on to oil change.
Run OEM Kenda/Kanine Kenda rear tires at 28#. They need that PSI due to single ply sidewall...I'd share pics, but they're too big. I just swapped out my rear tire on my 2023 F3 Limited 'cause the middle was shot. Got about 18,000 miles, so I'm good. Took me 30 minutes to get it off the bike – the shop didn't think I could do it in an hour! Got the new Kenda Kanine, and the dealer filled it to 28psi. Feels kinda rough on the road. Someone at the shop and on Facebook said my old tire wore out in the middle 'cause it was overinflated. I ran it at 15-20 psi, so how's that too much? What pressure are you guys running in your F3 Limited with the Kenda Kanine?
You really should do a search on Tire Pressure, and spend a few hours reading, but briefly, the Kendas and their clones, including the Kanines, Arachnids, and others, are simply lightly constructed and not greatly quality controlled car tires, and they NEED that 28 psi to carry the Spyder due to their light construction! No matter how low you run their pressure, you will still wear out the centre of the tread on the rear. This is because the lighter plies they use just aren't strong enough to stop the centre of the tread ballooning out when they rotate at anything much over about 20-25 mph, and the faster they rotate, the more they balloon out, so you end up only ever really running on the middle 2-3" of tread, which wears out quickly as a result!I'd share pics, but they're too big. I just swapped out my rear tire on my 2023 F3 Limited 'cause the middle was shot. Got about 18,000 miles, so I'm good. Took me 30 minutes to get it off the bike – the shop didn't think I could do it in an hour! Got the new Kenda Kanine, and the dealer filled it to 28psi. Feels kinda rough on the road. Someone at the shop and on Facebook said my old tire wore out in the middle 'cause it was overinflated. I ran it at 15-20 psi, so how's that too much? What pressure are you guys running in your F3 Limited with the Kenda Kanine?
Tried to figure out where to mount these lights so I could create some brackets:
View attachment 251677 - View attachment 251675
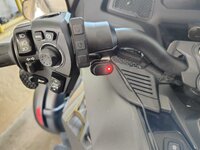
The controller it came with sorta sucked (5mA of drain when off, high/low beam selection only by toggling power, no ignition control, etc.) I ripped it out of the box and made my own "controller" with 2 relays. Low beam will be controlled via external switch, and high beam will be controlled by Spyder's high beam switch. Lights will only operate when key is on.
View attachment 251672 - View attachment 251674 - View attachment 251691
I mounted some similar lights. See if this post is of any help.
I took some time to wire in a few accessories:
- Showchrome Electronic Fuse Block: This is a plug-and-play adapter that separates the accessory wiring from the Spyder wiring and powers accessories directly from the battery.
- Front Wheel Mounted Fog Lights (see pictures): Bought and tried a few brackets and finally found ones that work. I had these lights on my Honda Rebel 1100 and for they price, they work well. These are wired into the Showchrome fuse block into one of the Keyed ports.
The wire routing from the lights to the Showchrome fuse block took the most amount of time with...
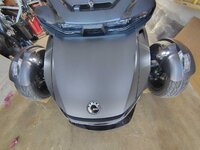
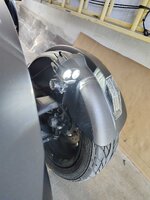
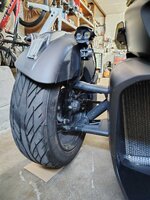
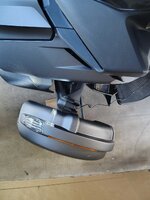
Nice! I also tried many different brackets and none of them worked for me, so I decided to make my own. The height of yours (~12-13 inches) is perfect for fog lights, but mine are driving lights and must be >=16 inches. The challenge was finding metal that was both thick enough to not flex but still be able to be bent into the proper shape...
I'll be posting photos when I have them mounted (wiring will take quite a while longer though)
Edit: got 'em mounted! A bit janky, but at least it's sturdy! Finally got a use for those useless 1" 12-point sockets.
View attachment 251733View attachment 251734
View attachment 251731
View attachment 251732
View attachment 251735
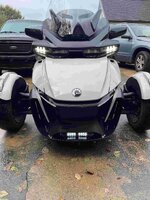
Very old garage door arms bent into shape with vise and sledge hammer, with a small tab welded on for the second bolt, and 1" sockets for the lights to clamp on...Very nice!
What did you use for the mounting brackets?
Sounds just like some of my engineering. When I am planning a new project I go out and inventory the scrap metal pile behind the shop to see what I have in stock and then order the rest.Very old garage door arms bent into shape with vise and sledge hammer, with a small tab welded on for the second bolt, and 1" sockets for the lights to clamp on...
 -
-  -
- 