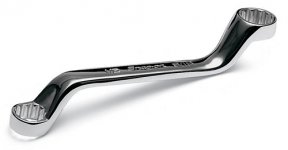
Removing the lower shock bolt first takes tension off of the upper shock bolt and makes the process easier. Installing the top bolt first during re-assembly is also a help, as is reversing the bolt direction. Here is how I recommend attaching the top assembly (taken from my Shock Adjuster Install Instructions). With a bit of patience, this can be done without too much grief. We also found that an offset box end wrench can be a big help.
Basically, you Pre-Install the Nut/Bolt onto the mounting bracket without the shock. Having the shock in the way is what makes it difficult. By using the double sided sticky tape on the nut, and pre-installing the nut bolt. It aligns the nut perfectly over the mounting bracket hole and sticks it there pretty tightly. When you remove the bolt, the nut stays in place so that you can mount the top of the shock and start threads without having to hold the nut in place. You can turn the bolt by hand to engage the threads. Once this is accomplished. The rest is fairly easy to do.
If BRP had welded this nut to the bracket. We would not even be having this discussion. My double sided sticky tape trick basically does exactly this.


21. Installing the Shock onto the Spyder - It can be difficult to get the nut started onto the upper Shock Mount bolt once the Shock is installed. The following steps are to be completed BEFORE re-installing the shock onto the Spyder.
Be sure that the flange surface of the nut and the mating surface on the FRONT SIDE of the frame where the TOP eye of the Shock mounts are clean and dry.
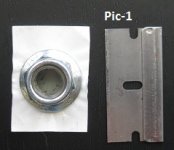
22. Cut a square from the strip of Double Sided Sticky Tape a bit larger than the flanged end of the Shock Mount Nut.
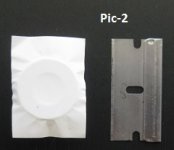
23. Expose one side of the sticky tape and apply it to the flange. Pic-1 & Pic-2. Press hard to get good adhesion.
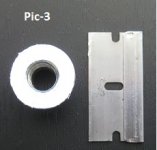
24. Using a razorblade or sharp box cutter trim the Sticky Tape around the inner and outer edges of the bolt flange. Pic-3 Be sure NO Sticky Tape is in or blocking the threads.
25. Insert the upper shock mount bolt all the way into the upper shock mount from the rear of the bracket. This is OPPOSITE of the Factory orientation. This makes installation much easier and makes no difference to the Spyder.
26. Expose the Sticky Tape and thread the nut a few turns onto the bolt, (nut on the front side of the frame).
27. Push the nut against the frame pressing FIRMLY. You can also pull on the bolt head to apply more pressure to the nut against the frame. This process will allow you to install the bolt without having to hold and align the nut, which is very difficult to do once the shock is in place.
28. Unscrew the bolt while pressing the nut against the frame. Do not disturb the Sticky Tape or allow the nut to spin!
NOTE: As an alternative to this procedure, some have used the sticky tape on a finger to hold the nut in place. Others have used the sticky tape on the offset box end wrench to hold the nut in place.
29. Return the shock to its general mounting position in the same manner as it was removed.
30. Align the top Shock Mount Eye with the mounting hole in the frame bracket. While holding the shock so there is no friction on the mounting bolt, gently push the bolt through until it contacts the nut. Turn the bolt clockwise with gentle pressure on the nut to engage the threads. Be careful not to push the nut away from the frame.
You can use the Offset Box End Wrench to hold the nut. But if you do, be careful not to disturb the Sticky Tape until you are sure you have good thread engagement with the bolt. Once the threads engage you no longer need to be careful.
Overall, this job is not that hard. As with many things in life. Patience and a little help when needed are the keys.


