spyder-dude
New member
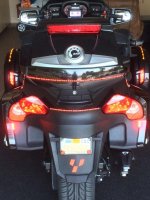
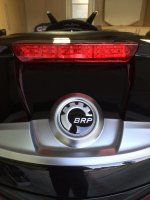
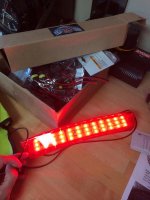
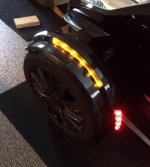
My luck isn't doing to well starting off on my mod installations on my new 2014 Spyder RTS. It appears there has been some changes to them compared to previous models. The custom dynamics kit uses BRP type connectors for the third brake light installation. The problem is that the factory wire connect you can't reach as it is probably zip tied and can only see it with a flashlight.
Looking for the best way to get access to this connector either by removing the rear fender or the side bag. Before I dive into this would like to hear some feedback from others that have done this mod on their 2014 Spyder.
Thanks,
Shawn
Looking for the best way to get access to this connector either by removing the rear fender or the side bag. Before I dive into this would like to hear some feedback from others that have done this mod on their 2014 Spyder.
Thanks,
Shawn
 opcorn: I've got one to install.