-
There were many reasons for the change of the site software, the biggest was security. The age of the old software also meant no server updates for certain programs. There are many benefits to the new software, one of the biggest is the mobile functionality. Ill fix up some stuff in the coming days, we'll also try to get some of the old addons back or the data imported back into the site like the garage. To create a thread or to reply with a post is basically the same as it was in the prior software. The default style of the site is light colored, but i temporarily added a darker colored style, to change you can find a link at the bottom of the site.
You are using an out of date browser. It may not display this or other websites correctly.
You should upgrade or use an alternative browser.
You should upgrade or use an alternative browser.
What Did You Do To Your RYKER Today?
- Thread starter campermac
- Start date
I finished installing the Shad saddlebag. It went about like I thought it would - OK overall but included moments of extreme frustration like everything I do. A few thoughts:
1. The designs of the case and mounting bracket are pretty solid.
2. I wish BRP wasn't so in love with star/Torx bolts. I lost count of how many times the star bit slipped out of the M8 panhead bolt. I smashed my knuckle once and thought I was going to strip the heads. The size of the Torx bit is too small for the torque needed, and a more cylindrical bolt head instead of pan, with a deeper star recess, would be smarter.
3. The longer bolts that replace the 2 Max Mount bolts for one of the bracket pieces were so hard to tighten that I thought I had stripped them several times. It's fun to torque them to spec when the Torx bit keeps popping out.
4. The mounting kit includes large a piece needed if you don't have the Max Mount. That's a waste of money and aluminum - they should offer 2 kits. I can't imagine ever removing the Max Mount and reconfiguring.
delkhouri
Active member
Finely got the saddle bag system fabricated and installed.
That looks real nice
Last edited by a moderator:
canamryder
New member
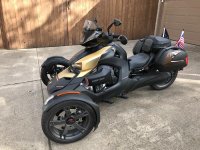
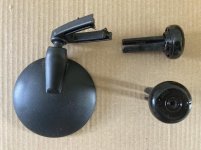
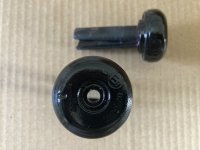
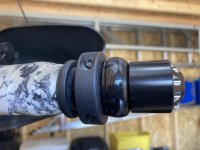
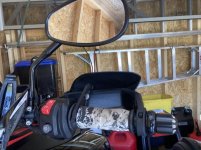
Today I received from T Rex Fabs the Bar End Weights. (on sale as of this date for $30.00 + tax) I went out in 28 degree shed and installed them. I had previously cut, ground, and painted the end handlebar expansions. I weighted them with screws, 17oz total.
https://www.trex-fab.com/products/handle-bar-end-weights-stainless
https://www.trex-fab.com/products/handle-bar-end-weights-stainless
Attachments
Last edited:
canamryder
New member
Installed Backrest
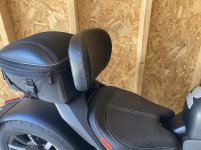
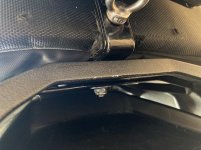
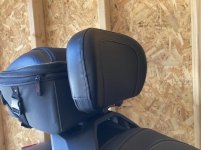
I finished installing a backrest with a homemade bracket (looks like it, also) The bracket is made from shelving brackets. I doubled stacked them for increased strength. Glad they do bend somewhat 'cause 90 degrees makes the top of the cushion push to much forward. The bracket goes back across the "lock" open hole in the max mount, then a cross member underneath , with a bolt and nylon lock nut clamps it down. The backrest still twist, but only if I make it. The Ryker backrest is not comfy (according to MY back), too small, too low, and not much padding. The eye hook is just for kicks.
https://www.amazon.com/dp/B08WZ16HWH?psc=1&ref=ppx_yo2_dt_b_product_details
https://www.amazon.com/dp/B0768SH78H?psc=1&ref=ppx_yo2_dt_b_product_details
Attachments
canamryder
New member
Today I went to "Ace" and picked up 2' of clear tubing, 5/16" ID if you're wondering, and a brass barb, for extending the fuel overflow tube. I used 14" of the 24" tubing. Cost me $4.77 (+tax).
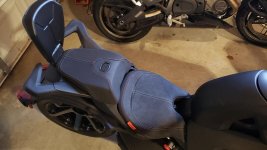
I installed the comfort seat and managed to break off one mounting tab  . BRP, please use a better plastic material or a metal tab system, because you know most people don't want to lift the body off to install a seat that *should* just snap into place. I never had to disassemble any motorcycle I had to remove the seat.
chris56
Active member
this year my Battery needed a charger - started fine and I made my first warm up .. runs perfect !!
https://www.youtube.com/watch?v=iL7_uAzKjkA&t=22s
https://www.youtube.com/watch?v=iL7_uAzKjkA&t=22s
canamryder
New member
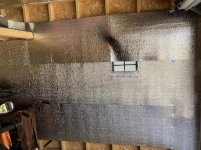
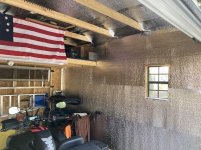
I improved my Rally's quality of life. She was suffering in the late afternoon heat in the shed last summer. So I installed a radiant heat barrier on the inside West wall. The roof was done last year. I might do the south end someday, but there is some shade back there. No attic crawling today either. I'll keep the East side alone, there's shade on that side. I'm thinking of adding some wood trim along the seams for a final touch.
Attachments
EchoVictor
Member
Tslepebull
Active member
I changed my CVT belt; it was the first time for my Ryker. I guess I could have taken it to my dealer, waited for a month, and paid a whole bunch. Between the clutch sheve tool and a new belt I have about $200 and my time in the job. Im retired so my time is free. It took about three hours for this time but now that I know all the figity tricks I am confident I can do it in less than an hour next time. I do not have any way to communicate with the ECM so I will have to make a trip to the dealer to get the transmission maintainence warning turned off.
EchoVictor
Member
canamryder
New member
Just finished the 1st ride of '22. (48 miles) Now only 24 miles until I hit the big 12,000 miler. This next time the fuel is low I'll raise the clam shell to check/change the CVT belt, warning will most likely be on by then. I'm not a rubber burner so belt, I expect, to be in pretty good shape. I'll measure the belt to check where it is in the width range. Maybe in the top 40% of range I won't change it. Trouble is it may need changing when it's 90 degrees out in the shed this summer. Decisions..Decisions.
Similar threads
- Replies
- 32
- Views
- 7K
- Replies
- 10
- Views
- 2K
- Replies
- 26
- Views
- 7K

