• There were many reasons for the change of the site software, the biggest was security. The age of the old software also meant no server updates for certain programs. There are many benefits to the new software, one of the biggest is the mobile functionality. Ill fix up some stuff in the coming days, we'll also try to get some of the old addons back or the data imported back into the site like the garage. To create a thread or to reply with a post is basically the same as it was in the prior software. The default style of the site is light colored, but i temporarily added a darker colored style, to change you can find a link at the bottom of the site.

Performance Pipe Installation

Nemesis

New member
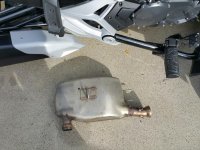
I decided to get the performance pipe for my F3S from Lamonster Garage. I was told it should add around 5 hp and improve the throttle time. It is also lighter and from the videos I've seen, sounds great!

I am hoping someone with more experience can describe the installation process or if possible, post a video showing how to replace the stock pipe with the new one. Does the back of the F3 need to be lifted to change out the pipe or can I just drive onto ramps (lifting the front about 12 inches)?

If it is a tricky process, or requires special tools, I'll just take it in to the dealer... I'd rather not have to take it to them though, they charge extra $$ and are booked up for another week or so. :(

Thanks!
 
Relax. .!!

Lamont sells quality and I'm sure it comes with clear instructions. If you look at where your factory pipe mounts it will go in the same place and hook up the same way. You can raise the unit if easier for you and you have the equipment but you can do it on the ground...take your time...:thumbup:
 
Remove one clamp where the stock muffler connects to the primary muffler under the bike. The stock muffler then pulls straight back and off the rubber mounts.

Remove 3 spring retainers on primary muffler to header. Then the primary muffler comes out of its rubber mounts.

Replacement is the reverse. The ramps should work just fine to give you some working room. Its and easy 30 minute job.

Thanks for the help. Any advice on how to remove the spring retainers? That's probably the hardest step...
 
Once my bank account recovers from all the LEDs the dealer is installing, this is the next thing on my list. Let us know how it goes.
 
Once my bank account recovers from all the LEDs the dealer is installing, this is the next thing on my list. Let us know how it goes.

The installation went pretty well. I used a hand-made tool to help disengage (and reapply) the springs. That was probably the trickiest part. There was a little bit of a hiccup when one of the rubber bushings popped out from where one of the pipe supports sits. It took a good 15 minutes to get that thing back in.

I'll try posting a video of before/after sounds. I really like the new sound. There is definitely an improvement in the weight as well (the cat is a beast). I haven't taken it out on the road yet so I'm not sure if it will be more responsive.

 
definatelly my next upgrade..!!!

The installation went pretty well. I used a hand-made tool to help disengage (and reapply) the springs. That was probably the trickiest part. There was a little bit of a hiccup when one of the rubber bushings popped out from where one of the pipe supports sits. It took a good 15 minutes to get that thing back in.

I'll try posting a video of before/after sounds. I really like the new sound. There is definitely an improvement in the weight as well (the cat is a beast). I haven't taken it out on the road yet so I'm not sure if it will be more responsive.


thank you.. def. will do this customization!!! sounds good!!!
 
Okay so I went for a long ride yesterday. Not only does it sound great but the F3 feels much more responsive. I am definitely happy with this purchase.
 
Just installed Lamonster performance pipe (cat delete) on my 2015 RT Ltd

I just completed the installation on my 15 RT Ltd. There are no removal/installation instructions with the product. Here's what I did:

1. Removed the exhaust springs using this method:
It's not as easy as the video suggests, but I found it the best way to uninstall and I used it on one spring to reinstall.
2. Loosened the muffler to cat converter clamp and pulled the two pieces apart.
3. Removed the mounting bolt for the muffler and removed the muffler. This got it out of the way and I believe made the rest of the job easier.
4. Took out the cat converter from the hanger above and two front positioning rubber mounting points. Had to push/pull/jiggle to get it out.
5. Installed Lamonster pipe by hanging correctly and then installing two of the three springs. I could not get the back-most (hardest to reach) spring done by myself. I'll ask my neighbor to assist me as I think this is better done with two people.
6. Rehung the muffler and connected the muffler clamp to Lamonster's pipe.
7. Tightened everything up.

Hopefully I've done this okay and running/performance will not be an issue. If so, I'll tell you more.

Rob
 
a convert to performance pipe

Installation was easy peasy. Sounds like a small single engine aircraft now.

Seat of the pants observations are notoriously subjective but the f3 does seem to like to rev a little quicker now. Kinda feels like the peak torque is moved a little further up the range but could be my imagination...

Definately a keeper.
 

Attachments

  • 2015-09-19 15.22.44.jpg
    2015-09-19 15.22.44.jpg
    93.2 KB · Views: 38
  • 20150919_131239.jpg
    20150919_131239.jpg
    86.3 KB · Views: 42
Back
Top