Is the mirror removal process the same as it is on the RT's as demonstrated here:
Or is it different?? Thanks for your help....................
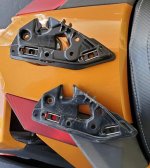
No they are not the same style or mounting type ......... Sooooooooooo Only if you have modified your ST to have RT mirrors .......... I looked into this because I wanted to do Magnets for mounting the ST mirrors ....NOT GONNA HAPPEN .:banghead::banghead::banghead: ........... Mike :thumbup:
:shocked: Actually mine were kind of the same on my '13STL (not sure why ?)
first & foremost proceed with caution! the wind deflectors have bolts that go into the mirror & body panel tho, I did also brake one spring clip by not putting back on correctly:yikes:
trained tech & White lithium grease helps.
Made me not want to try pulling them off again. PITA:barf:
Fyi my last attempt was December 2015