• There were many reasons for the change of the site software, the biggest was security. The age of the old software also meant no server updates for certain programs. There are many benefits to the new software, one of the biggest is the mobile functionality. Ill fix up some stuff in the coming days, we'll also try to get some of the old addons back or the data imported back into the site like the garage. To create a thread or to reply with a post is basically the same as it was in the prior software. The default style of the site is light colored, but i temporarily added a darker colored style, to change you can find a link at the bottom of the site.

I brightened up my trunk, frunk, and saddlebags!

IdahoMtnSpyder

Active member
I think I've got all the info together I need to post this DIY project. As I said in another thread I didn't want to risk spending $65 for the BRP light for the frunk only to find out it's rather wimpy. The base RT does not come with a frunk light. From what some others have said about the light I may have been wise to look for an alternative. So here it is. I'm going to post this in several messages to simplify the process of uploading photos. Please restrain from commenting or asking questions until I get it all up. Later, after it's all edited and cleaned up maybe Lamonster will move it to the DIY section.

I bought six of these bad boys from SuperbrightLEDs.com for $3.95 each. http://www.superbrightleds.com/more...ies-constant-current-smd-led-sign-module/980/
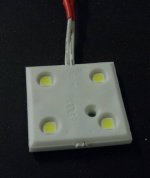
LED light.jpg

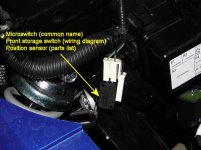
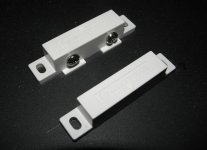
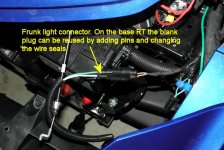
Items I used are automotive wire, mostly 18 gauge and about 12 feet black and white. BRP is consistent in using black for the ground wire. Other items were spade connectors, solder, and shrink tubing and alarm magnetic switches. I had bought parts and pieces for TE Connectivity/AMP SuperSeal 1.5 connectors for my fog light project so I used some pins and seals from that bunch to convert the blank plug on the frunk light wire to a functional connector. See this page for the parts: http://www.newark.com/webapp/wcs/st...rseal 1.5&pageSize=25&showResults=true&sf=783 If you're adding a light to the frunk of an RT you'll need to install a miroswitch, or some substitute, to turn the light on and off. The microswitch is also used for the hood actuator. I bought the magnetic switches from a local electronics supplier. You have to use the ones labelled for open loop, not closed loop.

Here's the magnetic switches for the rear trunk and saddle bags, and the light connector and microswitch for the frunk.
Mag switch 2.jpgFrunk light connector.jpgFrunk microswitch.jpg
 
Part 2

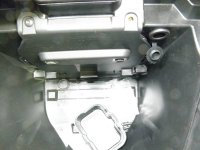
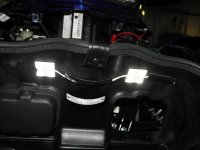
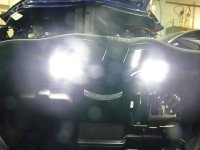
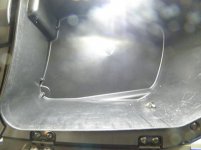
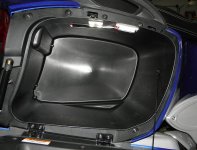
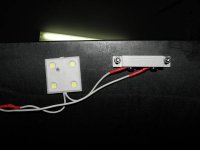
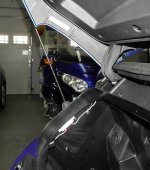
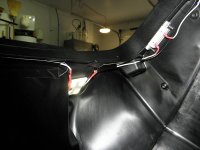
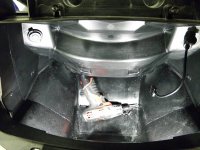
I don't show it but I drilled a hole in the side of the frunk to run the wires for the LEDs. I used Liquid Tape to seal it up. The LEDs are mounted on the sloped part of the trunk under the latch area. The direction is just right for lighting up the trunk. I think these pics will tell all that you need to know here. The photo showing the lighted interior of the trunk was shot with the camera in auto mode and is a bit overexposed. But the trunk is well lit though. If you have a liner you would need to cut holes in it for the LEDs to shine through. The base RT does not come with a liner and I don't intend to buy one. The second photo was taken with flash to better show the LEDs and wiring. You will see the accessory plug I installed. Bought it from Amazon. Lot cheaper than BRP. Had to enlarge the hole a bit. http://www.amazon.com/gp/product/B00791W8BW/ref=oh_details_o08_s01_i01?ie=UTF8&psc=1 Factory wires plug right on with no problem

Lighted frunk 2.jpgFrunk light location flash 2.jpgFrunk light location 2.jpg
 
Last edited:
Part 3

Here's the setup in the right saddle bag. Again, the camera was in auto mode and overexposed a bit, but you can see how well the interior is lit. The LEDs come with adhesive pads. The switch and magnet were fastened with screws. The screw heads and the wire entry were sealed with Liquid tape. The positioning of the switch and magnet with respect to each other takes some doing to get just right, although there is about 1/2 to 3/4 inch location tolerance to work with.

Lighted SB.jpgLED & switch location in SB 2.jpgSwitch & LED in SB 2.jpgMag on SB lid 2.jpgWire entering SB 2.jpg
 
Last edited:
Part 4

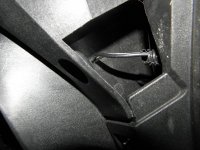
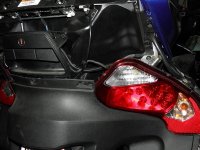
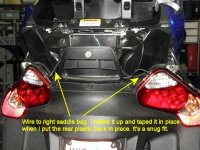
I used wire loom from NAPA for the wires but I'm not sure it's necessary. Probably taping them together every few inches would be plenty good. The space between the trunk and rear plastic is tight and the wire loom presented a little bit of a problem with fitting everything in.

Wire route at rt SB 2.jpgWire route to rt SB 2a.jpg
 
Part 5

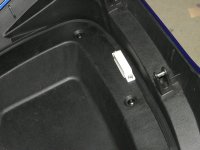
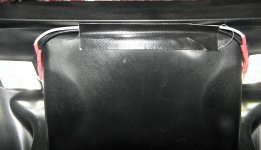
Here's the light and wiring inside the rear trunk. The magnetic switch works just fine through plastic. The trunk is very well lit although the photo is a bit overexposed. The switch and magnet are fastened with screws.

LED location in trunk 2.jpgSwitch & wire in trunk 2.jpgSwitch & LED in trunk 2.jpgLighted trunk 2.jpg
 
Part 6

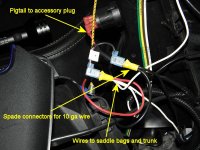
Here's the wiring connections at the rear accessory plug. Using this means the LEDs light up the bags and trunk anytime the lids are opened, if the plug fuse is in F6. It's a rather tight space in there, especially if you have a CB installed because this is in the same space with the antenna cable. The pigtail to the plug should be either 14 or 16 gauge to avoid any potential problem of overloading them. The fuse is 10 amp so the 18 gauge I used for the LEDs would be a bit light.

Removing and reinstalling the antenna support box is lot easier if you remove the seat back from the trunk, which is easy to do.

wires to SB & trunk.jpg
 
Most excellent

A+ effort and excellent posting to include pics.

Having ridden in the night and fumbled in the dark in the front and rear trunk (side cases not so much), this would be a great add.

My only 2 cents would be to spray paint the switches (and possibly the LED light white base) black so they blend with the black interior black case plastic.

Jerry
 
Last edited:
A+ effort and excellent posting to include pics.

Having ridden in the night and fumbled in the dark in the front and rear trunk (side cases not so much), this would be a great add.

My only 2 cents would be to spray paint the switches (and possibly the LED light white base) black so they blend with the black interior black case plastic.

Jerry
Thanks. As to painting the pieces, great idea, if one is anal about color and matching, which I'm not!! :thumbup: And then again, in my case smooth but mismatched looks better than painted and matching!:ohyea:
 
GREAT job, and an even better job of reporting on it! :clap: :firstplace:
BRP should take notice of this one... :thumbup:
Power it all of the time, so that you've got some light; regardless of whether or not the bike is running...
 
Love what you've done! Do you have any concerns with cargo bumps and scrapes of the wires and switches over time?
Not really, but could happen. One of the reasons I put them where I did is if you look in your boxes you'll see those areas are out of the main pathways of putting stuff in and out. That's also why I fastened the switches with screws and not mounting tape. The lights are flat and less than 1/4" thick. I decided the benefit of the light far outweighs the risk of damage.
 
Mike (BlueKnight911) suggested these lights from eBay may be useful in that they can be installed without tapping into 12vdc, plus can be relocated easily and used off the bike if you first secure a piece of metal (large fender washer maybe) to the location in the luggage where you want the magnetic-base lights to be.
 
Last edited:
Back
Top