• There were many reasons for the change of the site software, the biggest was security. The age of the old software also meant no server updates for certain programs. There are many benefits to the new software, one of the biggest is the mobile functionality. Ill fix up some stuff in the coming days, we'll also try to get some of the old addons back or the data imported back into the site like the garage. To create a thread or to reply with a post is basically the same as it was in the prior software. The default style of the site is light colored, but i temporarily added a darker colored style, to change you can find a link at the bottom of the site.

How to open dash on RT 2015

Scoot2Mtns

New member
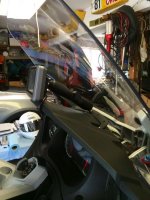
I've found lots of posts about people adding GPS to their dash, either on top or the gauge area. I've decided to use JTs dash mount with RAM mounts to mount my Zumo. I want to run the cabling to the Sypder's plug-in, either in through one of the windshield adjust holes or through the front lip of the dash. I've found pictures of tidy notches at the edge of the dash and pictures of cables running forward.

All descriptions and pictures seem to start with dash already taken apart. What are the tricks to getting the dash apart and back together without damaging anything? If you've run cabling through the windshield arm holes, what are the tricks to making sure the cable stays out of the way of the moving windshield arms?

Really appreciate all the mounting info I've found in the forums, but I'm sweating the details of cracking the dash open and running the cables.
 
There are screws on the front of the dash. Opens very easy. You can drill a hole. Or, as I did, add a double usb plug. Also from JT. I removed both my gauges and went to the digital ones already in the computer. They activate once you disconnect the gauges. :thumbup: If I can do it. Anyone can! :thumbup: Tom :spyder:
 
Whatch it..!!

The screws to remove the dash tend to fall and if they bounce to the neck they can disappear down there to never be found. Place a towel around the area before removing those screws...:lecturef_smilie: then you have access to all....:thumbup:
 
The screws to remove the dash tend to fall and if they bounce to the neck they can disappear down there to never be found. Place a towel around the area before removing those screws...:lecturef_smilie: then you have access to all....:thumbup:
:agree: Deanna
 
Thanks for the specific advice. I was worried there was a hidden screw or tab that I would break off if I just did the two screws.
 
I have JTs mount but am not able to find info on running the original cable for the Zumo up to the new location. Any input would be helpful. I do not want to run to a new plug in when I have a cable that already works, if it is long enough.
 
Green Dragon

I found it much easier to get a new GPS cradle harness and leave the OEM in it place! the dash top is pretty to "Split" after the necessary screw and windshield removal. I then ran the cables town the right side and zip tied the new cable directly to the OEM Garmin cables. That way it is easy to see where everything goes. For power, I left the OEM stuff alone and just used Positaps to tap into the wiring at the plug end. I also used a dremel and made the whole for the wire to come out the dash.
attachment.php
attachment.php
 

Attachments

  • photo 1.jpg
    photo 1.jpg
    43.8 KB · Views: 315
  • photo 2.jpg
    photo 2.jpg
    48.8 KB · Views: 317
The screws to remove the dash tend to fall and if they bounce to the neck they can disappear down there to never be found. Place a towel around the area before removing those screws...:lecturef_smilie: then you have access to all....:thumbup:


:agree::agree::agree:, and don't ask us how we know. :opps::opps:


Cruzr Joe
 
Back
Top