• There were many reasons for the change of the site software, the biggest was security. The age of the old software also meant no server updates for certain programs. There are many benefits to the new software, one of the biggest is the mobile functionality. Ill fix up some stuff in the coming days, we'll also try to get some of the old addons back or the data imported back into the site like the garage. To create a thread or to reply with a post is basically the same as it was in the prior software. The default style of the site is light colored, but i temporarily added a darker colored style, to change you can find a link at the bottom of the site.

Firstgear Panel Mount DC Connector

vtrider

Member
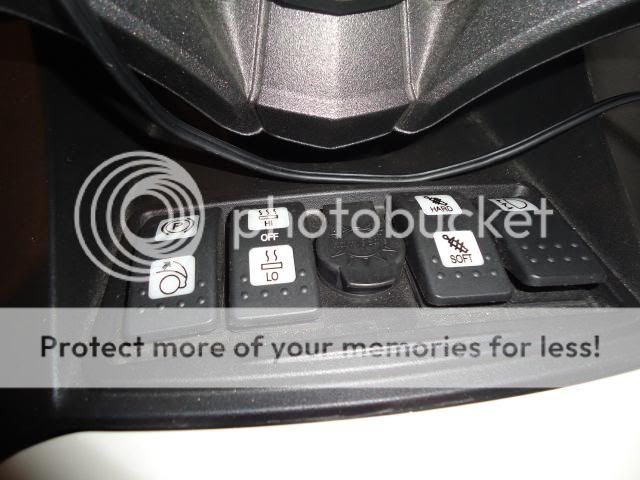
I had a busy weekend adding farkles to My RT this weekend. I installed the Sena SM10 dongle and homemade harness that I mentioned in another post and added a Firstgear panel mount DC connector to the switch cluster where the connector for the entertainment harness would normally go. I don't plan to add the entertainment harness, so this was a good place to add the DC connector. I can tell you though! This was not an easy install, getting the glove box off to get access to the underside of the switch panel in order to add the connector. I did manage though and it looks real good. I ran the wire harness for this to the battery with on inline fuse connection to the +12V. I will be using this connector mainly for my heated jacket and gloves. It will also make a good external source to plug in a battery tender. This is the connector that I ordered from the Motorcycle Super Store. http://www.motorcycle-superstore.com/46071/i/firstgear-6-dc-coax-panel-mount-connector .
 
Last edited:
This is what it looks like after the install

DSC01126_zps91654d56.jpg
DSC01125_zps17836050.jpg
 
Great job, looks factory installed and what an intuitive place to have it, right next to the heated grips switch!! :yes::yes::bowdown::bowdown::clap::clap:
 
What made this mod work well, was the fact that no drilling in the panel was required for the DC socket. Once I removed the plug hole cover, the hole in that location was just the right size for the socket. The real bear was getting the panel and glove box removed with all the connectors in tact for the switch cluster. Once I was able to work from the underside of that, I was able to spin the nut onto the DC Socket that holds it in place. That took some patients, because the nut barely fit in between the dividers for the switches. I had to make small turns to finally get it secured tight in place. I then had to run a cable that connects to the DC socket plug and installed that to the battery.
 
Garmin makes a smaller panel mount that maybe easier to install , maybe not in this location because of the pre existing hole size
 
Back
Top