• There were many reasons for the change of the site software, the biggest was security. The age of the old software also meant no server updates for certain programs. There are many benefits to the new software, one of the biggest is the mobile functionality. Ill fix up some stuff in the coming days, we'll also try to get some of the old addons back or the data imported back into the site like the garage. To create a thread or to reply with a post is basically the same as it was in the prior software. The default style of the site is light colored, but i temporarily added a darker colored style, to change you can find a link at the bottom of the site.
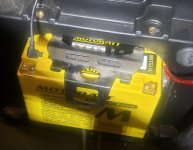
Any tips for easier RT battery removal and replacement?

UtahPete

Active member
I've done this twice before and it has never been simple. The compartment is cramped, the hold down bracket never wants to stay in place while I'm trying to get the battery wiggled onto the tray. Has anyone got any tips for doing this right the first time without skinned knuckles and a whole lot of sailor talk?

20210526_135732.jpg
 
I've replaced one battery and had the original one out for a load test with no skinned knuckles and fairly large hands. I just set the battery in place and slip the hold-down bracket in place. Yes, it's a little finnicky to get the bracket in place but I check how I'm aiming it with a shop mirror before inserting.
 
.

I removed the frunk lid before working on the battery. It's just 4 machine screws and that really opens up access to the frunk.
Lew L
 
I've replaced one battery and had the original one out for a load test with no skinned knuckles and fairly large hands. I just set the battery in place and slip the hold-down bracket in place. Yes, it's a little finnicky to get the bracket in place but I check how I'm aiming it with a shop mirror before inserting.

When you 'set the battery in place', how exactly do you do that? Push it straight in without the terminal wires connected? Set the front bottom edge in place and tilt it upright? Some other way?
 
The nice thing with the Motobat battery's are the posts on all four corners so if your cables are long enough you can pull them out and hook them out in the open!!!
 
I have to defer to Mikey because I've used Yuasas exclusively; but just set it in place rearward side first, squared, anchored the hold-down bracket with its rubber strap and connected the cables, positive first of course.
 
Advise a small pice of tape on open side Of terminal blocks keep the nut from falling out. Remove after bolt gets started, won’t interfere with connection.:popcorn::lecturef_smilie: oh ya don’t forget Star washers:clap:
 
Advise a small pice of tape on open side Of terminal blocks keep the nut from falling out. Remove after bolt gets started, won’t interfere with connection.:popcorn::lecturef_smilie: oh ya don’t forget Star washers:clap:

Both good pieces of advice. Thanks.
 
I too struggled with this, here's the method that I found works best. Insert the battery in to the space with the top tilted towards you. Simply tip the battery vertical and it should be in the home position. Connect the cables and you're good. The top clamp is tricky and may take a few tries to get it to catch. Like most things, the more we do it, the easier it becomes.
 
I like using Deka batteries...They have the slickest and easiest terminal connections...I just did my routine 3 year battery replacement last week...Slid the battery into the opening...put the mental top hold down ontop and confirmed the tabs went into the 2 slots with a mirror...stretched the rubber hold down up and secured it to the metal top bracket...Used the supplied bolts & spacers and attached the cables to the sides of the cable connectors...(NOT THE TOP HOLES)...YES, + on first...

I've been using Deka AGM powersport batteries for many years with good success...PLUS, I've NEVER seen and sign of corrosion anywhere...

larryd
 
I too struggled with this, here's the method that I found works best. Insert the battery in to the space with the top tilted towards you. Simply tip the battery vertical and it should be in the home position. Connect the cables and you're good. The top clamp is tricky and may take a few tries to get it to catch. Like most things, the more we do it, the easier it becomes.

I like your 'senility' prayer.

After many hours of struggling with trying to attach the cables to the rear posts of the battery, I finally gave up on that and did exactly as you describe. The extra posts on this battery are wasted in this application, I think.
 
I like using Deka batteries...They have the slickest and easiest terminal connections...I just did my routine 3 year battery replacement last week...Slid the battery into the opening...put the mental top hold down ontop and confirmed the tabs went into the 2 slots with a mirror...stretched the rubber hold down up and secured it to the metal top bracket...Used the supplied bolts & spacers and attached the cables to the sides of the cable connectors...(NOT THE TOP HOLES)...YES, + on first...

I've been using Deka AGM powersport batteries for many years with good success...PLUS, I've NEVER seen and sign of corrosion anywhere...

larryd

Dekas seem identical to Yuasas in that respect.

My Yuasas have lasted 7 years with good service.
 
Back
Top