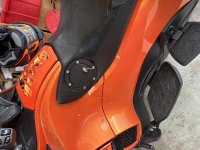
With the help of those of you who had performed this procedure before me, I installed a billet fuel door on my spyder over the last couple of days. And I took lots of pictures! So without further ado;
This is the fuel door I used.
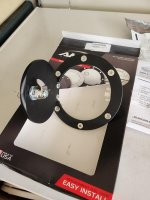
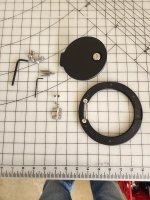
The fuel door taken apart.
The seat with tape showing the level line and center point of the gas cap and fuel door. Note the tape showing cap location and fairing start point.

Another view of center point already punched with soldering iron.

Bulls Eye!
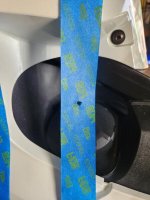
Hole in seat via the soldering iron with seat vinyl pulled back.
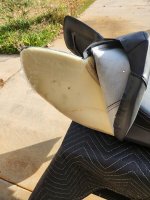
Hole marked and ready to cut.
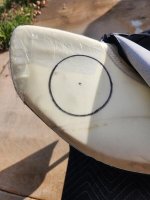
I used a 4 1/2” hole saw and turned it by hand to cut the foam. Once the foam was removed, I used the hole saw to cut through the pan (plastic) by running it backwards.
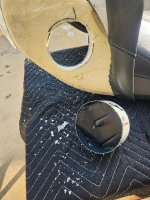
What the pan looks like after it’s cut.
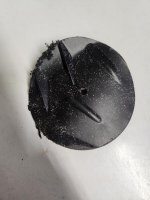
I pulled the vinyl back into place and marked the cut lines.
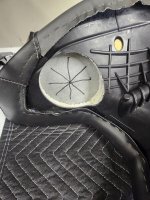
I cut the vinyl using a utility knife and cut a piece of leather to line the exposed edge of foam.
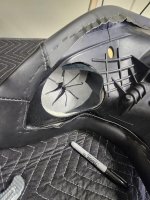
Then I pulled the tabs formed by cutting the vinyl back and temporarily stapled them on the back of the pan.
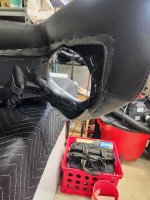
What the front side of the seat looked like after pulling the vinyl back and stapling.
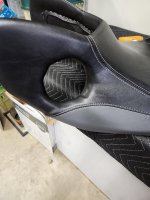
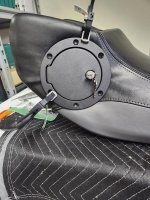
The fuel door clamped into place and ready to punch the holes with the soldering iron.
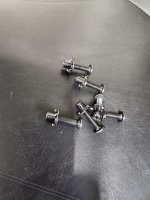
Hardware used; cut the prongs off the t-nuts using a pair of diagonal cutters, punch one hole, insert screw through the front and t-nut through the back. Tighten to hold fuel door in place.
The t-nut on the high side of the pan will require a bit more trimming in order to ensure clearance when the seat is in the down position.
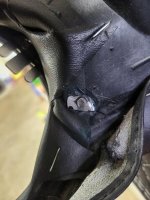
Hardware installed.
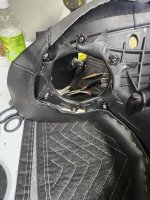
Hardware trimmed with a dremel tool and cutoff disc.
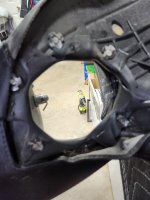
High side t-nut trimmed to fit.

Fuel door tightened down, vinyl tabs pulled tight and stapled into place.
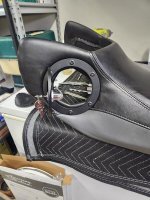
Back of seat covered with a piece of leather to protect the left side fairing.
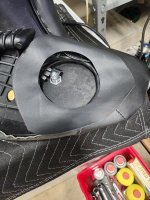
Spray adhesive and staples were used to secure the leather. Vinyl was pulled into place and stapled with stainless steel staples.
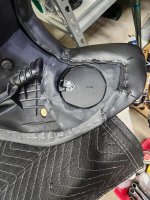
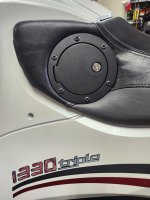
Fuel door installed and closed.
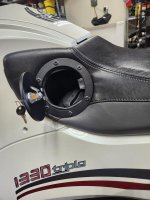
Fuel door open…. Note the piece of leather on the latch plate; keeps the door from rattling by tightening the latch and protects my hand from getting cut by the latch plate.
This is the fuel door I used.

The fuel door taken apart.

The seat with tape showing the level line and center point of the gas cap and fuel door. Note the tape showing cap location and fairing start point.

Another view of center point already punched with soldering iron.

Bulls Eye!

Hole in seat via the soldering iron with seat vinyl pulled back.

Hole marked and ready to cut.

I used a 4 1/2” hole saw and turned it by hand to cut the foam. Once the foam was removed, I used the hole saw to cut through the pan (plastic) by running it backwards.

What the pan looks like after it’s cut.

I pulled the vinyl back into place and marked the cut lines.

I cut the vinyl using a utility knife and cut a piece of leather to line the exposed edge of foam.

Then I pulled the tabs formed by cutting the vinyl back and temporarily stapled them on the back of the pan.

What the front side of the seat looked like after pulling the vinyl back and stapling.

The fuel door clamped into place and ready to punch the holes with the soldering iron.

Hardware used; cut the prongs off the t-nuts using a pair of diagonal cutters, punch one hole, insert screw through the front and t-nut through the back. Tighten to hold fuel door in place.

The t-nut on the high side of the pan will require a bit more trimming in order to ensure clearance when the seat is in the down position.

Hardware installed.

Hardware trimmed with a dremel tool and cutoff disc.

High side t-nut trimmed to fit.

Fuel door tightened down, vinyl tabs pulled tight and stapled into place.

Back of seat covered with a piece of leather to protect the left side fairing.

Spray adhesive and staples were used to secure the leather. Vinyl was pulled into place and stapled with stainless steel staples.

Fuel door installed and closed.

Fuel door open…. Note the piece of leather on the latch plate; keeps the door from rattling by tightening the latch and protects my hand from getting cut by the latch plate.


