• There were many reasons for the change of the site software, the biggest was security. The age of the old software also meant no server updates for certain programs. There are many benefits to the new software, one of the biggest is the mobile functionality. Ill fix up some stuff in the coming days, we'll also try to get some of the old addons back or the data imported back into the site like the garage. To create a thread or to reply with a post is basically the same as it was in the prior software. The default style of the site is light colored, but i temporarily added a darker colored style, to change you can find a link at the bottom of the site.

The Utopia backrest

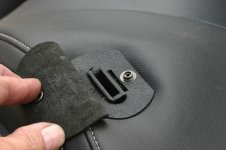
is there anyway to get something from that location? i lost the red plug that goes over the battery accessory terminal under the seat ... had it on the passenger seat. lifted the seat up and bam... down the black hole behind the seat it went.

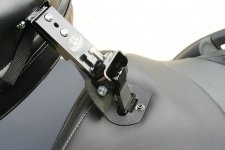
I just placed my non-racheting hand on the plastic that holds the nut... but the towel idea sounds a lot easier!:thumbup:
 
Has anyone been successful installing the Utopia backrest without removing the seat?

After installing my Utopia backrest twice (first time on original seat, then on warranty replacement seat) I think it would be extremely difficult to do. Two holes have to be drilled in the bottom of the seat, then it can be frustrating to align the holes with the ones in the bar that goes through the seat and then fastening them together.
 
Stillriding is right about trying to get the bolts and holes lined up. Instructions call for "picking out the foam". Ha, easier said than done. I never got the second bolt in; just couldnt get it to bite, and finally gave it up. So far, its holding fine with just the one. My suggestion is, pull the seat off, mark the holes, drill, then cut the plastic between the two holes in order to have more room to "pick out the foam". Also, I think with the larger hole underneath you will be able to feel it with the tip of your knife as you punch it down thru the seat.

Then your last problem is getting the seat bolts back
in! :yikes:
 
Last edited:
After installing my Utopia backrest twice (first time on original seat, then on warranty replacement seat) I think it would be extremely difficult to do. Two holes have to be drilled in the bottom of the seat, then it can be frustrating to align the holes with the ones in the bar that goes through the seat and then fastening them together.

You too ??

I did the install twice for exactly the same reason. I agree, installing it without removing the seat would be difficult, but removing and replacing the seat can be made fairly easy by jamming the nuts for the pivot in place using something like cardboard, or even chewing gum. Next use something to hold the spacers in place, such as a thick grease.

I did the install in less than an hour each time, and that included removing the seat, installing the backrest, and reinstalling the seat.

For those who have trouble lining up the holes in the seatpan with the holes in support bar, try this: Use a smaller Phillips head screwdriver to spear one of the holes in the bar. You can use this to monkey the bar around inside the seat until the threads line up with the second hole and you can insert the bolt. Tighten down the bolt in the second hole and then you should be able to remove the screwdriver and install the second bolt.

This technique worked for me. I hope this is helpful
 
I just got the Utopia Backrest for my RT today and have looked at the instructions, also searched for videos or better pictures. I have old eyes and can't really make out a few of the details.
I won't be doing the install for another week as I am gong out of town, but I sure would like to see some pix of the install.
Any help will be appreciated. I don't like the idea of cutting the seat. I especially don't like the idea of screwing it up!

best,
Joe

Joe- I wrote this about my install....
WE HAVE UTOPIA!!!

I saw so many Utopia mods at SpyderFest, talked to happy owners and sat on a couple. I was sold. It came in yesterday an I'm riding on it today ( took the day off to mount it).

Like everyone said, the most scary part is taking a knife to the seat! YIKES!! But after you measure 3 times ya suck it up and cut.

The HARDEST part was aligning the threaded holes from the inside the seat bar with the holes in the external piece to get the bolts in. With help from a lunchtime visitor- GLRANGE (who is a member here but has yet to get his Spyder), we got the bolts in. 5 minutes later we were done!!

Taaaa Daaaaaa.....
205cdea9.jpg

546f1f26.jpg

6410c777.jpg

b2c8012c.jpg

This last pic shows the under seat bracket. You may need to flip it over for it to make sense :)


Sent from my iPhone7 using Tapatalk


Sent from my iPhone7 using Tapatalk
 
Good info, Phil, thanks. Now, tell us also about your strap-on cushions you have there. Do they work well, and if so, where available? Thx!
 
Good info, Phil, thanks. Now, tell us also about your strap-on cushions you have there. Do they work well, and if so, where available? Thx!

I love them. I saw them on a Spyder while at SpyderFest last year. Mine are lamb + gel. I'll have to research since I can't remember where I got them :(


Sent from my iPhone7 using Tapatalk
 
Phil- Thank for the pictures. The last one is especially helpful.
I noticed in the instructions it says to "peel the backing off the boot and stick it in place" then cut.
I got the set up that allows for quick removal of the backrest and the "boot" doesn't have any backing, or sticky parts. it seems to attach by Velcro to the rectangle tube that goes into the seat and does not seem to secure to the seat itself. It really doesn't look like it will work and needs to be stuck to the seat- I may have to glue it.
Has anyone done an install with the quick disconnect option?

I see a phone number on the instructions and I will be calling them for some guidance on this. I suspect things will be a lot clearer to me when I have the seat off.

many thanks for the pix.


Joe.
 
I got the set up that allows for quick removal of the backrest and the "boot" doesn't have any backing, or sticky parts.
I also ordered the quick removal one. Please keep us posted on what you find out about the install.
 
I also ordered the quick removal one. Please keep us posted on what you find out about the install.

I just finished this install this afternoon.It took me 3-4 hours and I was doggin'.Couple of tips:
-Filleting knife cuts the whole deal like butter
-drill out the holes on the bracket about 1/16",will give you a little forgiveness in aligning the bolts.
-slide the strip down the shaft around 1/2",it seems to work well.

Level of difficulty: 1 cut!! (out of 5):roflblack:
 

Attachments

  • Back Rest 001.JPG
    Back Rest 001.JPG
    87.5 KB · Views: 99
  • Back Rest 003.jpg
    Back Rest 003.jpg
    36.9 KB · Views: 123
  • Back Rest 005.JPG
    Back Rest 005.JPG
    93.7 KB · Views: 150
  • Back Rest 006.jpg
    Back Rest 006.jpg
    42.7 KB · Views: 101
Can you explain this one, thanks.

The top "strip" with the snap cover attached to it is held in place by two strips of velcro that go down the shaft.As you push the shaft into the seat it compresses the top "strip" into the seat giving it a nice tight fit to the seat.There is no adhesive used to keep this in place(the one for the RS has an adhesive on the top "Strip" that holds it in place),the pressure of pushing the shaft into the seat holds it in place.It does travel upwards slightly when you insert the shaft so allowing about a 1/2" space allows it to travel upwards and still remain just about flush to the seat.Sounds more confusing than it is,but it is important that strip is placed properly on the shaft.Trial and error might be a bit of a hassle,try a 1/2" and I think you'll be fine.
Check out the pic with the back rest tilted forward and note the height of the shaft that comes out of the seat.Happy to talk with you on it if you want to call me.
*Actually the close-up pic shows the "Strip" and the shaft and how much it can compress.
 
Last edited:
Thanks! My backrest arrived today and your explanation now makes perfect sense. I hope to install it on Wednesday.
 
Rain predicted for the next 3 days. I just finished the install. I have yet to put the seat back on but I got the surgery done and everything bolted tight. Mine is the removable kind. Eraser your pictures were a huge help.
The hardest part was starting the 2 bolts under the seat where the 2 supplied brackets meet. I uses my drill with it's 9/32 bit on it and went in and out of the 2 holes I drilled about 200 times, each time I drew a little more white foam up the bit until I had a fairly clear area to work in. Other than that is was just that nervous moment with knife in hand about to cut the very expensive seat.
Now I really appreciate surgeons.
Many thanks to previous posters and thier helpful hints. I lined everything up with a tapered punch.

Can't wait for a good day to ride
 
Back
Top