• There were many reasons for the change of the site software, the biggest was security. The age of the old software also meant no server updates for certain programs. There are many benefits to the new software, one of the biggest is the mobile functionality. Ill fix up some stuff in the coming days, we'll also try to get some of the old addons back or the data imported back into the site like the garage. To create a thread or to reply with a post is basically the same as it was in the prior software. The default style of the site is light colored, but i temporarily added a darker colored style, to change you can find a link at the bottom of the site.

Swaybar on the Rally Edition

4 Ryker bar kits went out yesterday. Another 8 will go out today. I'm finally catching up. I must say I am very excited about this one. I think you will be impressed. At least I hope so. It gets harder and harder to live up to the hype. But I am trying!

Will pictures and instructions be available for DIY people before they buy so they can decide if they can do it AND will you have to lift the Ryker 23 inches or more like the F3?
 
Will pictures and instructions be available for DIY people before they buy so they can decide if they can do it AND will you have to lift the Ryker 23 inches or more like the F3?

Yes, I can send a full set of instructions to anyone who would like to look them over before they buy. Please email me at [email protected] This makes it easier on me. I'm getting old so I'm looking for 'Easier' every chance I get! :rolleyes:

I must say that this will be one of the easier installs when compared to the current sway bar kits. No need to jack your Ryker to the sky like with the 2013-2019 Spyders.
 
I received my bar Saturday, installed it today. It DOES make a difference, especially on rough roads. I don't notice a big difference on cornering but it definitely takes much of the instability out of rough road riding (and I have lots of those...)

Some tips for those who have not yet installed Ron's kit:
1) don't forget to disconnect the fan when you move the radiator;
2) the initial directions (they may be changed by now) have an error: the 'slit' in the block goes up, not down. Put the Left Bottom Down on the left and the Right Bottom Down on the right (as you face the front) and you are good.
3) use a long box end 10mm wrench to get to the nuts on the blocks (they are a bear but it can be done!)
4) use a piece of paper to 'jam' the nut in the box end when you are putting them back on

If these tips don't make sense now, they will when you start the installation!

Took two of us just about 2.5 hours to do mine. I think we can do my buddies in under 2 now that we know some stuff!

I would add a couple more things:

1. The Arm pinch bolts for the are 5/32 and not 1/8.
2. I left the factory bar connected while I cut it in half. That eliminated having to hold it while cutting it. Once it was cut and then disconnected, it slid right out.
3. I put a dab of grease on each side of the link lower connection, which held the spacers in place while sliding the bolt through.
4. Installing the Bushing Block flange nuts was the most difficult part of the install. I found that magnetizing my 10mm box end wrench helped. Like McRuss said - they are a bear.
5. Don't forget to reconnect the fan connection like some 71 year old idiot did. lol

I did notice that curves are flatter with the new bar. Looking forward to some more riding today to evaluate the stability and lateral forces from wind. I found BajaRon to be very responsive to my questions, so don't be afraid to contact him if stumped, or reach out here for help.

Initial instruction sheets had some errors. I have made corrections which address all of the suggestions/dependencies listed. It is definitely a process. And I will say that making good, step-by-step instructions may be the most difficult portion of any project.

Thank you for all the input, feedback and suggestions! It makes it easier on the next person.
 
Ron,
At least your instructions are written in English and not Canadian! And thanks for picking up the phone when we called! It is nice to have someone who really cares about their product! I made a longer run with the finished product yesterday but wind was brutal and I was fighting that and not really able to fully evaluate the addition of the sway bar. I did notice a difference on my rough road but not sure about the curves. Time will tell but I'm glad I made the conversion!

PS, it didn't matter but there is no Photo #10.
 
At least your instructions are written in English and not Canadian!

I don't know what that means... but I guess I need to apologize for it somehow now...
My apologies for all the trauma you have been exposed by the written Canadian!
;)
 
Ron,
At least your instructions are written in English and not Canadian! And thanks for picking up the phone when we called! It is nice to have someone who really cares about their product! I made a longer run with the finished product yesterday but wind was brutal and I was fighting that and not really able to fully evaluate the addition of the sway bar. I did notice a difference on my rough road but not sure about the curves. Time will tell but I'm glad I made the conversion!

PS, it didn't matter but there is no Photo #10.

Yes, the old saying 'Haste Makes Waste' applies here. There was no need for Photo # 10 so I took it out. But I failed to remove the reference to it. Like you said, it didn't matter. That's why I took it out. I think the current instructions are much better. Fixed all (I hope) of the little miscues in the original set.
 
Last edited:
I don't know what that means... but I guess I need to apologize for it somehow now...
My apologies for all the trauma you have been exposed by the written Canadian!
;)

The owners manual has enough grammatical errors that I refer to it as being written in Canadian! Was supposed to be a compliment!:clap:
 
Well I got my sway bar, thanks Ron, but since I put a rock through my radiator I will have a few days to wait to put it on. :(
 
Thanks Ron...... I got the New Sway Bar on the first Ryker in about 2 hours and the second one in 1 hour. The hardest part was those nuts to get them started for the blocks. :gaah:Otherwise it went good... Test rode and WOW!!! well worth the investment. I highly recommend it if anyone is on the fence on getting one.:thumbup:
 
Thanks Ron...... I got the New Sway Bar on the first Ryker in about 2 hours and the second one in 1 hour. The hardest part was those nuts to get them started for the blocks. :gaah:Otherwise it went good... Test rode and WOW!!! well worth the investment. I highly recommend it if anyone is on the fence on getting one.:thumbup:

Harvey (SpyderPops) has a great little exaggerated offset box end wrench that makes those little beggar bushing block nuts easier to get going. Too late for you but maybe help the next guy.

Wrench.jpg
 
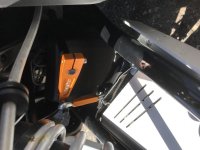
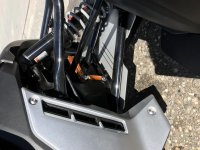
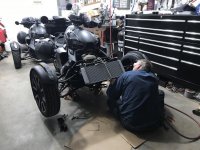
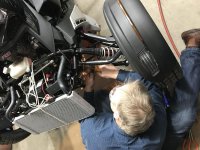
We pounded on a couple hundred miles today and tested out the new BajaRon Sway Bar and was well pleased with the superb handling and drivability control that it had. No disappointments.... Install went good while reading the instructions. First Ryker took me 2 hours and the 2nd Ryker took a little less than an hour to complete when I knew what to do. All in all it was a straight forward and clean install.nosL8h7NTc2X%JFnMNEAHQ.jpgQAtsDaRsTCCFmrC9N28a0Q.jpgLDeSo36eQ26r4Rm+vASc4A.jpgxvrW4b0bR6SvLX7a+fPi1Q.jpg
 
We pounded on a couple hundred miles today and tested out the new BajaRon Sway Bar and was well pleased with the superb handling and drivability control that it had. No disappointments.... Install went good while reading the instructions. First Ryker took me 2 hours and the 2nd Ryker took a little less than an hour to complete when I knew what to do. All in all it was a straight forward and clean install.View attachment 172383View attachment 172384View attachment 172385View attachment 172387

Awesome! How do you like the slotted panels under the lower A-Arms?
 
Just installed them and the splash guards the same time as the sway bar.. Looks great and easy to install... Im sure they will work great.
 
Back
Top