Golf Bag Carrier (beta version)
Yes, beta version. It is a beta version because the steel bracket I made out of steel pushed my total loaded weight to 48 pounds, exceeding the hitch rating of 40 pounds. So I am going to make an identical bracket out of aluminum, but all else will remain the same.
Functionally, this carrier is exactly what I wanted. This is a dual purpose carrier. Obviously it carries the golf bag, but I can also carry a couple of duffles for trips that my wife and I take.
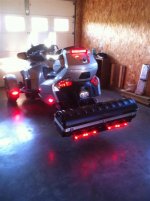
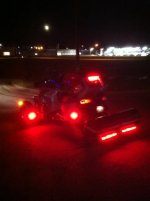
I didn't want to invest in a trailer and I didn't need that much room anyway, so I came up with this project. I added the LEDs so that the cagers couldn't miss me at night.
The first thing I used was the dual receiver that I puchased at this link:
click here
As you can see, the dual receiver allows the carrier to mount securely and the twin mount prevents twisting and instability. You can see this initial piece of the puzzle in an earlier post of mine above. I kept the slip in carrier in the above post, but used it as a pattern for my bracket that I would mount the case to.
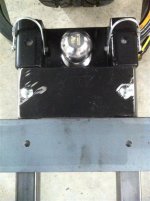
The two bars that slide in are 1.25 inch OD and are 14" long.
I then mounted a 3.5" x 3/16" x 7.5" (the black piece you see above with stove bolts and grind marks)
Immediately thereafter, a 3.5" x 3/16" x 36" long cross piece (partially shown above unpainted) attached to the two slide in square tubes. Once I was sure all was perfectly straight and that the device slid in and out easily, I then welded the cross braces to the square tubing.
Next, I prepared the "bumper" for lack of a better term and welded it to the twin square tubes. I needed this "bumper" to mount the LED lights on and also to provide some stability. I also attached two outside braces (the short perforated pieces you see below) on the outer perimeter and welded them in place. I used a 1" hole saw to allow me to mount the LEDs and run the wires through. The holes needed to be large enough for the lights that I purchased which had a protruding plastic section where the wires came of of the LED. After assembly, what this creates is a nice rectangular base to bolt the carrier to. You might notice the rounded ends of the "bumper". I simply used a 4" round lid and marked the rounded edge with a sharpie. I used a 6" grinder to take off the bulk of the material, being more careful as I approached the curved line. When I had it roughed in, I used my dremmel with a polishing wheel to finish up and smooth the edges. I then prepped and painted.
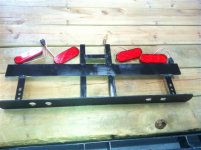
After mounting the LED lights with super strong 3M double side mounting tape and wiring to the BRP trailer harness that I purchased, (part number 710002029 which can be found on this site (
click here)). I used the wiring diagram found here on this site and incorporated two LEDs for each side. Running lights work on all four, inner two are wired to the brakes, and outer two are connected to the left and right signals utilizing a 5 wire flat connector. Simply cut the trailer end off the harness 710002029 above (be sure not to cut off the wrong end!!) If anyone wants a wiring diagram, I plan on preparing one and posting later.
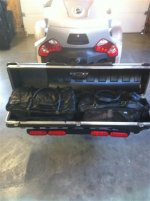
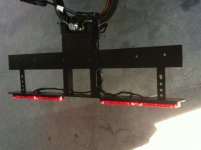
Below you see the completed bracket, fully wired and attached to the Spyder. I zip tied the wires to the bracket so everything would stay tucked up nice and tight. At this point I do a final check for fit and finish. Making sure it slides easily in and out of the receiver.
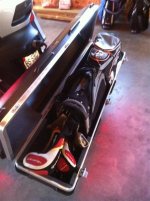
Next, I took the SKS golf bag that I purchased used off of Ebay to save money. It is the single bag model
2SKB-4812WS and is made of ABS plastic. (
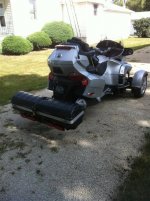
click here) These bags are made for durability so they will handle highway travel. I set the SKS carrier onto the rectangular bracket that I built and marked a series of places to drill holes through the base of the SKS carrier and then through the metal bracket that I built. I used stainless bolts, washers, and nylon lock nuts. Bolts are 5/16 x 18 thread. And I made sure to use large fender washers inside the SKS carrier to prevent the bolt heads from pulling through. My bolts go through the 36" long x 3.5" wide base and also through the two smaller perforated braces on the perimeter. This prevents any "rocking" of the carrier. When all was bolted in place the carrier was secure and ready to go.
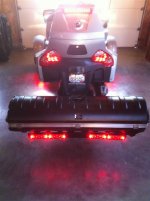
Final width is 48" wide which puts it well within the front wheel footprints.
Mounting the carrier low and horizontally seemed to provide more stability than a vertical mount.
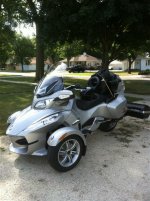
The final product is shown below.
More pics in the next post.

