• There were many reasons for the change of the site software, the biggest was security. The age of the old software also meant no server updates for certain programs. There are many benefits to the new software, one of the biggest is the mobile functionality. Ill fix up some stuff in the coming days, we'll also try to get some of the old addons back or the data imported back into the site like the garage. To create a thread or to reply with a post is basically the same as it was in the prior software. The default style of the site is light colored, but i temporarily added a darker colored style, to change you can find a link at the bottom of the site.

Secret Code for the Foglights

Fog light cover........

Did my fog lights this week also. On the left side, take the push pins out of the trim piece that runs by the frunk, remove the 1 Torx screw at the rear of that panel. You can then pull it out far enough to get you hand in to place the cover in the correct position and snap it in. Made the job very easy.
 
Conclusion

I finally got everything in place! :yes:

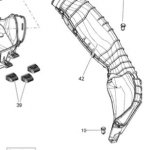
The left side is where it's tough :banghead:, and all the advice about removing as much trim, bolts, and pins around the frunk is right on. The issue is that there's an air inlet valve that fits so snugly behind the fog light back cover that I simply couldn't maneuver it into position. Not sure, but I don't think this is an issue prior to 2014 models.
attachment.php


So - I managed to route a nylon strap from underneath in the wheel-well up and over the valve piping and down the other side of it. Pulling on the straps from underneath with my right hand I managed to flex the pipe about 1/4 inch away from the back of the light, which left me enough room to maneuver the light cover into position with my left hand. For me, that one cover was absolutely the toughest part of this farkle. Now that it's done, all of the lights are white and very bright.
 

Attachments

  • Air inlet valve.JPG
    Air inlet valve.JPG
    20.5 KB · Views: 198
Back
Top