eddieshep999
Active member
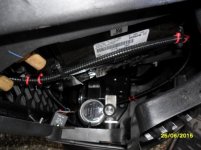
I want to replace my OEM horn but can't tell which wires are + & -
the horn terminals. have no markings. but the 2 colours are
1 green.with a white strip
1Light Blue with a beige strip
Can someone advise me Which is the Positive. & which is the Negative
Thanks
the horn terminals. have no markings. but the 2 colours are
1 green.with a white strip
1Light Blue with a beige strip
Can someone advise me Which is the Positive. & which is the Negative
Thanks