• There were many reasons for the change of the site software, the biggest was security. The age of the old software also meant no server updates for certain programs. There are many benefits to the new software, one of the biggest is the mobile functionality. Ill fix up some stuff in the coming days, we'll also try to get some of the old addons back or the data imported back into the site like the garage. To create a thread or to reply with a post is basically the same as it was in the prior software. The default style of the site is light colored, but i temporarily added a darker colored style, to change you can find a link at the bottom of the site.

Relays

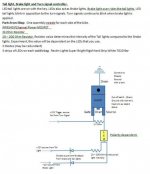
:agree: Almost. This circuit will flash the LED when the turn signal is ON. I think he wants to have a marker light that is ON all the time, that flashes during the turn signal. Seems like moving the "hot to fender lights" on the right side to the N.C. position fixes it. The light is ON all the time, then turns OFF when the turn signal is active. It will just blink out of sync - which looks cool! At least I THINK that's what he wants :dontknow:. It's what I would do - more lights the merrier!

Steve


Look again, when the turn signal is not on, you have your fender lights on, (the hot lead goes thru the NC contact, from battery to fender) when the turn signal is activated, it is opposite/out of sync, but flashes the fender lights. You need one for each side.
 
Transistor Circuit for Switching and Flashing Lights

I built this circuit for my LED Saddle bag lights.Should be easy to adapt to front driving or marker lights.
Use any keyed power wire as a source for your lights. Tie into the turn signal wires for controlling the flashers.
Very small. Just a transistor and a couple of resistors and diodes. Nothing critical or fancy.

Tail light, Brake light and Turn signal controller.
LED tail lights are on with the key. LEDs also act as Brake lights. Brake light over rides the tail lights. LED tail lights blink in opposition to the turn signals. Turn signals continue to blink when brake light is applied.
I made all my connections at my trailer wiring harness.

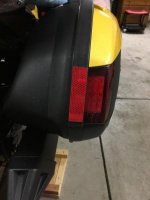
Switch.jpgtaillights.jpg
 
Interesting project JerryB.

If it was me. I would just get 3 SPDT relays and then just use the NC or NO terminal depending on what I wanted the relay to do. But it is very good to see things done a different way and with different components.

For a trigger voltage to turn the driving lights on. I would tend to go for a circuit controlled by the load shedding relay. That way the the lights don't come on until the engine starts. On a 08 GS an easy circuit to get to would be the front trunk accessory plug wire. I have not double checked but think it is ECM switched. Just a personal preference, does not matter either way.

When you get it done please post a video of how it works.
 
Hi Billy,

Re: Interesting project JerryB.

Thanks; as mentioned, I sort of like thinking out of the box.

Re: For a trigger voltage to turn the driving lights on. I would tend to go for a circuit controlled by the load shedding relay. That way the the lights don't come on until the engine starts. On a 08 GS an easy circuit to get to would be the front trunk accessory plug wire. I have not double checked but think it is ECM switched. Just a personal preference, does not matter either way.

I'm not 'electrical' enough to know what 'load shedding' means but I do want to have the lites so that they come on well after the Spyder is started up, not just when the key is turned. I have not yet checked to see if the headlites work this way or not.

Re: On a 08 GS an easy circuit to get to would be the front trunk accessory plug wire.

Any thoughts on just where this wiring is located? I am planning on mounting the lites to the sides of the frunk so I could bring them up to behind the instrument panel together.

Re: When you get it done please post a video of how it works.

I will try to do so; I'll probably have my daughter help me.

And thanks for your comments,

Jerry Baumchen

PS) This has become an interesting thread. I really just started it to tell people about the unusual relay that I found.
 
The front trunk accessory circuit is connected to the trunk power plug if you have that option. If you do not have that option the wires and rubber boot are zip tied to the frame on the left side behind the trunk. I checked the wiring diagram and it is controlled by the ECM so I would assume that it will turn on when the engine gets to idle speed for the first time after engine start.

If you do not have the optional power plug and do not plan to install it. I would use that circuit as your power source. It is used for nothing else. That would save you one relay and fuse in your circuit. It is protected by a 3 amp fuse in position 3 in your fuse box. Will guess that the fuse maybe already installed. I think 3 amp would be good enough for what your doing. But if not the wires are heavy enough to go to 5 amp fuse.
 
Hi Billy,

Re: The front trunk accessory circuit is connected to the trunk power plug if you have that option.

I do not have a power plug in my frunk. It is just a big, empty cavity for throwing stuff into. :yes:

Re: If you do not have that option the wires and rubber boot are zip tied to the frame on the left side behind the trunk.

I plan on removing the frunk soon to mount the driving lights. I will look for this wiring.

Re: I would use that circuit as your power source. It is used for nothing else. That would save you one relay and fuse in your circuit.

I plan to use this circuit ( if I can find it ) only for the tripping wire to the Normally Open relay; not as the power source to the driving lites.

The power will come from the PC-8* that I plan on installing on the top ( hidden ) side of the black plastic piece that goes between the panels that the tailites are mounted on; '08 GS Spyder.

With the PC-8, I will run all power for any non-stock electrical thru it. It makes things neat & simple; I like things like that.

I am a person who really dislikes to see wiring that wanders all over the place and/or looks like a plate of spaghetti. :banghead::banghead::banghead:

And thanks for all the info; after all, that is what this site is all about.

Jerry Baumchen

PS) If this all comes off as I hope it does, I will do up a drawing of it & post it for anyone else to see & consider.

* http://easternbeaver.com/Main/Wiring_Kits/Fuseboxes/PC-8/pc-8.html
 
Last edited:
Hi folks,

Re: Relays for Driving Lites/Turn Signals

Just a little update; it is a project still being developed.

The Normally Closed relay that I got from Allied Electronics that I thought would control two circuits seperately would not do so. It would trip both circuits at the same time; not what I want to do.

So Allied Electronics ( bless their hearts ) sent me two single circuit Normally Closed relays.

Today I also have received my goodies from Eastern Beaver.

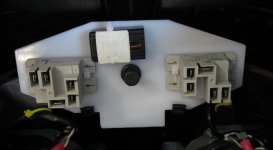
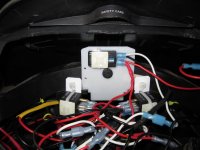
I have mounted the Normally Open relay & the two Normally Closed relays on a piece of plastic that will sit behind the instrument panel.

Here is a photo of it temporarily in place:

P-6.jpg

In the center, at the top, is the Normally Open relay that I hope to switch/control from the wire(s) that Billy Bovine told me about; the ones to be found when I get the frunk removed.

On the sides are the two Normally Closed relays that will be switched/controlled from the turn signals.

The black spot in the center is a push/pull pin to hold the plastic panel to a flat area that is quite recessed behind the instument panel. The push/pull pin is the same one that holds a fair amount of the tupperware in place. A 5/16" hole makes this push/pull pin fit very nicely.

The plastic piece sort of 'sits' on two 'lugs' that are in this area. They did hold some of the turn signal wires but I just removed the wires from the two inside lugs ( there are two more farther out to the sides ) & zip tied them to the two outer lugs so they don't just flop around.

Now back to work,

Jerry Baumchen
 
Relays - The Good & the Not So Good

Hi folks,

OK, time to update this thread.

When I started this thread, it was merely to tell people about this fancy Normally Closed relay that I found. However, it sort of morphed into my installing some lites on my Spyder, so that is what this is now about.

My first goal was to install Driving Lites on the front of my Spyder.

My secondary goal was to have these Driving Lites also act as turn signal lites.

Well, the Driving Lites work as I wanted them to. Getting them to act as turn signal lites did not go so good.

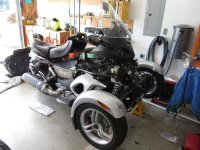
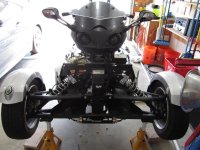
Stripping the Spyder for work)

W-b.jpg


W-c.jpg


I bought a PC-8 and a Cooper-Bussman In-Line 30 amp Fuseholder from:

https://www.easternbeaver.com/Main/Wiring_Kits/Fuseboxes/PC-8/pc-8.html

https://www.easternbeaver.com/Main/Elec__Products/Fuseholders/fuseholders.html

The PC-8 allows me to have nothing attached to the battery terminals except the factory battery leads & the two 12 ga wires that feed the PC-8. Everything else comes off of the PC-8.

I had previously bought a 20 Amp Micro Relay without Tab ( this is a Normally Open relay ) from Eastern Beaver and know that their products are very good. This relay controls the Driving Lites.

https://www.easternbeaver.com/Main/Elec__Products/Relays/relays.html

I then was given two Normally Closed ( SPDT ) relays by Allied Electronics:

https://www.alliedelec.com/schneider-electric-magnecraft-9as5d52-12/70184952/

These would make the Driving Lites function with the turn signals. When the turn signals would be energized, these two relays would turn off the appropriate Driving Lite; as a turn signal would lite up, a Driving Lite would shut off.

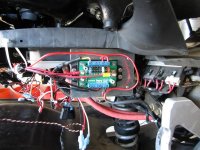
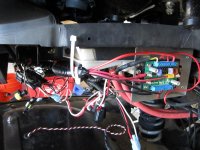
I mounted the PC-8 under the Spyder on the right side. I had a local sheet metal shop make me a 2-piece bracket for mounting the PC-8, here are two photos of in it place:

W-k.jpg


W-l.jpg

This 2nd photo also shows how I brought the leads from the battery over to the PC-8. I found this plastic tubing that is the same as BRP uses for protecting wires. I got this plastic tubing up at the local Ace Hardware store.

There is a metal plate that comes from the chassis of the Spyder ( perpendicular to the main chassis ) that had two holes in it; this is what the sheet metal PC-8 bracket is bolted to.

During this effort, I also bought a new, longer lead for my Battery Tender:

https://www.amazon.com/gp/product/B01N7CEV00/ref=oh_aui_detailpage_o00_s00?ie=UTF8&psc=1

The electrical leads for this come into the Unswitched contacts on the PC-8, that is so I can use the Battery Tender when the Spyder is turned off. All other leads on the PC-8 are attached to Switched contacts. I used a 7.5 amp fuse on the PC-8 for the Battery Tender leads. The other leads ( for my 3rd tail lite & the Driving Lites use 3 amp fuses ).

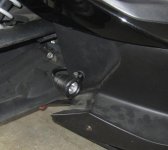
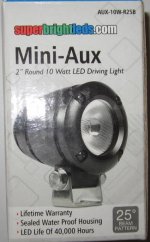
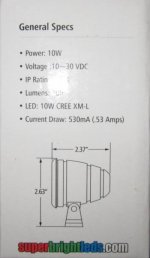
Here are the Driving Lites that I bought:

W-m.jpg


I am now at the five photo limit so I'll post this and add to it.

Jerry Baumchen
 
Last edited:
Hi folks,

Some more photos of the Driving Lites that I added.

W-h.jpg


W-i.jpg


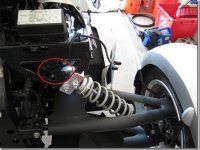
I then needed to find a power source for the Driving Lites. I am not that much of an electrical type of guy but a fellow S/L person saved my bacon. Ron Michiels ( who is billybovine on here ) told me where I could find a switchable lead, he said to look here:

W-e.jpg


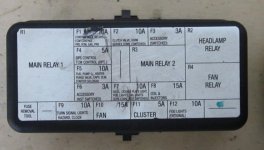
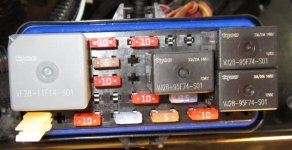
I undid the zip tie and there she was. This electrical lead is this, the F3 position in the fuses that are under the frunk:

W-7.jpg


I pulled the cover off and found this:

W-8.jpg

So I stuck a 3 amp fuse in and moved to the next step, which was splicing into this lead to use it as a switching wire for the Normally Open relay that will turn the Driving Lites on.

OK, at my five photo limit, so onto the next post.

Jerry Baumchen
 
Hi folks,

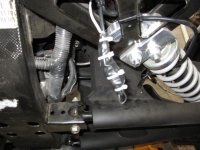
Here is the splice into this accessory lead at the F3 position:
W-3.jpg

I just stripped back the insulation on the hot side of these two wires, wrapped everything in electrical tape, tied it up with zip ties & put it back into position. This accessory lead had a rubber boot on it for when you would connect it to lites, etc in the frunk. I just cut the boot off & had access to the wires:
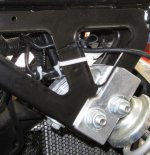
W-4.jpg


The next step was to locate/mount the three relays. I wanted all of them back, under the instrument panel. This is where things went poorly. After trying three locations back, under the instrument panel, the fourth time worked. However, I am quite certain that one of the first three attempts is what cost me the damaged ( I think ) Normally Closed relay.

Here is the Normally Open relay, mounted on a piece of plastic which is held in place by one of the push pins that holds a lot of the tupperware in place on Spyders:
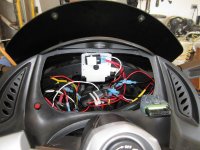
W-f.jpg

I just drilled a 5/16" hole in the plastic piece and in the flat plastic area that is back there.

I tried to mount the two Normally Closed relays on a couple of pieces of plastic in a similar manner but they would always get in the way of the instrument panel, which is quite thick. I am now convinced that one time while trying to put the instrument panel back into place, I damaged one of the Normally Closed relays; at least, I think this is what happened.

I then wired everything together & started her up. This is where things got really goofy. When I first fired her up the right side Driving Lite was on - I have no idea why. I spent about 2 - 2 1/2 hours trying everything that I could think of to get the Driving Lites to work with the turn signals. I could only get the left side Driving Lite to work with the left turn signal. The right side Driving Lite would do all sorts of crazy things. I decided that this was now above my knowledge, so I removed both Normally Closed relays & just wired things up so the Driving Lites work properly. By using the F3 position in the fuse panel, the Driving Lites come on when the key is turned. They go off when the key is turned off; but they wait about 10 seconds after the key is turned off, then they turn off. This was a little unnerving at first but it is easy to get used to.

Here are the Driving Lites in operation:
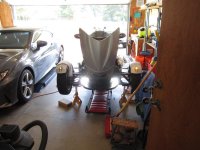
W-g.jpg


While I had the Spyder tore down I decided to do some other stuff to it. My coolant bottle was low so I added more coolant. One side of my brake fluid reservoir was low ( the one that always seem to be the one that goes low ), so I added more brake fluid. I also changed out the vacumn hoses with the silicon ones. Gene De Lany ( Chupaca on here ) was very helpful with this effort.
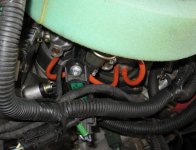
W-j.jpg


In conclusion, my Driving Lites work like I wanted them to ( I just need to get them aimed properly ). I could not get the Driving Lites to function with the turn signals; this is not that important to me. After spending a fair amount of time giving it a lot of thought, I am thinking that the right side Normally Closed relay became damaged while trying to find a good location for it. I might just try to find a couple of smaller-in-size Normally Closed relays and try it again; all of the wiring is still there.

I also want to thank David Craft ( Haze on here ). Here sent me his schematic on how he built his own Normally Closed relays. I found it very interesting but I am simply not that good with this whole 'electricity' thing. I rather like to just buy what will do the job and go forward.

If anyone has any questions, just jump in and ask; I'll do my best to answer,

Jerry Baumchen
 
Last edited:
Just as an aside, the best investment I have made for my Spyder F3 electronics so far is the $300 Neutrino box from Tricled. Wired from the battery it contains resettable circuit breakers, relays, trickle charging connection etc etc. I have used it for my Lamonster USB charge port, my Wolo air horn, my driving lights (triggered from my low beams, but set to be operable only when there is no current from my low beams....low beam wiring on the Aussie F3 is much easier to access than high beam wiring), my Daylong heated seats, my trickle charger. The configuration (via smartphone) of the trigger conditions include time, temperature, load etc etc.

I know it’s a bit expensive, but it has well and truly paid for itself in my eyes:thumbup:

https://www.tricledusa.com/_p/prd1/...rino-smartphone-controlled-power-distribution

Pete
 
Hi Pete,

Re: the best investment I have made

Re: I know it’s a bit expensive

I'm with you. Buy the good stuff and it will work.

Although, 'a bit expensive' is very subjective. :yes::yes::yes:

I like what my PC-8 does; probably because I doubt that I will be adding much more to the Spyder.

But then again, who knows for sure. :shocked:

Jerry Baumchen
 
Hi Pete,
Although, 'a bit expensive' is very subjective. :yes::yes::yes:

I like what my PC-8 does; probably because I doubt that I will be adding much more to the Spyder.

But then again, who knows for sure. :shocked:

Jerry Baumchen

Yep, yep, yep, Jerry.....you are absolutely correct. You’ve got to find what works best for your particular situation. Since I’m such a klutz with electronics, forking out the extra dollars and not having to worry about relays, fuses, circuit breakers and connections was a no brainer for me. :2thumbs:.......thanks for “I doubt that I will be adding much more to the Spyder”. You gave me a good laugh :D:D

Pete
 
Automotive Bosch cube type relays at most any parts store are available with 5 pins. The switched power input goes to the NC pin with power off on the coil and thru the NO contact with power on the coil.
 
Wiring for lights

Jerry,
Your hard work paid off with a very clean
installation. I really like the lights and the
mounting of the relays.
Cheers, David C.
 
Hi folks,

SUCCESS!!!!!!!!!!!!!!!!!!!!!!!

Some call it hard-headedness, some call it tenacity; I prefer the latter. :banghead::banghead::banghead:

I got the Driving Lites to work as turn signals. :yes::yes::yes:

In Post #30 I mentioned how I could get the left side Driving Lite to work as a turn signal but not the right side. I thought that I had damaged the relay for the right side.

I was convinced that I could make them work as turn signals. So I went to Google & found these:

https://www.grainger.com/product/GR...PBR_6056-9431-2&cm_vc=AZIDPBR_6056-9431-2&req=

In Post #16 it was mentioned about going to Grainger. I did not since Allied Electronic had provided the two relays for free.

One major problem with the previous relays is that they were just too large for the cavity behind the instrument panel. And the contacts were oriented towards the instrument panel, taking up even more room.

I mounted the two new Normally Closed relays here ( know as SPDT relays; Single Pole Double Throw ), they are to the left & right of the Normally Open relay:

W-q.jpg

All three relays are mounted on 0.060" high impact polystyrene. It is easy to work with, to cut with heavy duty scissors, and easy to drill holes into.

I wired everything so that all the parts are modular. If one item should crap out, I can remove it without having to cut any wires. Just buy a new item & install it.

Here is a video of the Driving Lites functioning as turn signals:

https://www.youtube.com/watch?v=O803mRUe9Wo&feature=youtu.be

Everything works just as I was wanting it to do.

Jerry Baumchen

PS) Here is a photo of the 10 gage stainless steel washers that I had made to reinforce the inside of the frunk:

W-p.jpg

I have no idea on the strength of the 'plastic' that the frunk is built of so I wanted to do something to ensure that the Driving Lites do not tear out.

PPS) My daughter made that entire video on her iPhone. This new tech world is leaving me behind.
 
Last edited:
Relay

Amazon RLS125 12-vdc . One relay will do both. It i a single pole double throw relay meaning it has both NC and NO contacts you want to use.


[/QUOTE]
 
Hi Bob,

Re: Amazon RLS125 12-vdc

Yup, those are SPDT relays. They are $4.92 each; I paid $4.35 for two from Grainger.

Jerry Baumchen
 
IMO you have a bullet proof setup, but if you had went with my suggestion in #13, you would have saved a lot of time & effort and maybe money:yes::yes::yes::yes:
 
Hi Bill,

Re: you would have saved a lot of time & effort and maybe money

That is a 'maybe.'

The first Normally Closed ( SPDT ) relays were free.

I have very little interest in building my own relays. As stated before, I prefer to buy the necessary parts & get them to working.

Your link in Post #13 was for five relays; I only needed two to make the Driving Lites work as turn signals.

Jerry Baumchen
 
Back
Top