• There were many reasons for the change of the site software, the biggest was security. The age of the old software also meant no server updates for certain programs. There are many benefits to the new software, one of the biggest is the mobile functionality. Ill fix up some stuff in the coming days, we'll also try to get some of the old addons back or the data imported back into the site like the garage. To create a thread or to reply with a post is basically the same as it was in the prior software. The default style of the site is light colored, but i temporarily added a darker colored style, to change you can find a link at the bottom of the site.

New Side panels

Along with the 2014 panels John is going to follow your lead and drill some 4" holes in the under body panels, but he's going to add some 23 gauge galvanized hard wear cloth with 1/4" to the holes for added protection. ;)
 
This list is for the Pearl White Panels from FlamingoBabe ...

Part # Description Qnty
250000079 Panel Nut M5 X 0.8. Model-ST 1
250000577 Torx Screw K40 X 12 4
517302785 Clip 1
704903140 Can-Am Decal for White Model 1
705007329 LH Upper Side Panel 1
705007330 RH Upper Side Panel 1
705007700 Vegas White Pearl LH Front Panel 1
705007706 Vegas White Pearl RH Front Panel 1
705007737 Vegas White Pearl LH Upper Side Panel 1
705007738 Vegas White Pearl RH Upper Side Panel 1
518327600 LH Upper Side Panel Foam 1
518325518 RH Upper Side Panel Foam 1

You will need the 2 decals this is for white…look up the black….. paint touch says 2013 and 2014 same,,,pearl white
704903140 $33.98 Can-Am Decal for White Model-2


This part.... 250000079 Panel Nut M5 X 0.8. Model-ST 1

Is not used!

I've been trying to find out from others where they even came up w/ it? :dontknow:

.
 
Along with the 2014 panels John is going to follow your lead and drill some 4" holes in the under body panels, but he's going to add some 23 gauge galvanized hard wear cloth with 1/4" to the holes for added protection. ;)


I did not do 4" holes.

I used a 2" hole saw and made 2-3 holes in each bottom panel. :D
 
Yesterday my wife and I rode down to South Pittsburg, TN for the National Cornbread Festival. This was the first time we have ridden our 2013 ST-S with the new panels for more than 200 miles with temperatures higher than 70 degrees.

On the ride yesterday we had temps in the mid 80s and I must say the new panels definitely make a difference in keeping the bike cooler. There is still some hot air getting trapped under the tupperware but nothing like it was before. Perhaps it is now time to cut some 4" holes in the very bottom panels, or just remove them to let that air out.

I am very pleased with the conversion and can recommend it whole heartedly to anyone that has an ST-S.

Carl

Thank you for the great feed back Karl. Am sure there will be more owners with 2013 STS (with overheating isues) that will be replacing their side panels once the word get out there. :clap:
 
I did not do 4" holes.

I used a 2" hole saw and made 2-3 holes in each bottom panel. :D

Just remove them! They do nothing but trap heat. I think that is there only purpose.:dontknow: I removed mine and have gone over 1000 miles without them. I do feel the heat under the panels has been little less.
 
Please show us with photos if you can

I will definitely follow up with some pics. I am out of town so John is supposed to be picking up my Spyder Angel from the Dealer tomorrow (4 hours round trip after work kinds sucks). I have to call to confirm the pickup then maybe tomorrow he'll drill the holes and put on the mesh. Can't wait to see how my new 2014 panels look. My Lamonster HWY Pegs showed up today too in the mail so am hoping - :bowdown: - John will install them so that when I get home next week I'll have a nice COOL comfortable bike to ride out on our 3 week trip the end of June. Really excited about the panels ...
 
I rode to Spyderfest with 2014 air flow panel on right side....and 2013 panel on left side.....riding in 90+ degrees my gas cap..(before 2014 panel about 175 degrees)....which is on the left side was cool to the touch....never had boiling gas....the flash on the ECM improved the heat...but adding 2014 panels is the perfect ticket......removed bottom panels.....a year ago.......I'm happy with the flash and 2014 panels
 
Side panels

I've been watching your post and response's but missed how much the panels cost. I'm looking to put about 7000 miles on the bike this summer and am concerned about the heath of the the bike.

I did leave the bottom panels off.
 
Maybe someone should produce an add on air scoop rather than replacing the whole side panel. Cut a hole in the existing and then attach the scoop over it
 
I rode to Spyderfest with 2014 air flow panel on right side....and 2013 panel on left side.....riding in 90+ degrees my gas cap..(before 2014 panel about 175 degrees)....which is on the left side was cool to the touch....never had boiling gas....the flash on the ECM improved the heat...but adding 2014 panels is the perfect ticket......removed bottom panels.....a year ago.......I'm happy with the flash and 2014 panels
John was supposed to pick up my bike today but a panel was on backorder so BRP is overnighting it to my dealer - sure hope it gets there tomorrow so John can get it Saturday. Dealer didn't even call me to let me know it wouldn't be ready for pick up. Sure glad I called them before he made the 4 hour round trip. We had a little talk about expectations in the level of service I receive ...
 
Poor Man's Air Scoop

Maybe someone should produce an add on air scoop rather than replacing the whole side panel. Cut a hole in the existing and then attach the scoop over it

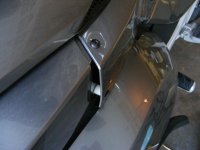
With a little work and a few cents, you can make an air scoop. scoop 002.jpg

Pic is the left side of the bike looking towards the rear.

Remove four screws from side panel. Pull the front of the panel out until you feel resistance. Use a sharpie marker to mark where you will drill new hole on the panel under the side panel. Remove side panel. Drill a hole large enough for the torx bolt to go through. Move the clip nut out to the new hole. Reinstall the two rear bolt and the top bolt.

Now cut a piece of 1/4" fuel hose about 3/4" long. Place it between the side panel and the clip nut. Now the hard part...
Go to the hardware store and purchase two 6 mm bolts that are about twice as long as the factory torx bolt. I had to settle for allen head bolts. I bought a couple neoprene washers to go between the bolt and the panel. Install your new , longer bolts. In the pic I had a piece of white plastic for the spacer but I found out the 1/4" fuel hose works just as well and is harder to see.
 
here is a pic of the front of my spyder with right side 2014 air flow panels and left side 2013 panel
re 2013 2014 panel.jpgre 2014 panel.jpg
the first pic you can see difference....second pic right behind the fog light see the air flow opening
 
Last edited:
This thread has bad info and no one will respond to correct.

Hope no one in the future orders parts listed here! :banghead:
 
Back
Top