thereverend
Member
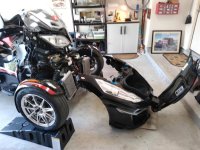
I have a 2015 RT special edition and I purchased the Lamonster L.E.D. kit which includes fog light and headlight bulbs. In trying to get the left side (pod) open to insert the bulb, there is an air intake plastic channel that blocks the ability to get it open, so decided to try to remove the frunk and I also have a SpyderPops bump plate to deal with. So I suppose I have to undo the wiring for the led lights for the bump/skid plate? Then unplug all light connections and undo the lock latch? The videos I've watched are not 2015 RT specific, the closest is a 2014, but they do not mention the air intake at all as being a pain. Any pictures or advice would be appreciated.
Last edited by a moderator: