• There were many reasons for the change of the site software, the biggest was security. The age of the old software also meant no server updates for certain programs. There are many benefits to the new software, one of the biggest is the mobile functionality. Ill fix up some stuff in the coming days, we'll also try to get some of the old addons back or the data imported back into the site like the garage. To create a thread or to reply with a post is basically the same as it was in the prior software. The default style of the site is light colored, but i temporarily added a darker colored style, to change you can find a link at the bottom of the site.

Mounting GPS at eye level on RT?

no holes anywhere i hate drilling if ican avoid it the picture thing was my first attempt apparently did it wrong ran wire through the dash were the windshield arms go you have to take the dash out with the gauges you can feed the wire up through there very easy pick up power from gauge wires replace dash and go this gives power with key on only

Thanks. I get it now.
 
IMG_1234[1].jpgIMG_1235[1].jpg

Hay Pete, I tried to send these in a message but had no luck. Doc Riverside did most of the work on this, and I feel fortunate that he let me help. This position makes for easy viewing without blocking any of the road. It wasn't hard to do, just time consuming and required opening up the front between the frunk and console (and taking off the windshield ) allowed easy access and sight , and we opened up the righthand side to make it easier to thread the connector thru the framework. If you are still interested in doing this, contact Doc Riversider, or, I can try to explain what all we did on the telephone.

David
 
View attachment 148437View attachment 148438

Hay Pete, I tried to send these in a message but had no luck. Doc Riverside did most of the work on this, and I feel fortunate that he let me help. This position makes for easy viewing without blocking any of the road. It wasn't hard to do, just time consuming and required opening up the front between the frunk and console (and taking off the windshield ) allowed easy access and sight , and we opened up the righthand side to make it easier to thread the connector thru the framework. If you are still interested in doing this, contact Doc Riversider, or, I can try to explain what all we did on the telephone.

David

Thanks, David. And all the others who responded with some great tips.
 
Dash rack

I just use a JT style dash rack ( OK ----I copied it out of 6061-t6 aluminum ) and some RAM mounts.) Ran the power to the battery tender pigtail ( BE CAREFUL OF THE POLIARTY) in the frunk. all easy peasy.

Kaos
 
easy way out

I should have been more clear. I already have the RAM mount accessory bar attached to above my dash. Now I have to figure out the wiring. THAT is what I'm looking for some advice on. Thanks.

I also put the bracket and ram mount on top but finding the easy way out, I removed one of the useless gages and had a 12 volt outlet installed then just uses a cigarette charge cable. I plug it in when I need to and store it away when I don't need GPS
 
Has anyone tried changing the location of the GPS mount so that it is closer to eye level? I'd like to mount mine above the dash, so I don't have to take my eyes off the road to see the route / instructions / etc. Also, mounting it higher and level will eliminate much of the sun glare on the screen.

I thought it might be a simple matter of rerouting the factory gps cable but everything is so tight in there I haven't been able to figure out where it originates.

Got any tips on this?
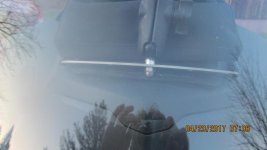
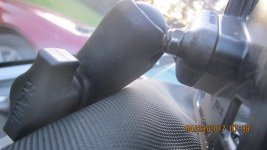
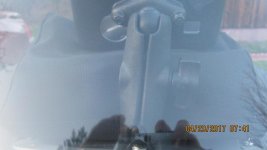
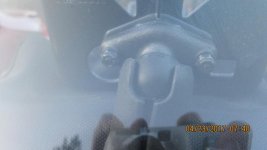
I put my GPS above the dashboard . I bought the flat dash bar w/several holes for attaching other attachments from JT( he is a vendor on this site) I got the black stain steel. Here is a picture: Dash bar mount 001.jpg flat dash bar mount, & Dash bar mount 002.jpg B-Ball on long arm back of GPS mount, Dash bar mount 004.jpg long arm attached to B-ball, Dash bar mount 003.jpg back of GPS holder with B-Ball.


I have a 2014RTS-SE6. Deanna
 
ok going to try this with pictures used ram stick on mounts one on each side of console with regular length arm so far works well purchased wiring from edotechsupply.com for both sat and gps hard wire into the harness no cig. lighter socket required ran wire through the dash along side upper arms for windshield picked up power and ground from fuel gauge and temp gauge now let's try picturesView attachment 148361View attachment 148360View attachment 148359View attachment 148358
The links did not work for me. Would you repost links. Deanna
 
I also put the bracket and ram mount on top but finding the easy way out, I removed one of the useless gages and had a 12 volt outlet installed then just uses a cigarette charge cable. I plug it in when I need to and store it away when I don't need GPS
Or buy a 12Volt Dual adapter with wires/ with on/off switch & connect to battery in the front.

I bought mine from JT who is a vender on this site.

Deanna
 
Wiring GPS mounted on dash (power only)

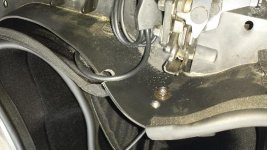
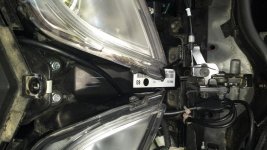
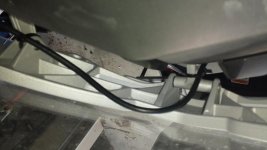
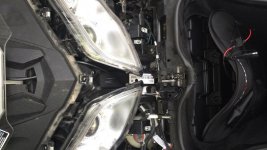
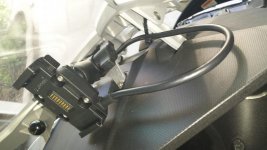
After listening to all the advice and suggestions here, I decided to route the power cable through the back of the windshield, down through the slot at the bottom, between the headlight modules and then into the frunk where it can be attached via battery tender connector to the battery. This leaves it with power on always, but I don't intend to leave the gps sitting out there on the bike unattended anyway. This solution involved removing several pieces of tupperware to expose the space between the headlights, but that's it. I didn't have to cut any wires, tap into any circuits or drill any holes except for the small slot where the cable enters the frunk.

See attached pics (assuming I can figure out how to attach them)

20170531_165806.jpg20170531_165928.jpg20170531_170005.jpg20170531_170405.jpg20170531_174658.jpg
 
sun sheild

View attachment 148437View attachment 148438

Hay Pete, I tried to send these in a message but had no luck. Doc Riverside did most of the work on this, and I feel fortunate that he let me help. This position makes for easy viewing without blocking any of the road. It wasn't hard to do, just time consuming and required opening up the front between the frunk and console (and taking off the windshield ) allowed easy access and sight , and we opened up the righthand side to make it easier to thread the connector thru the framework. If you are still interested in doing this, contact Doc Riversider, or, I can try to explain what all we did on the telephone.

David
where did you get the sun shield is that a ram part ?
 
Update to the dashboard gps mount

After listening to all the advice and suggestions here, I decided to route the power cable through the back of the windshield, down through the slot at the bottom, between the headlight modules and then into the frunk where it can be attached via battery tender connector to the battery. This leaves it with power on always, but I don't intend to leave the gps sitting out there on the bike unattended anyway. This solution involved removing several pieces of tupperware to expose the space between the headlights, but that's it. I didn't have to cut any wires, tap into any circuits or drill any holes except for the small slot where the cable enters the frunk.

See attached pics (assuming I can figure out how to attach them)

View attachment 148549

Had a chance to try out the new gps mount this weekend. Really like the new position on the dashboard near eye level. But, being on a 9-inch RAM arm it vibrates way too much on anything but the smoothest road :shocked:. So, I'm going to try to resolve that issue by positioning weatherstripping foam between the top of the dash and the bottom of the gps and see if that helps.
 
Hey Pete, nice work. The vibration of the long arm is why I mounted mine the way I did with the short arm. I still have a little vibration but not enough to be a problem. Keep up the good work. Here is my end result.


David
 
Let me try this again. I just moved the GPS from the handlebar to the top of the console, because I didn't want to purchase a mount for the triaxis bars. So I used a RAM mount to put the GPS right above the 'safety card'. It wasn't that hard, but it was time consuming as the wiring harness runs down the right hand side behind the body work. There is enough wire to do this and we pulled the GPS wiring from the handlebar, out the side, and then had to open up the wiring harness to get enough wire to run it up and on top of the console. We took off the top of the console and just re-routed the wiring, then put it back together.


View attachment 148347


David

this is a great idea, I'm going to do same. I just took apart gps bracket at handle bar, thinking it had a plug-in to back of garmin holder. but it doesn't. I have not yet took off any Tupperware. so if you follow wire down to somewhere, does that end have a plastic connector to unplug? just wondering which side might be easier to take apart, if its the garmin holder, I would have to take off back then take wires apart in that internal area
 
GPS Cable

just got gps cable out. WHEW what a time. my first time inside spyder. windshield, assorted Tupperware, 1 light, instrument cluster. its an amazing machine inside! now I can re-route cable up on top dash, and install tricled phone holder / usb cig lighter on handlebar where gps was at
 
Back
Top