• There were many reasons for the change of the site software, the biggest was security. The age of the old software also meant no server updates for certain programs. There are many benefits to the new software, one of the biggest is the mobile functionality. Ill fix up some stuff in the coming days, we'll also try to get some of the old addons back or the data imported back into the site like the garage. To create a thread or to reply with a post is basically the same as it was in the prior software. The default style of the site is light colored, but i temporarily added a darker colored style, to change you can find a link at the bottom of the site.

Making the 2013 Spyder RT-S "Perfect"

Well i talked with Two Brothers Racing they are under the impression it not that big of deal but then again they do not have a dual channel to offer.

I do fully agree any bike I tuned myself or with the assistance of Fuel Moto ran much better than the OEM set bike.

I actually think that with the fact that some bikes are grossly out alignment it increases the drag then add in the big pot belly stove under the seat and lack of space to move air and you have bad combination of things some worse than others.

Do you have a infared heat gun?

I am wrapping my pipes so if you did we could do a sequenced heat gun test to see if the differences there might be with ceramic vs heat wrap.
 
My running theory on why some bikes are running hotter than others and why cylinders are showing different mixtures is the O2 sensors BRP seems to be using have a larger than desired range of calibration. I would dare bet that if you swapped O2 sensors front to rear, your lean cylinder would swap in time too.

Great theory and quite possibly the reason! I'd try it if I hadn't already purchased the AutoTune.
 
Do you have a infared heat gun?

I am wrapping my pipes so if you did we could do a sequenced heat gun test to see if the differences there might be with ceramic vs heat wrap.

I don't have one. I know that both are effective and I was debating on which way to go, but since I had the headers off to have the O2 bungs welded in, the same shop does the ceramic coating too, so I told them to just do both.
 
I finished installing the ISCI front hand brake yesterday. This first picture is a little fuzzy, but it shows the new ISCI clevis pin in place that replaces the OEM one. This pin attaches the rear brake pedal to the linkage which actuates the braking system. All of this is on the right side of the bike, to the inside of the driver and passenger pegs / foot boards.

Belt Tensioner - 1.jpg

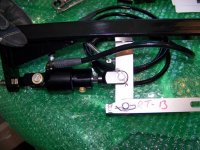
Here is the main bracket that has the slave cylinder and you can see that the brake line is already attached. The upper part will be secured to the frame where the right side frame rail bolts in. The lower bracket that says "RT-13" will slide in to the new clevis pin from the previous picture.

ISCI Front Brake - 2.jpg

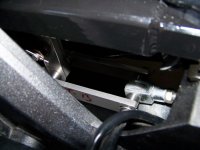
This shows the lower bracket now in place at the clevis pin.

ISCI Front Brake - 3.jpg

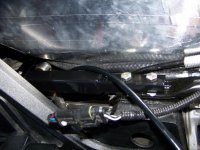
This shows where the upper bracket secures to the frame at the frame rail mounting point. In a previous post, I had mentioned that the 2nd bolt in the picture has been broken by the dealer which forced me to have to drill it out and tap in a new thread. The new bolt did thread just fine, but I ended up purchasing a longer bolt and putting a nut on the other side of it. You can get underneath the frame at this point to do that, so I figure it is just added security since that bolt is a re-thread.

ISCI Front Brake - 4.jpg

Continued in next post .....
 
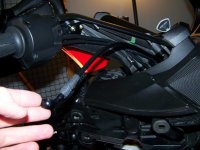
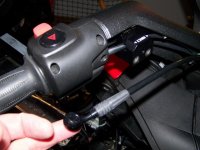
The next step was to remove the right handlebar cover and route the brake line. Routing the line took some time. I ran it through the main wire bundle and it took a bit of maneuvering to get it through.

ISCI Front Brake - 5.jpg

This picture shows the new ISCI mounting bracket attached to the throttle clamp.

ISCI Front Brake - 6.jpg

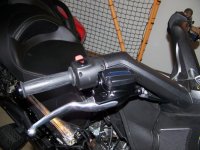
The next step was to put the handlebar cover back on, mount the front brake, attach the brake line and bleed the brake.

ISCI Front Brake - 7.jpg

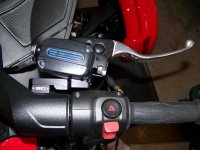
Here is a top view of the finished product. It gives a good visual of how the brake mounts to the handlebar bracket.

ISCI Front Brake - 8.jpg

It is pretty neat to see how this was engineered. The front brake simply actuates the braking system at the rear brake. When you pull in the front brake, the rear brake pedal depresses as well. The hardest part of the installation was getting the 4 screws for the handlebar cover back in. It took me 30 minutes and a lot of patience.

Overall, I am very impressed with the quality of the ISCI front hand brake. It is expensive, but after seeing how well it was built and seeing it actually work makes it all worth it.
 
did you

The next step was to remove the right handlebar cover and route the brake line. Routing the line took some time. I ran it through the main wire bundle and it took a bit of maneuvering to get it through.

View attachment 82317

This picture shows the new ISCI mounting bracket attached to the throttle clamp.

View attachment 82318

The next step was to put the handlebar cover back on, mount the front brake, attach the brake line and bleed the brake.

View attachment 82319

Here is a top view of the finished product. It gives a good visual of how the brake mounts to the handlebar bracket.

View attachment 82320

It is pretty neat to see how this was engineered. The front brake simply actuates the braking system at the rear brake. When you pull in the front brake, the rear brake pedal depresses as well. The hardest part of the installation was getting the 4 screws for the handlebar cover back in. It took me 30 minutes and a lot of patience.

Overall, I am very impressed with the quality of the ISCI front hand brake. It is expensive, but after seeing how well it was built and seeing it actually work makes it all worth it.

i have the hand brake also, did you have a problem bleeding it. i had a bear of a time getting all the air out of it
 
Thanks for the great pictures!
I'm gonna speed-dial you, if I ever get the opportunity to add one of these setups to my bike! :thumbup:
 
i have the hand brake also, did you have a problem bleeding it. i had a bear of a time getting all the air out of it

No problem at all. I used a brake bleeder to do it. I just filled the master cylinder with fluid, attached the brake bleeder to the slave cylinder down at the bracket and let it draw the fluid through the line. It only takes a few minutes.
 
Thanks for the great pictures!
I'm gonna speed-dial you, if I ever get the opportunity to add one of these setups to my bike! :thumbup:

Feel free to if you ever need help. I'm hoping that my posts are detailed enough to get others through the job or at least give them enough information to get them started.
 
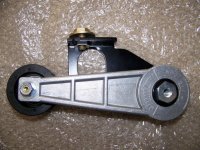
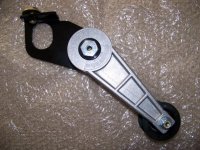
Today I got the SmoothSpyder belt tensioner installed. The picture on the left shows what it looks like when you take it out of the box. If you pull down on it as you see it, there is upward tension which had me confused as to how it should be oriented. I realized that you have to loosen the tensioner bolt in the middle and extend it as seen in the second picture. Once I did that, the upward tension was reversed which is how it is supposed to go on the bike.

Belt Tensioner - 1.jpg Belt Tensioner - 2.jpg

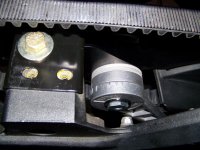
The 2013 RT tensioner is awesome because there is no drilling. It bolts directly to frame just inside of the left frame rail. Installation was very simple.

Belt Tensioner - 3.jpg

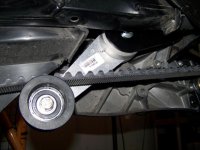
Here is a picture taken from under the right side of the bike showing the inside of the tensioner. With the recommended tension set (10-12 lbs.), you can see the upward pressure it puts on the belt. One thing to note is that you need to trim the belt guard in order for the tensioner to clear. Behind the tensioner, you can see how I trimmed mine. I used cutters and a dremel and just cut it straight. It looks fine because from the left side of the bike, this part of the guard is hidden behind foot peg / footboard assembly.

Belt Tensioner - 4.jpg

This part too seems be of high quality. It is pretty heavy and just feels very well built. I did have belt vibration under certain conditions, so I hope this takes care of it.
 
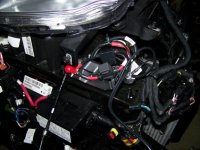
I learned something new about the Spyder today. I noticed that on the left front corner of the bike, there are battery posts. After looking it up in the manual, you can indeed hook up a battery tender to it and that is exactly what I did. Once I get the frunk back on, I'll just hide the pigtails in there which will make it much easier for charging the battery.

Battery Tender.jpg
 
Today I got the SmoothSpyder belt tensioner installed. The picture on the left shows what it looks like when you take it out of the box. If you pull down on it as you see it, there is upward tension which had me confused as to how it should be oriented. I realized that you have to loosen the tensioner bolt in the middle and extend it as seen in the second picture. Once I did that, the upward tension was reversed which is how it is supposed to go on the bike.

View attachment 82338 View attachment 82339

The 2013 RT tensioner is awesome because there is no drilling. It bolts directly to frame just inside of the left frame rail. Installation was very simple.

View attachment 82340

Here is a picture taken from under the right side of the bike showing the inside of the tensioner. With the recommended tension set (10-12 lbs.), you can see the upward pressure it puts on the belt. One thing to note is that you need to trim the belt guard in order for the tensioner to clear. Behind the tensioner, you can see how I trimmed mine. I used cutters and a dremel and just cut it straight. It looks fine because from the left side of the bike, this part of the guard is hidden behind foot peg / footboard assembly.

View attachment 82343

This part too seems be of high quality. It is pretty heavy and just feels very well built. I did have belt vibration under certain conditions, so I hope this takes care of it.

Keep an eye out for the gap between the arm and the belt guard you had to trim. Over time, the belt will stretch a little and the arm will take up the slack - up to the point the arm hits the belt guard. Then it doesn't work like it should.

"Mind the Gap" and you will really like how this smooths out the bike on the road.

Jerry
 
So here is question maybe a dumb one.

the (uppers) body panels around the seat have a torx-head screw but they have dimples in the center is there a special torx head driver with hole to accommodate this?
 
So here is question maybe a dumb one.

the (uppers) body panels around the seat have a torx-head screw but they have dimples in the center is there a special torx head driver with hole to accommodate this?

Yes there is. The first time I took the panels off, I went out and bought those bits and come to find out, those screws don't come out. On the other side is a post that you pull out on to get the panel off. So the screw secures the post for "popping" that part of the bodywork in and out.
 
Yes there is. The first time I took the panels off, I went out and bought those bits and come to find out, those screws don't come out. On the other side is a post that you pull out on to get the panel off. So the screw secures the post for "popping" that part of the bodywork in and out.


See thats why no question is stupid question........:clap:

Thanks.
 
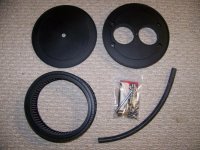
The KewlMetal Air Filter Kit has finally arrived. This is pretty much all there is to it.

KewlMetal Air Filter Kit - 3.jpg

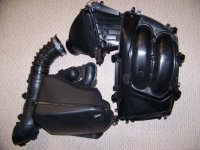
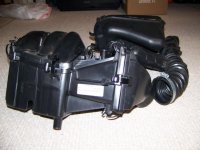
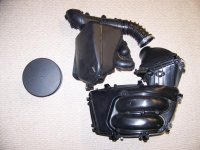
Here are a couple of pictures of the OEM air filter system. It is massive. Take note of how much space it takes up both horizontally and vertically. There is no room for air circulation in the upper part of the Tupperware with this thing in there. Oh yeah, it is impossible to work on the upper engine as well.

KewlMetal Air Filter Kit - 1.jpg KewlMetal Air Filter Kit - 2.jpg

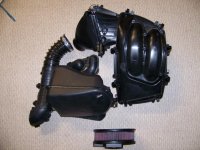
Here is a comparison of the two systems.

KewlMetal Air Filter Kit - 4.jpg KewlMetal Air Filter Kit - 5.jpg

As stated, two straight forward benefits are that it provides easier access to the engine and it adds a bunch of open space for air to circulate. Another benefit is that it will let the engine breath. I am adding the cat bypass and the Akraprovic silencer, but those mods would be handicapped by not opening up the intake.

Lastly, the OEM system weighs a whopping 11 lbs. The KewlMetal system only weighs 2 lbs. When I am done with this project, I will post what the total weight savings is. The Akrapovic subtracted 10 lbs. The KewlMetal kit subtracted 9 lbs and I have yet to compare the catalytic converter with the Y-pipe. I think when I'm done, there will easily be a 20 - 25 lb weight reduction.
 
Great info my Kewl Metal AF is on order along with the cat bypass Y pipe.

Heat tape xtra hvy duty.

I am going with Two Bros muffler carbon fiber.

I bet the Cat weighs 40 lbs could wrong but that thing is as large as pot belly stove.

I also will add the new Vertika Trikes upper louvre intake vents for better flow to get the hot air out while moving.

The real estate that stock AF takes up is crazy it acts like an air dam not allowing much "flow" of air.

Great at updates keep it up it is helpful.
 
kewl intake

Great info my Kewl Metal AF is on order along with the cat bypass Y pipe.

Heat tape xtra hvy duty.

I am going with Two Bros muffler carbon fiber.

I bet the Cat weighs 40 lbs could wrong but that thing is as large as pot belly stove.

I also will add the new Vertika Trikes upper louvre intake vents for better flow to get the hot air out while moving.

The real estate that stock AF takes up is crazy it acts like an air dam not allowing much "flow" of air.

Great at updates keep it up it is helpful.

if you add the kewl intake do you have to add a juice box--will it change how rich or lean the engine runs ?
 
Great info my Kewl Metal AF is on order along with the cat bypass Y pipe.

Heat tape xtra hvy duty.

I am going with Two Bros muffler carbon fiber.

I bet the Cat weighs 40 lbs could wrong but that thing is as large as pot belly stove.

I also will add the new Vertika Trikes upper louvre intake vents for better flow to get the hot air out while moving.

The real estate that stock AF takes up is crazy it acts like an air dam not allowing much "flow" of air.

Great at updates keep it up it is helpful.

I have weighed the catalytic converter and believe it or not, it is just 12 lbs. I too thought it was heavier. I'm waiting to get my Y-pipe back so I can weight it, but it too has some weight to it. I bet it will be about half the weight.

Yes, that stock air box is an absolute monstrosity. No wonder why you can't get any real air moving through the upper vents on the Tupperware.

It's great to hear about your upgrades as they will only make the bike run and perform better. Feel free to post back here with your progress. I don't mind.
 
Back
Top