wd5gnr
New member
When I first got the bike (2013) I bought an extra speaker grille from Cheap parts -- it was just a few bucks. Then I took the original out and drilled it for a 12 socket. I wasn't sure where to pick up switched or where the fuse box was, so I used an inline fuse and dropped it to the "jumper terminals" in the frunk. I know now that the battery is just below that and you can easily access it through the frunk (this is a 2013, remember) so if I had to do it again, I'd go right to the battery.
This does two things. It makes a nice place ot put a charger or a Bluetooth transmitter. I also have my battery tender set up with a cigarette lighter plug so you just plug it in there. So far, nothing exciting.
However, if I don't want to charge the bike, I feel bad leaving the Bluetooth dongle in. I have one now that comes out easily, but the one I had previous was a tight fit. And sometimes you just want to walk away from the bike for awhile while parked and not have anything drawing power.
So... off came the panel again.
https://smile.amazon.com/gp/product/B071H9KXKQ -- I got red because the bike is read but they have other colors.
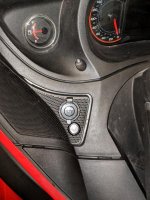
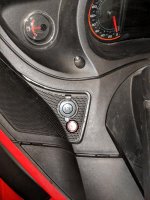
Drilled a hole in the panel using a pilot hole and then a step bit. I cut the quick connects off the 12V socket and wired the switch in the middle with wire nuts. The printout they send you is black and white, so you want to go look at the color wiring diagram on the web because the black text vanishes in the printout.
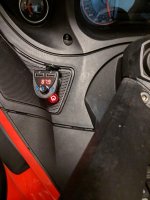
And there you are:

Power off

Power on (LED washed out in picture)

All set to ride.
10 minutes and 10 dollars.
This does two things. It makes a nice place ot put a charger or a Bluetooth transmitter. I also have my battery tender set up with a cigarette lighter plug so you just plug it in there. So far, nothing exciting.
However, if I don't want to charge the bike, I feel bad leaving the Bluetooth dongle in. I have one now that comes out easily, but the one I had previous was a tight fit. And sometimes you just want to walk away from the bike for awhile while parked and not have anything drawing power.
So... off came the panel again.
https://smile.amazon.com/gp/product/B071H9KXKQ -- I got red because the bike is read but they have other colors.
Drilled a hole in the panel using a pilot hole and then a step bit. I cut the quick connects off the 12V socket and wired the switch in the middle with wire nuts. The printout they send you is black and white, so you want to go look at the color wiring diagram on the web because the black text vanishes in the printout.
And there you are:

Power off

Power on (LED washed out in picture)

All set to ride.
10 minutes and 10 dollars.
