bluestratos
New member
I had a LED light on the lid of the trunk but it was pretty bad. I also forgot to turn it off and burned out the batteries so when I did need light it did not work. I kept thinking about putting in a wired trunk light but with the limited reserve I have (battery) I was afraid I would forget to turn it off by not closing the trunk. What I needed was a circuit that turned off after a preset amount of time.
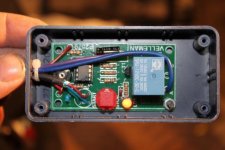
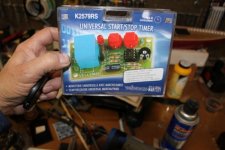
Radio Shack sells the timer shown, it took about 1 hour to build the circuit board. Where you see the second red button (momentary push button for on) I instead hooked up to wires so I could place my own remote momentary Switch I already had. I put the unit in a small project box (Radio Shack). You can see I had to remove a small area of the lid to allow the relay space.
I removed the rear seat pad , both speaker blocks, the panel above the license plate, the left hand side panels and the access hatch for the battery, about 15 minutes. This gave me plenty of room to install and run run wires.
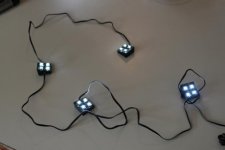
I found a set of LEDs at Napa, they come in a package of 2 sets, 4 light blocks per set. I mounted these under the lip of the turn on the four coners (the trunk box,not the lid) and then cut each light feed wire in half to allow me to pass them through a 1/8 hole I drilled in the the trunk. All the wires are hidden by the panels. I then resoldered the wires and shrinked wrapped all three points were I had to reconnect the 2 wires.
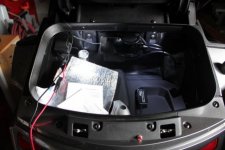
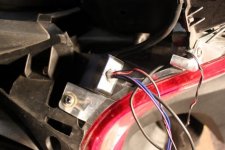
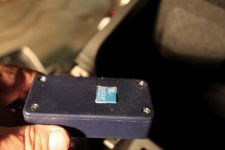
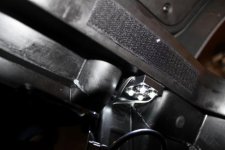
I placed the control box in the cavity behind the left tail light (wrapped in foam to prevent rattles), plenty of wasted room there and it pulls out easily if necessary. I installed a small red momentary switch switch just right of the slot you see for the rear panel.
Power for the timer and LEDs, comes from the battery with a small fuse holder in line. Lastly I hooked up the ground for the timer and for the LEDS and all done with install.
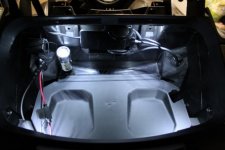
Now, I had already set the timer for 3 minutes so when I push the switch, the 4 LED blocks light up and turn off on their own.
To extend the light I just push the button again. You can set the timer up to 15 minutes, up to you. I found 3 is more than enough so far.
I was limited on the number of photos I could attach so I will follow up with a couple more pictures.
Radio Shack sells the timer shown, it took about 1 hour to build the circuit board. Where you see the second red button (momentary push button for on) I instead hooked up to wires so I could place my own remote momentary Switch I already had. I put the unit in a small project box (Radio Shack). You can see I had to remove a small area of the lid to allow the relay space.
I removed the rear seat pad , both speaker blocks, the panel above the license plate, the left hand side panels and the access hatch for the battery, about 15 minutes. This gave me plenty of room to install and run run wires.
I found a set of LEDs at Napa, they come in a package of 2 sets, 4 light blocks per set. I mounted these under the lip of the turn on the four coners (the trunk box,not the lid) and then cut each light feed wire in half to allow me to pass them through a 1/8 hole I drilled in the the trunk. All the wires are hidden by the panels. I then resoldered the wires and shrinked wrapped all three points were I had to reconnect the 2 wires.
I placed the control box in the cavity behind the left tail light (wrapped in foam to prevent rattles), plenty of wasted room there and it pulls out easily if necessary. I installed a small red momentary switch switch just right of the slot you see for the rear panel.
Power for the timer and LEDs, comes from the battery with a small fuse holder in line. Lastly I hooked up the ground for the timer and for the LEDS and all done with install.
Now, I had already set the timer for 3 minutes so when I push the switch, the 4 LED blocks light up and turn off on their own.
To extend the light I just push the button again. You can set the timer up to 15 minutes, up to you. I found 3 is more than enough so far.
I was limited on the number of photos I could attach so I will follow up with a couple more pictures.
Attachments
Last edited: