dsvogel
Member
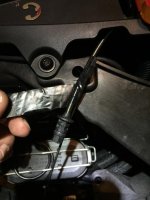
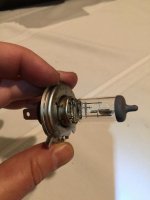
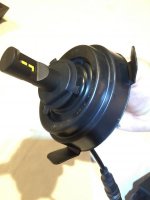
Installing anything but “regular” bulbs in the Headlights of the new F3T/Limited’s is impossible to do by going through the Lateral Service Panels because of the bulk of LED bulbs. I installed XenonDepot bulbs and in order to use the dust boot, I had to install the boot on the bulbs first. Pushing that mess through the tiny opening was impossible ... I tried for hours over the course of 3 days. :banghead:
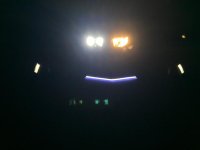
I want to give a lot of thanks to SpyRyd for giving me suggestions on how to accomplish this feat. I took some pics during the process and wanted to share with the community. The F3 — especially the triple black — looks better with LED headlights IMHO! :doorag: It’s not a bad job to do, and will probably take you an hour per side if you are the careful type. It could be done quicker... I'll be installing on a friends new F3 this week and expect the whole process to take an hour now that I know what I'm doing.
If you think I could edit something to be clearer, please let me know, or contribute your own pictures for clarification. As always, do at your own risk, and typical disclaimers apply.
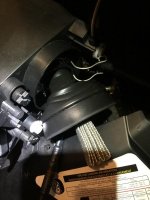
Body Panel Removal
Most of the instructions for removing body panels are in your Owners Manual (starting pg 43 in mine), so I’m going to gloss over how to remove most of these panels, and just list them. I recommend doing one side first, installing the LED headlight bulb, and then reinstalling panels. That gives you the other side to reference if you have an extra screw or ‘push pin’ plastic rivet left over.
Remove the…
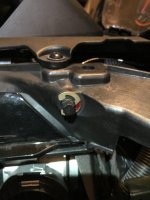
• Lateral Service Panel
• Front Service Cover (under the headlights)
• Side Panel
• Mirror Cover (painted plastic surrounding the blinker. See thread link)
These panels are not covered in the Owner’s Manual, but also need to be removed.
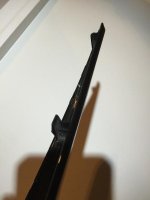
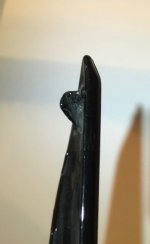
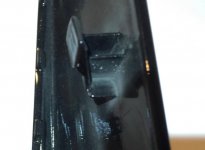
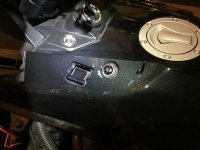
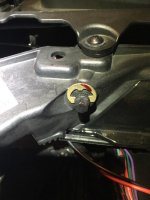
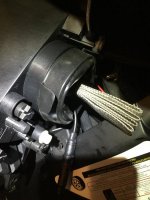
• Nose. This is the painted piece that sits above the headlights and below the windshield. You should see that at the bottom of this piece, there is a Torx bolt and nut.
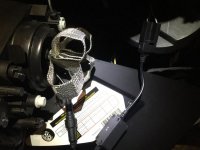
• Console/Speakers cover. This is one large piece that snaps into place. I found pulling on the left/right edges easiest for snapping it out. When reinstalling, make sure all clips are going into their designated holes and not "missing" else they could be bent. (You can skip removing this cover ... see below)
I want to give a lot of thanks to SpyRyd for giving me suggestions on how to accomplish this feat. I took some pics during the process and wanted to share with the community. The F3 — especially the triple black — looks better with LED headlights IMHO! :doorag: It’s not a bad job to do, and will probably take you an hour per side if you are the careful type. It could be done quicker... I'll be installing on a friends new F3 this week and expect the whole process to take an hour now that I know what I'm doing.
If you think I could edit something to be clearer, please let me know, or contribute your own pictures for clarification. As always, do at your own risk, and typical disclaimers apply.
Body Panel Removal
Most of the instructions for removing body panels are in your Owners Manual (starting pg 43 in mine), so I’m going to gloss over how to remove most of these panels, and just list them. I recommend doing one side first, installing the LED headlight bulb, and then reinstalling panels. That gives you the other side to reference if you have an extra screw or ‘push pin’ plastic rivet left over.
Remove the…
• Lateral Service Panel
• Front Service Cover (under the headlights)
• Side Panel
• Mirror Cover (painted plastic surrounding the blinker. See thread link)
These panels are not covered in the Owner’s Manual, but also need to be removed.
• Nose. This is the painted piece that sits above the headlights and below the windshield. You should see that at the bottom of this piece, there is a Torx bolt and nut.
⁃ Loosen this bolt nut, but don’t remove yet.
⁃ The top lip of this panel clips in, so pulling on it will release the clips.
⁃ Remove the bolt and nut being careful not to lose either in the bike.
⁃ The top lip of this panel clips in, so pulling on it will release the clips.
⁃ Remove the bolt and nut being careful not to lose either in the bike.
• Console/Speakers cover. This is one large piece that snaps into place. I found pulling on the left/right edges easiest for snapping it out. When reinstalling, make sure all clips are going into their designated holes and not "missing" else they could be bent. (You can skip removing this cover ... see below)
Last edited: