• There were many reasons for the change of the site software, the biggest was security. The age of the old software also meant no server updates for certain programs. There are many benefits to the new software, one of the biggest is the mobile functionality. Ill fix up some stuff in the coming days, we'll also try to get some of the old addons back or the data imported back into the site like the garage. To create a thread or to reply with a post is basically the same as it was in the prior software. The default style of the site is light colored, but i temporarily added a darker colored style, to change you can find a link at the bottom of the site.

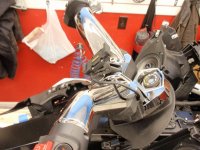
help with tri axsi

garb55

New member
I just purchased a set of Tri axis handle bars for my 2014 RTL
I have been looking everywhere for some help on pulling the front of the RT apart
The instructions with the bars suck but all it says is to pull the front and all the top off
Thanks
Don
 
Hi Don

I bought a Service manual download from Ebay. It has instructions on how to remove the upper body work as one piece.

If you can't find it on Ebay I could try to Email you a copy.
 
Have to agree..!!

:agree: getting a shop manual is the best idea. Will help now with the bars and with many future projects you may do. :thumbup:
 
I have a manual I downloaded from Repair it manual ,com
It shows the parts break down similar to when you want to order parts
Is this the best I can get
I can probably figure it out was hoping for something better
Nils888
my email is
[email protected]
Thank you
Don
 
I have a manual I downloaded from Repair it manual ,com
It shows the parts break down similar to when you want to order parts
Is this the best I can get
I can probably figure it out was hoping for something better
Nils888
my email is
[email protected]
Thank you
Don
Hi Don

I will send you what I have Via WeTransfer.com
 
Hi Don

I bought a Service manual download from Ebay. It has instructions on how to remove the upper body work as one piece.

If you can't find it on Ebay I could try to Email you a copy.

Is that the Tech Spark Digital Manual?
 
Thanks Nills888 and Bob
I have had the sides and back of my:spyder2: apart many times already to do many farkles
the frunk looks very similar to my GS so it should be no problem
the part that I am my to sure how to take apart is the top pod with the windshield and the head lights to get to the handle bars
that is the part I can not find any instructions for
have a great day
Don
 
The Tech Spark manual has wrong info in it unless they fixed it! It has you taking the wrong bolts out to remove the headlight pod. That whole pod comes off with four bolts and some wiring connectors and the headlight adjustment cables. Don't forget to pull the glovebox back or off first.
 
Thanks Nills888 and Bob
I have had the sides and back of my:spyder2: apart many times already to do many farkles
the frunk looks very similar to my GS so it should be no problem
the part that I am my to sure how to take apart is the top pod with the windshield and the head lights to get to the handle bars
that is the part I can not find any instructions for
have a great day
Don

You do not have to remove the frunk as there is nothing gained except being closer to the handlebars. I did this without the need of the service manual. Yes the instructions could be better, but it does show eveything that you need to remove.
Tips - If you remove the Frunk and seat cables from the ignition switch as it shows you do for access to the bolts behind - hook a finger around the top and bottom of the cable housing where it is attached to the switch and pull strait out as it is very easy to break off the plastic tip of the cable. There is room to just push aside the cables after you remove the cable ends from the switch.

The black plastic cover at the bottom of the bars. You can get at the screws that hold it on by turning the bars as far rignt and then left. You will need to fell them to remove and install them as these hidden up under that cover. REMEMBER to put that back on as it will be the first peice that goes on.

If you are running a stock GPS make sure the cable is in place before you start putting on the new bars, or you will be doing it over.
 

Attachments

  • Tri-aexes 009.jpg
    Tri-aexes 009.jpg
    68.6 KB · Views: 19
  • Tri-aexes 007.jpg
    Tri-aexes 007.jpg
    57.9 KB · Views: 18
  • Tri-aexes 005.jpg
    Tri-aexes 005.jpg
    54.7 KB · Views: 19
Back
Top