• There were many reasons for the change of the site software, the biggest was security. The age of the old software also meant no server updates for certain programs. There are many benefits to the new software, one of the biggest is the mobile functionality. Ill fix up some stuff in the coming days, we'll also try to get some of the old addons back or the data imported back into the site like the garage. To create a thread or to reply with a post is basically the same as it was in the prior software. The default style of the site is light colored, but i temporarily added a darker colored style, to change you can find a link at the bottom of the site.

Head Light Adjustment

spydertrike

New member
On my RT-S the low beam distance is bad. Can only see about six feet with a horizontal line on top of beam. Done a little research and I understand there is only one bulb per side with a projection. I guess I need to make an adjustment. QUESTIONS: Is the adjustment knob the brass one that is located under the left side panel where you would check the oil level ? Is there always the same brass knob on the right side of bike under the same panel ? To make the distance go further out with the lighting, which direction do you turn the knobs ? Thanks
 
:shocked: I'm at the wrong computer; all of my information is in the office machine!! :gaah:
But I do think that they've got a knob like that on each side... Those are (or should be!) the adjusters.
 
Yes, the brass knob.
33 ft from from test surface (wall, garage door, etc.)
light beam in between 16.3" (bottom of beam) to 20.3" (top of beam)

headlight adj.jpg
 
Last edited:
Well if it weren't for the debris that Jeff picked up on his grille; I'd be happier than a clam in wet sand...
Caution lap 27
metal debris in turn 3...
 
Yes, the brass knob.
33 ft from from test surface (wall, garage door, etc.)
light beam in between 16.3" (bottom of beam) to 20.3" (top of beam)

^ think that's the fog light #'s

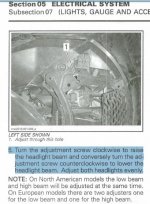
Owners manual page 133

3. 33 feet from the test surface, trace a mark at 642mm (25.3 in) above ground thenanother at 732mm (28.8 in).​
4. Select
low beam.

NOTE:​
The high beam becomes adjusted
at the same time.

Once wall measurements are marked off. Don't forget to bleed the air out of the rear shock(before adjusting). The bleeder is under your seat. It's a standard schrader valve. Once adjusted - if you have an onboard compressor, it will recharge the shock to whatever level you previously had it set at. Just cruse around a bit.
 
Last edited:
Foggy decisions

No biggie Steve.

Speaking of fog lights. It's my understanding the earlier models were equipped with adjusting attachments like the headlights are. Unfortunately some wizard decided it wouldn't be needed........

What was he thinking?

nojoke
 
The European setup has the adjustability; but they're not foglights over there...

Headlight adjustments??

Assumptions:
Spyder RT Headlight Height: 35.0" (This could change with a heavier/lighter driver/passenger, cargo load, tire pressure, performance
shocks, etc.)
BRP Spec for Headlight Adjustment: Adjust for a low beam height of 25.3" to 28.8" (27.1" halfway point) at 33' with a 200 lb driver.
Calculated Angle: 1.15° downward

Angle Distance Low Beam Height Adjustment
1.15° 33' 25.3" - 28.8"
1.15° 30' 26.0" - 29.5"
1.15° 25' 27.2" - 30.7"
1.15° 20' 28.4" - 31.9"
1.15° 15' 29.6" - 33.1"
1.15° 10' 30.8" - 34.3"
 
Don't overthink the headlight aiming. If, when loaded, they are too high, lower them a bit. If to low, raise them. It doesn't really take a tape measure and a calculator. If you have vehicle inspection in your state, and they check the beam height, though, you probably need to be close to spec.
 
^ think that's the fog light #'s

Owners manual page 133

3. 33 feet from the test surface, trace a mark at 642mm (25.3 in) above ground thenanother at 732mm (28.8 in).​
4. Select
low beam.

NOTE:​
The high beam becomes adjusted
at the same time.

Once wall measurements are marked off. Don't forget to bleed the air out of the rear shock(before adjusting). The bleeder is under your seat. It's a standard schrader valve. Once adjusted - if you have an onboard compressor, it will recharge the shock to whatever level you previously had it set at. Just cruse around a bit.

Thanks very much for your post. I will make the adjustments once the weather warms up a little.
 
Back
Top