Samir221
New member
I have been entertaining the idea for couple of years now, even when I still had my 13 Sts but never got around doing it till today. I am glad I decided to finally take care of it. On a scale of 1 - 10 I will say it was a 2. Pretty easy process.
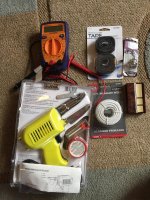
Things I got to make it happen:
1) garage door opener remote.
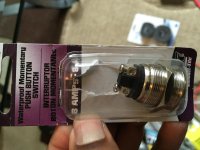
2) waterproof momentary push button switch.
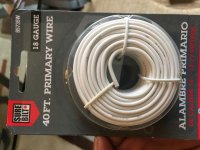
3) 18 gauge wire.
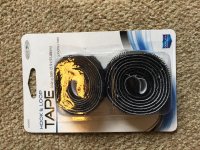
4) Velcro.
5) a voltmeter.
6) soldering gun.
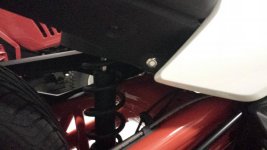
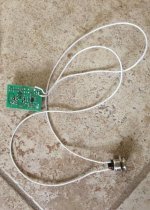
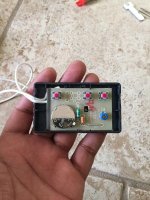
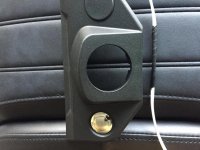
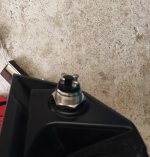
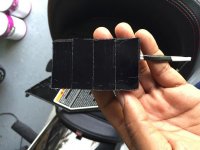
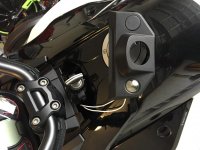
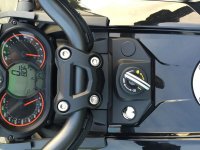
I started up by opening the remote and using the voltmeter ( set on impedance) to figure out which connectors on the back of the remote board I have to solder the wires to. Touching the right connectors with the voltmeter tips will cause the remote to activate and control the garage door. Once the right connectors are identified the Next step is to solder the wires to the identified connectors in the back of the board. ( this part is actually the hardest part of the whole process) . Once that part was done I put the remote back together and moved to securing the push button to the plastic piece on the bike. With my luck , the push button was a perfect fit. All I had to do is screw it around till it sat flush against the plastic part and then secured it with the washer it came with.
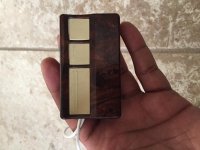
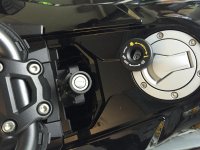
Once that was done, all I needed to do is wire the push button. Velcro the remote in a secure hidden spot under the left panel, zip tie the wires and I was done. I went for a test ride came back home and it worked like a charm. I love it, all the more I didn't have to drill or mess up any of the bike's panel and if need be and I want to remove it or use that spot down the road for something else all I have to do is just unscrew the push button back up and remove the remote and I am all done. I am really excited I got this done because it was a pain to always have to get off the bike to open and close the garage door.
Hopefully the instructions along with the pictures are not confusing and make it easier for whomever would like to do it as well. If any clarification is needed please let me know. The whole project cost less than 20 dollars.
Things I got to make it happen:
1) garage door opener remote.
2) waterproof momentary push button switch.
3) 18 gauge wire.
4) Velcro.
5) a voltmeter.
6) soldering gun.
I started up by opening the remote and using the voltmeter ( set on impedance) to figure out which connectors on the back of the remote board I have to solder the wires to. Touching the right connectors with the voltmeter tips will cause the remote to activate and control the garage door. Once the right connectors are identified the Next step is to solder the wires to the identified connectors in the back of the board. ( this part is actually the hardest part of the whole process) . Once that part was done I put the remote back together and moved to securing the push button to the plastic piece on the bike. With my luck , the push button was a perfect fit. All I had to do is screw it around till it sat flush against the plastic part and then secured it with the washer it came with.
Once that was done, all I needed to do is wire the push button. Velcro the remote in a secure hidden spot under the left panel, zip tie the wires and I was done. I went for a test ride came back home and it worked like a charm. I love it, all the more I didn't have to drill or mess up any of the bike's panel and if need be and I want to remove it or use that spot down the road for something else all I have to do is just unscrew the push button back up and remove the remote and I am all done. I am really excited I got this done because it was a pain to always have to get off the bike to open and close the garage door.
Hopefully the instructions along with the pictures are not confusing and make it easier for whomever would like to do it as well. If any clarification is needed please let me know. The whole project cost less than 20 dollars.


")