• There were many reasons for the change of the site software, the biggest was security. The age of the old software also meant no server updates for certain programs. There are many benefits to the new software, one of the biggest is the mobile functionality. Ill fix up some stuff in the coming days, we'll also try to get some of the old addons back or the data imported back into the site like the garage. To create a thread or to reply with a post is basically the same as it was in the prior software. The default style of the site is light colored, but i temporarily added a darker colored style, to change you can find a link at the bottom of the site.

garage door opener modification

Samir221

New member
I have been entertaining the idea for couple of years now, even when I still had my 13 Sts but never got around doing it till today. I am glad I decided to finally take care of it. On a scale of 1 - 10 I will say it was a 2. Pretty easy process.
Things I got to make it happen:

1) garage door opener remote.
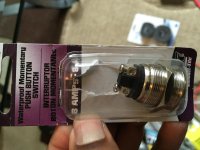
2) waterproof momentary push button switch.
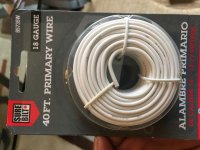
3) 18 gauge wire.
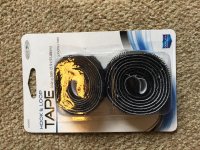
4) Velcro.
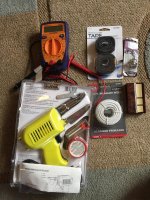
5) a voltmeter.
6) soldering gun.

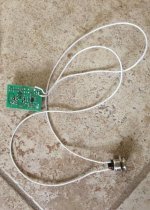
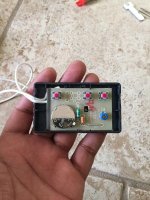
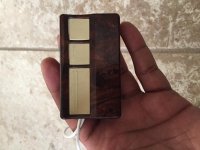
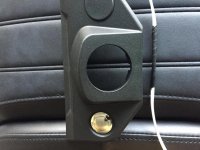
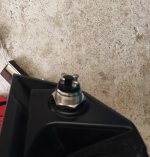
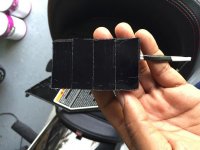
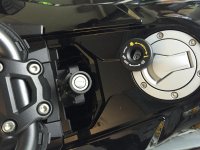
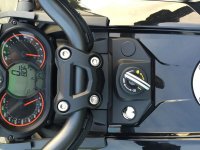
I started up by opening the remote and using the voltmeter ( set on impedance) to figure out which connectors on the back of the remote board I have to solder the wires to. Touching the right connectors with the voltmeter tips will cause the remote to activate and control the garage door. Once the right connectors are identified the Next step is to solder the wires to the identified connectors in the back of the board. ( this part is actually the hardest part of the whole process) . Once that part was done I put the remote back together and moved to securing the push button to the plastic piece on the bike. With my luck , the push button was a perfect fit. All I had to do is screw it around till it sat flush against the plastic part and then secured it with the washer it came with.
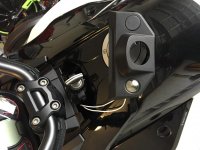
Once that was done, all I needed to do is wire the push button. Velcro the remote in a secure hidden spot under the left panel, zip tie the wires and I was done. I went for a test ride came back home and it worked like a charm. I love it, all the more I didn't have to drill or mess up any of the bike's panel and if need be and I want to remove it or use that spot down the road for something else all I have to do is just unscrew the push button back up and remove the remote and I am all done. I am really excited I got this done because it was a pain to always have to get off the bike to open and close the garage door.
Hopefully the instructions along with the pictures are not confusing and make it easier for whomever would like to do it as well. If any clarification is needed please let me know. The whole project cost less than 20 dollars.
 
parts and tools used

attachment.php
attachment.php
attachment.php
attachment.php
 

Attachments

  • image.jpg
    image.jpg
    57.9 KB · Views: 485
  • image.jpg
    image.jpg
    104.7 KB · Views: 475
  • image.jpg
    image.jpg
    60.7 KB · Views: 472
  • image.jpg
    image.jpg
    67 KB · Views: 476
step by step in pics

pics or project
 

Attachments

  • image.jpg
    image.jpg
    54.9 KB · Views: 96
  • image.jpg
    image.jpg
    41.2 KB · Views: 104
  • image.jpg
    image.jpg
    45.4 KB · Views: 73
  • image.jpg
    image.jpg
    75 KB · Views: 101
  • image.jpg
    image.jpg
    45.8 KB · Views: 105
more pics and final product

attachment.php
attachment.php
attachment.php
attachment.php
 

Attachments

  • image.jpg
    image.jpg
    48.2 KB · Views: 475
  • image.jpg
    image.jpg
    61.7 KB · Views: 472
  • image.jpg
    image.jpg
    61.4 KB · Views: 473
  • image.jpg
    image.jpg
    64.4 KB · Views: 474
Congrats..!!

nicely done. Did the same a while back on my RS. Was most concerned with finding the contact points but as you say not that hard...your has a nice mounting point...:2thumbs: looks great....
 
I just keep my 3 door portable in the glove box🃏😃

Ditto: velcro'd in, stays in place, out of sight, out of all weather, can pop the glove box open when approaching the garage in the dark, can find the button by touch and drive into the garage and close the door behind me (very nice in wet weather)
 
I would put mine in the glove box also but since I have a F3s I don't have one. Only the front trunk and believe he has an F3 also.


Sent from my iPhone using Tapatalk
 
I do have a f3s so no glove compartment for me. :thumbup: And As stated above, it is a lot convenient to have easy access to it especially when it's raining or too dark. Plus it does make my f3s slightly different than the thousands f3's out there. ;)
 
Necessity is the mother..

Great mod, clean build and great instalation. Good for you.
I want to try and do the same on my GS, and plan that as well as a couple of others this winter.
I currently have my three button remote in either my jacket or tank bag, but I like your idea.:thumbup:
 
Great mod, clean build and great instalation. Good for you.
I want to try and do the same on my GS, and plan that as well as a couple of others this winter.
I currently have my three button remote in either my jacket or tank bag, but I like your idea.:thumbup:
Thanks and good luck with ur future incoming mods! Make sure to post updates and pics!! :thumbup:
 
Easy remote door opener solution....

I painted my single garage door opener all black to match the color of the panel in front of the gauge cluster. Velcro'd the remote door opener to the panel (can barely see it as it blends in with the panel) Both my car & SUV have the garage door openers above the rear view mirror thus I hadn't used the remote control units in 10 yrs. Cost = $ zero, effort = 5-10 minutes.
Darrell
 
Did almost the same thing. instead of the upper switch mounts (I used one for my fog light mod and want to add heated grips at some point) I used the hole under the seat on the black plastic side panel. I also tied into the 12v connector so I wouldn't have to replace the battery.

CJ JAX
 

Attachments

  • 20151027_111400.jpg
    20151027_111400.jpg
    39.2 KB · Views: 51
Did almost the same thing. instead of the upper switch mounts (I used one for my fog light mod and want to add heated grips at some point) I used the hole under the seat on the black plastic side panel. I also tied into the 12v connector so I wouldn't have to replace the battery.

CJ JAX
i like that a lot especially the idea of not having to worry about changing the battery. Good job!! :thumbup::thumbup:
 
i like that a lot especially the idea of not having to worry about changing the battery. Good job!! :thumbup::thumbup:
There is an unused capped two pin 12v connector that Lamont thought might be for gps power located about 12 inches forward of my switch location.

CJ JAX
 
There is an unused capped two pin 12v connector that Lamont thought might be for gps power located about 12 inches forward of my switch location.

CJ JAX
Did u just solder the 12v connector to the right connectors on the garage door opener?
 
Did u just solder the 12v connector to the right connectors on the garage door opener?
I ordered a bunch of two pin and three pin mating connectors for all the different mods I was doing on my RT. I like to be able to plug and unplug stuff without cutting on the existing harness. I think I got the last group of connectors on Amazon (E-TING 10 Kit 2 Pin Way Waterproof Electrical Wire Connector Plug)
. Made a short pigtail to run to the battery connections on the garage door opener.

CJ JAX
Thanks
 
Back
Top