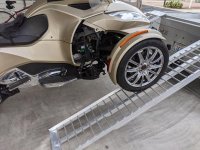
Hello, finally got around to ordering and replacing the OEM sway bar with one from Baja Ron. Great service and suggestions on using super glue to hold spacers to the links, thanks Ron. Used my ATV ramps to raise the front of the F3, so easy, thanks to those who have suggested this method.
So on the scale of 1-10, about a five on my F3 basic, all right in the open, easier to just slide the splash guards down the rail, don’t have to remove them! Mine had the two frame stiffener bolts, just removed the plastic covers and was able to remove them and the sway bar blocks. When you are going back with the sway bar, replace the frame stiffener bolts first, makes lining up end blocks a breeze!
Took me an leisurely three hours with coffee/bathroom breaks, like all things Spyder, take your time, remember what order things come off and if possible do it yourself! Way cheaper and you learn how your bike fits together.

") ) for the few seconds it takes to pull the old bar off & then sliding the new bar in the way the old one came out - and that REALLY isn't all that hard if you think about it a little.
) for the few seconds it takes to pull the old bar off & then sliding the new bar in the way the old one came out - and that REALLY isn't all that hard if you think about it a little.  hyea: Certainly it wasn't at all difficult on my 2013 RT, nor any of the older RT's I've helped others do; nor for that matter, on any of the older GS's, the RS/RSS's, or the ST's that I've helped with..... :thumbup: