• There were many reasons for the change of the site software, the biggest was security. The age of the old software also meant no server updates for certain programs. There are many benefits to the new software, one of the biggest is the mobile functionality. Ill fix up some stuff in the coming days, we'll also try to get some of the old addons back or the data imported back into the site like the garage. To create a thread or to reply with a post is basically the same as it was in the prior software. The default style of the site is light colored, but i temporarily added a darker colored style, to change you can find a link at the bottom of the site.

Doc Humphrey's Hinge Kit - A change or Goof?

IdahoMtnSpyder

Well-known member
Doc, is this a change or a goof? I bought your hinge upgrade kit last summer and am finally getting around to installing them. In your instructions you discuss and picture the inner brackets as having a step at each end on one side. The brackets I received are flat, no milled thinner end sections. Did you change the part and forget to change the instructions, or are these pieces made wrong? Here's a pic of the bracket and the corresponding part of the instructions.
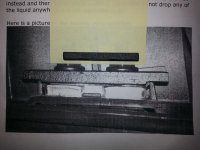
Saddlebag hinge kit.jpg

The end result of the unmilled brackets is the space between the OEM backing plate and the inner bracket will require much thicker and/or more shims than in the kit. I'm planning on going down to the hardware store and get some washers. Hopefully they will be close enough in thickness to work.
 
Doc, is this a change or a goof? I bought your hinge upgrade kit last summer and am finally getting around to installing them. In your instructions you discuss and picture the inner brackets as having a step at each end on one side. The brackets I received are flat, no milled thinner end sections. Did you change the part and forget to change the instructions, or are these pieces made wrong? Here's a pic of the bracket and the corresponding part of the instructions.

View attachment 145290

The end result of the unmilled brackets is the space between the OEM backing plate and the inner bracket will require much thicker and/or more shims than in the kit. I'm planning on going down to the hardware store and get some washers. Hopefully they will be close enough in thickness to work.
.
You should have gotten 8 black shims, 4 red shims, and 4 yellow shims with the kit. If you cannot find them, let me know and we will mail them to you. After several testers were unable to use the notched backing plate to make a complete bridge between the plastic and metal on the back, we revised that portion of the kit and included the shims so that they would fit every RT out there. Your instructions should have explained this. If you have the old set that doesn't talk about the shim, let me know and I will also include them with the shims if need be. I would not suggest using something from a hardware store. The ones we have created work very well and are powder coated. If you need them wait a few days for the mail and do it the way I designed it to be done.
Mistakes sometimes happens, and we will make this right if you were shorted. Like Lamont says, "If you are not happy, we're not happy."

Also, make sure you have the original metal plate in place. It needs to stay in place. The shims, usually a back and red, sometimes a yellow instead of red will bridge the space between the metal and the tabs that hold the OEM plate in place.
 
Last edited:
i watched the install video a couple of times before i figured out
what was going on. finally dawned on me . its a lot better than
the written instructions.--irv
 
i watched the install video a couple of times before i figured out
what was going on. finally dawned on me . its a lot better than
the written instructions.--irv
.
That is a pretty involved install. We have re-written the instructions several times, but it doesn't take place of actually seeing it done.

Here is the link for it:
 
Hi Doc!
I was one of your "Guinea Pigs" on this project... :D
The Missus seems to regularly stuff those storage compartments until I'm ready to pass out... :shocked:


...But nothing has broken!! :yes::yes::yes:
Your upgrade works! nojoke :clap:
 
Doc, I don't know what I was seeing or doing when it looked like the shims weren't thick enough, but when I went out and checked again after your response, the shims do fill the gap. What threw me off was the picture in your instructions shows the milled back plate, so when it looked like the first time that the shims weren't enough, and the plate was flat instead of milled I figured that was the problem! I did get the shims in the kit.

I suggest you change the picture to show only the flat bar. When I get it assembled I'll take one for you if you want.

Are all the shims supposed to be powder coated on both sides? My eight black ones are, but the red ones are coated one side only, and the yellow ones are two on one side and two on both sides.

I would also suggest you include in the instructions a note about which shim is thickest and which is thinnest. It's not readily apparent by feel that the red are thinner than the black.

Thanks for the clarification.
 
Back
Top