• There were many reasons for the change of the site software, the biggest was security. The age of the old software also meant no server updates for certain programs. There are many benefits to the new software, one of the biggest is the mobile functionality. Ill fix up some stuff in the coming days, we'll also try to get some of the old addons back or the data imported back into the site like the garage. To create a thread or to reply with a post is basically the same as it was in the prior software. The default style of the site is light colored, but i temporarily added a darker colored style, to change you can find a link at the bottom of the site.

Dave & Teddy's Most Excellent Adventures 2012

I'm glad I jumped in at the end of this thread to read about the hitch. My dealer said they were a pain to get off (AKA Hammer Time) thus talked me out of getting one (for now). I wanted to do more research but I guess the research came to me. When I get one (I need something for my PGR flags), I will to the same - Keep the hitch off until needed.

Hey shrubs, search "flag holders" and the 1st hit will be what you want. Seems a board sponsor
ISCI has some neat ones according to that thread - without the hitch. :thumbup:
 
Please don't be misinformed by my mishap here.... This is mostly self inflicted

I'm glad I jumped in at the end of this thread to read about the hitch. My dealer said they were a pain to get off (AKA Hammer Time) thus talked me out of getting one (for now). I wanted to do more research but I guess the research came to me. When I get one (I need something for my PGR flags), I will to the same - Keep the hitch off until needed.

I agree that its not only logical but smart to only have the hitch installed when needed, as a little less weight on the Spyder can add up to potential fuel savings over many thousands of miles, plus the added benefit of not subjecting your hitch needlessly to the harsh environmental conditions when not needed.

But once a hitch is properly lubricated and installed correctly, it really shouldn't be all that hard to remove, albeit snug & yes, a hammer or some judicious wiggling may be needed:rolleyes: 
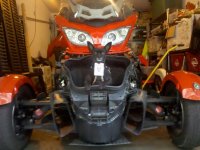
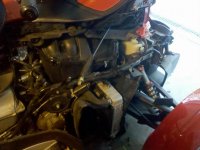
My issue here was mostly self inflicted, as I never lubricated the unit and have ridden over 34,000 miles using Teds Red Sled as our daily driver year round and in ALL weather conditions including rain, sleet, snow and even salt covered roads:shocked:
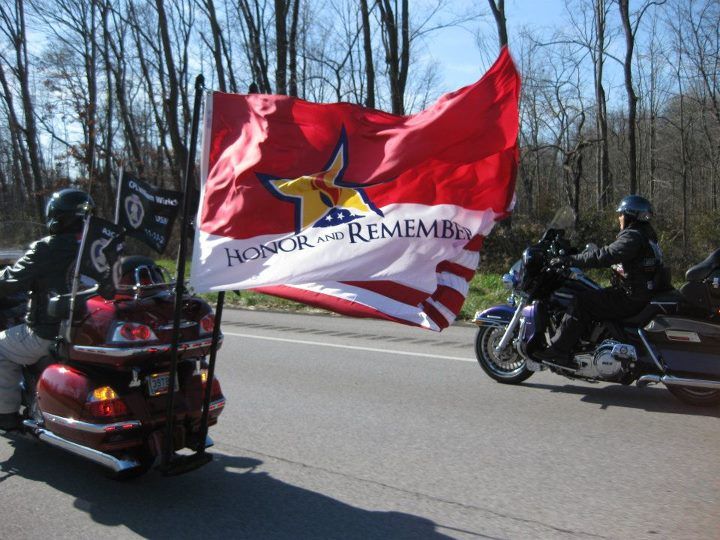
Hindsite being 20/20, I should have known to take extra precautions to protect and liberally lubricate these parts so I didn't run into this issue. Again, I'm Live'n & Learn'n alot every day, but please, don't let my error in judgment dictate or negatively skew how your experience may be.

If your just needing something for mounting flags, you may want to do a search of the forum, cause I've seen different vendors that have had some mounting brackets that didn't need to be attached to a hitch, and that could potentially save you upwords of $500 plus the cost for the needed wiring harness and installation, if you weren't going to use it for a trailer :dontknow: why spend the extra cash :shocked: save it for more farkles:2thumbs:
 
For daily use, I will use the Rumbling Pride flags - I liked how they looked on Dr. Buck's. For other times, I've got the mount to use. It's 2 6' poles to hold 3x5 flags. It will mount on just about any hitch and I've used it on my truck's Reese hitch during inclement weather.

Here's what it looked like on the back of my Wing. (Photo taken last Nov during the 3095ride in oHIo honoring the 3095 men and woman from oHIo who were lost in Viet Nam)

It should mount fine on the Spyder's hitch.

flags_zpsd4bd19fc.jpg
 

Hindsite being 20/20, I should have known to take extra precautions to protect and liberally lubricate these parts so I didn't run into this issue. Again, I'm Live'n & Learn'n alot every day, but please, don't let my error in judgment dictate or negatively skew how your experience may be.

I learned this lesson the hard way also: :shocked: It was with a Jeep Libery that I left with a hitch in the receiver for way too long! :yikes: That thing was so corroded/rusted in place that it might as well have been welded in there... We even pulled the pin , chained it to a tree, and put it in 4WD low...:yikes: Just spun four tires on the blacktop...
:gaah:
 
View attachment 53658View attachment 53657The left side end cap of the Swing Arm is nice & snug, while the right side was very loose. Anyone know if this is a major issue or no biggie, just needs to be tightened up:dontknow:
When the axle is out, the caps (and adjusters) may be loose. There is nothing to hold them in place. It is normal.

Don't overthink this. Clean things up real well, do something (like synthetic grease) to inhibit further corrosion, and put things back together. I'd pull the hitch in the winter, if the trailer isn't needed, or at least grease the bolt at both ends of the season. a good glob of grease on the nut end of the axle, around the opening before you slide on the hitch, will help keep out moisture, but you will probably cuss at it every time you take the hitch back off and have to clean it up. Don't forget that you will need to adjust and align the belt when you put the wheel back on. That is when the caps need to be snug and tight to the swingarm.
 
Thanks Doc-Riverside - He's got us covered

:bowdown::firstplace: He called me and talked me through what I needed to know :firstplace::bowdown: Thank You so much doc :thumbup::cheers::bowdown: I'm learning, slowly but surely, I'm learning ;)

Been two weeks now that Teddy & I haven't been able to ryde:yikes::(:shocked: and we're still waiting on the parts to get here from BRP, so we've still got a few more days to this insanity to endure:gaah:

You can damn well bet, once we get his Red SLed back up and rolling again, we're gonna be put'n some miles of smiles on:2thumbs: thats for sure :yes::doorag::clap:
 
They say a picture is worth a thousand words .................

:helpsmilie:
attachment.php
:helpsmilie:

:yikes:
attachment.php
:yikes:

:yikes:
attachment.php
:yikes:​
 

Attachments

  • Chew.jpg
    Chew.jpg
    64.2 KB · Views: 194
  • TeddyFrunk.jpg
    TeddyFrunk.jpg
    61.3 KB · Views: 216
  • SideSpyder.jpg
    SideSpyder.jpg
    52.8 KB · Views: 199
Last edited:
I may be getting in over my head, but once you've made the leap, no turning back now

This has grown way larger than I ever thought, but ..............

Since Teds Red Sled is up in the air anyway with us waiting on parts, I figured I might as well go ahead and do all the maintenance items that I've got the parts here for. So yesterday, when I got home from work and as witnessed by the above video, Teddy was at the front door once again and happy to greet me:yes::clap::roflblack: He's a "Hudini" what can I say:ohyea:

So I looked on the counter at all the items that have been collecting over the past few months, awaiting time for me (or dealer) to install them. But with my financial situation being what it is, the cost of dealer labor is sadly NOT an option. Knowing I have the MidWest repair manual and more importantly, help from this Awesome Community, I decided it time to go ahead and jump in head first.

Here's a list of whats going to be attempted in the next couple of days. My buddy & I have already installed the Xenon Depot HID lights, but I also have the Xenon Depot Fog Light HID replacements as well. Then from our own BajaRon, we have the front and rear brake pads that are going to need to be replaced along with the mother of all attempts for me, the dreaded PLUGS & WIRES.

The fog HIDs replacement shouldn't be a problem, since I now have prior experience from doing the headlight replacement.

The brake pads, even tho from my understanding aren't that major of a job, still gives me pause, as again, I've NEVER done them, so there's lots of unknowns, along with the possibility that I could do something wrong that I read about and it will require a Dealer Visit and hook up to BUDS. Not to mention, if I were to screw something up, we're only talking about the brakes and whats the worse that can happen :dontknow::lecturef_smilie: (Sorry, a little sarcasm there folks)

But what is really stressing me out, is the Plugs and Wires install. Even in Rons instructions, (it all seems straight forward and easy) he recommends removing the air-box to get to the front cylinder, which for an experienced wrench, I'm sure isn't a big deal. For me tho, just stripping that much tupperware off of Teds Red Sled was a BIG DEAL:shocked: Less alone, to actually know what I'm looking at:shocked:

I've got the BRP parts list on-line which does give you a very good EXPLODED VIEW of all the bits and pieces, along with the MidWest Repair Manual, but to say I'm NOT a little intimidated and overwhelmed would be a total Lie:lecturef_smilie:

But if I don't do it, it won't get done and I'll never learn. I know its important for ALL of us to know our own limitations, but until you've pushed the envelope and tried, how do you know what your limitations are?

For those out that that have done the brakes or the plugs and wire install, any tips? Are these mods that I SHOULDN'T be trying to do on my own, without having any experience or prior knowledge:dontknow::lecturef_smilie: My fear is doing more harm than good, but at 34,000 miles, the brakes DO need to be done, and even tho we've not noticed a problem with the plugs & wires, at this milage, I think it best they ARE done, wouldn't you agree?

Curious also, as I've seen a couple of threads discussing the Great Improvement of airflow by removing the AirBox completely and replacing it with an aftermarket system from one of the site Sponsors, tho I'm not sure which one. I looked on ESI's site, but there system isn't recommended for the RT, RS only. Any suggestions or advice on this subject would also be greatly appreciated by Teddy and me. As you can see in the one pic above with him in the stripped down Frunk, the lil guy is dying to go for a ryde:pray:
 
Man...... I wish I lived closer to you. I would love to get my hands on T.R.S to help you out. :rolleyes: The brakes and plugs/wires should be very similar to my videos on the RS.
 
Last edited:
Thanks Randy, I'll check them out once I get home from work today

:opps: Sad to say I've never watched them, cause I know you put alot of work into doing them:bowdown: but I figured most wouldn't be applicable to an RT :dontknow: but I'll definately check them out when I get home today :clap: Thanks again buddy :2thumbs:
 
Doc, I wasn't sure if you had experience with this or not

:rolleyes:Thanks for the heads up once again Doc & I'll get the Frunk removed later today and then, once I get ready to start digging into this project, (after watching Randy's Videos:bowdown:) I'll definately be giving you a call for some more of your sage advice and insight. Thanks once again;):bowdown:
 
spark plugs

Dave, I replaced my spark plugs and wires just recently. You don't need to remove air filter to replace spark plug. Its a bit tricky but can be done. After doing it once I think second time would be no problem. If I can help call me. I will say you will notice a difference after you install. Brakes are easy to replace. The hardest thing to do is get all that plastic off and I see you'll done that. :banghead:
 
Looks great!

Dave

The airbox removal is a task in itself but can be done (http://www.spyderlovers.com/forums/...eplaced-with-KewlMetal-Performance-Air-Intake ). Been there, done that. The replacement comes from KewlMetal (Site Sponsor). I can assist on the airbox removal project if you decide to do it. It will make replacing the right plug and wire a whole lot easier as well as getting rid of all the heat at the seat/glove box area. The hardest this about replacing the plug wire is that is a tie wrap that is well hidden. You should have taken the Frunk off so it would be easier to grease the A-Arm grease fittings and it needs to be removed if you do the airbox. The tie wrap is to the left of the plug .

View attachment 54109

Love the look and bet engine loves the fresh air, but would this be one of those things that would void warranty? Just not sure I would perform this type of mod while still having warranty.
 
If you decide to remove the entire airbox, don't forget to plug the throttle body with a shop towel before you remove the screws. If a screw goes down the intake, you are in deep so-do.
 
Take Pics!

Dave, as you work, take plenty of detailed pictures before during and after each project. You may find that they will be of great help when you're trying to remember what goes where. I also recommend you take a picture of each fastener (screw) being held in your hand next to the hole it came out of. This will help you locate the proper size and length for that location while reassembling. I did this when installing the BRP CB/intercom on my RT & was glad I did.

Also, use a muffin pan to hold your fasteners. You can keep them separated by location & will find it helpful to remember what goes where when going back together.
 
When I pull my RT apart I always have a piece of styrofoam handy. I take screws and bolts and push them into the styrofoam and then label each section specific to where I removed them from. Makes it a breeze when reassembling things. Using the camera on your cell phone before disassembly is also a great idea.
 
Thanks for the great suggestions about how to keep track of all the "Nuts N Bolts"

:banghead::opps: Too bad Teddy can't send me back in time to last week when I started all this tho :opps::banghead:

;)We managed to get the Frunk off just a few minutes ago and I can now say:thumbup:

:shocked: I've seen parts of Teds Red Sled that I thought I'd never see :shocked:

:yikes:Once I stepped back and actually took in all of what was before me:yikes:

:barf:I was actually nauseous at the site of the enormity of it all :barf:


:pray::pray:I am living and learning, thats for sure:pray: :pray:
 
Back
Top