• There were many reasons for the change of the site software, the biggest was security. The age of the old software also meant no server updates for certain programs. There are many benefits to the new software, one of the biggest is the mobile functionality. Ill fix up some stuff in the coming days, we'll also try to get some of the old addons back or the data imported back into the site like the garage. To create a thread or to reply with a post is basically the same as it was in the prior software. The default style of the site is light colored, but i temporarily added a darker colored style, to change you can find a link at the bottom of the site.

Cavman's gettin' started

Whoa Nelly! I looked up "Ancra" on the internet and it came up with several sites that showed tie down straps. :rolleyes:

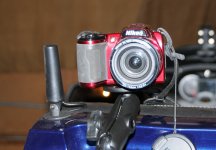
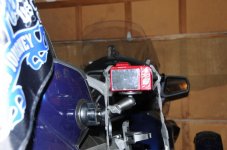
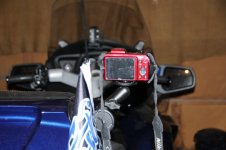
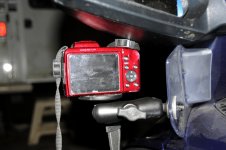
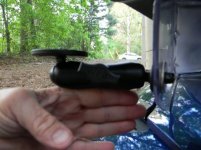
I got the rest of the Ram mount parts the USPS lost for me last week. So, now I can set up my little Nikon to shoot video with sound. It won't shoot through the windshield, so I have to hang it out in the breeze. I will secure the lens cap and strap before getting under way. Here are a few setups I came up with.
DSC_9133s.jpgDSC_9136s.jpgDSC_9142s.jpgDSC_9149s.jpg It's a 12MP camera and is light weight. It will shoot HD in I think 720 up to 29 minutes no matter what size card is in there.
In the first photo, you can see the mount for my first generation non-HD GoPro HERO cam, on the dash.
 
Whoa Nelly! I looked up "Ancra" on the internet and it came up with several sites that showed tie down straps. :rolleyes:
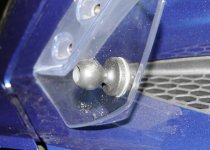
The round one is what Ancra calls their "Bolt-on Fitting Kit". It is kind of an obscure part in their aircraft line. They make lots of hardware, fittings, and starps for aircraft, trucks, and other uses.
 
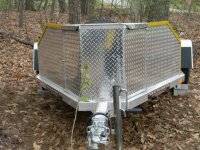
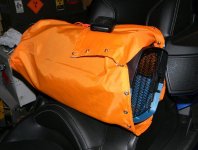
Added some yellow reflective tape to the trailer. DSCN1287s.jpgAlso I sewed up a cover bag for a pet carrier for Stumpy my ferret. Your dogs will stay put but it's in a ferrets nature not to stay put. They don't see very well so they don't see the danger of jumping from a moving Spyder. :yikes: It has a snap down end piece and it's made of nylon with a coating. It's almost a rescue orange color. It looks yellow in this photo. It will be tied to the passenger handles. Stumpy will hang out in his hammock.
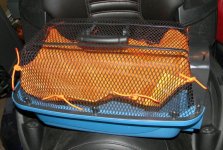
DSCN1289s.jpgDSCN1294s.jpgMade a hammock that can have something snuggy added to it for the carrier.
DSC_5037s.jpgThis is Stumpy. We may do a test drive with Stumpy in the travel loft tomorrow.
 
Last edited:
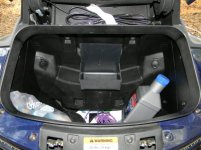
Another project I've had in mind got built and installed today.
I have had a XM Roady for a number of years. I have used it in a number of modes of transportation.
Pickup trucks, camper and boat.

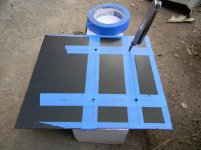
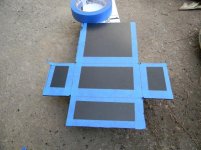
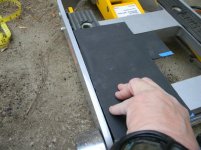
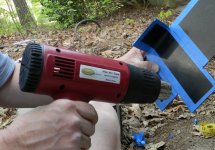
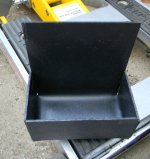
So I got some Kydex, laid out a pattern, drilled relief holes and bent it into a box shape with the help of a heat gun.
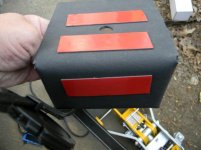
I put some HD two way foam tape on the back and a hole for access to a screw that goes inside the trunk.DSCN1312s.jpgDSCN1313s.jpgDSCN1314s.jpgThe floor jack is great for forming bends in Kydex!
 
Last edited:
DSCN1317s.jpgDSCN1321s.jpgDSCN1323s.jpgDSCN1325s.jpg
The extra at the top of the back panel, is for wrapping any extra cords to keep them out of harms way.
 
Coz, you can do a web search for Kydex. There are lots of places that sell it. I got mine from one the vendors of knife making parts some years ago.
Kydex is the plastic material that some holsters are made of. Comes in many colors.
 
I tried to make a block off out of Kydex for the heat. Didn't really work out and I didn't want to kill a cookie sheet. :opps:

So I order the kit from Spyderpops.

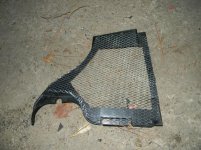
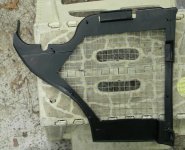
I did remove the bottom panel as instructed. There was a connector that dropped out that is part of the radiator fan circuit. Can't have that dangling. So I modified the bottom panel cause I felt there needed to be something under there to keep road stuff from hitting under there.DSCN1352s.jpgIt's aluminum screen type stuff I got from the Homo Depot. If doesn't do well, I can replace the screen with hardware cloth as it's more durable.

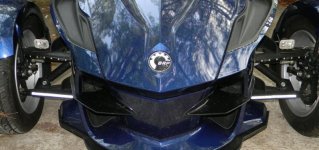
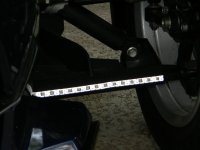
I also added some LED strips I had thought of putting on my truck. I put them on the lower 'A' arms instead. I have applied some white reflective tape to the strip for more front visibility for oncoming traffic. They are applied at a slight upward angle too.DSCN1356s.jpgDSCN1357s.jpg They are tied into the controller for some flashin' action!
 
I had ordered a yellow Halo kit from Reggy last month. I put the two rear strips on the bottom inside of the saddlebags, facing down, instead of the trailing arms. One of these strips I discovered to be defective, as it was real dim. The other single short strip I put in the gap of the frunk lid bottom. The real long strip that is supposed to go on the frame has not been installed. I'm still pondering on that one. I have a bumpskid and it's been "skidding" under there. :yikes: I don't want a LED strip to get scraped off!

I had ordered the controller kit with the Halo kit. I installed the three strips on channel #1. Wired them through the FuzeBox. Nothing happened? :shocked:
I took a bunch of photos, wrote some notes and sent this off to Reggy. He confirmed I had wired everything right. So with his suggestion, I used an alternative voltage source and check the other circuits.
I found that channel #1 was bad and all the others were fine and working. ;)

So, Reggy said he would send another controller. Got it today and sent the bad one along with the bad LED strip back to Reggy. He will be sending a replacement LED strip soon.

REGGY is da Man! :yes::yes::yes: Three cheers for Reggy! :clap::clap::clap: WooHoo! What great service!
 
Stumpy will hang out in his hammock.
View attachment 42617This is Stumpy. We may do a test drive with Stumpy in the travel loft tomorrow.

Glad to hear you are staying at the LadyBug campground. My two Beagles are anxious to meet Stumpy !

If you dont believe it, just ask that lady that runs the Alamo Motel in Maggie Valley about her cat !
 
Last edited:
Got more done

Got more done.View attachment 41092View attachment 41093View attachment 41094View attachment 41095View attachment 41096
Got the GloRyders in stalled on the wheels. I chose amber to match the fender LEDs. Caught a photo of the TricLED 'A' arm signals working. Here are my HyTeck Wally World Driving Lights. Then there is the XM antenna mounted on the trunk lid with the cable 'secured' inside the lid area. I have a Delphi Roady with the power cord with the built in FM transmitter. I'll plug this in the power connector in the trunk. Then plug in the antenna. Set the FM frequency and can listen to the XM channel I have selected on my FM stereo. Of course anyone near me can also listen to the same FM frequency.


When do you have time to Ride......:joke:


Freebob...:doorag:
 
Well FreeBob, I rode this past Sunday and the Sunday before that. ;)

This past Sunday I tried my XM radio setup. I had to get the owner's manual
out to read about programing the radio. It took several tries. I had to set the
radio on 88.1 on the FM dial to receive the signal from the power plug of
the Roady transmitting the XM signal. It worked great.
 
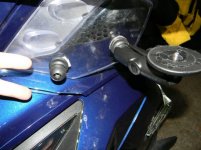
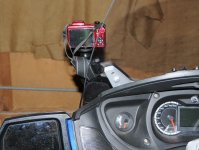
New camera mount. Well, took the advice Lamont and installed a Ram ball on the left deflector screen. My ball mount had to go on the outside since I'm using a camera.
DSC_9154s.jpgDSC_9161s.jpgI'll secure the strap and lens cover around the Ram post when getting ready to shoot HD video.
 
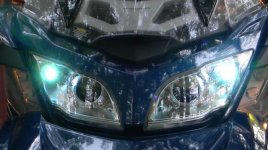
HID lights are in. I ordered a set of 35 watt HID lights from DDM Tuning. I had to talk to one of their tech guys today to do some tweaking. The left side need to have a connector reversed and the right side not.

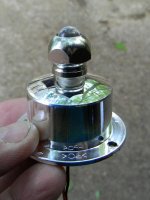
Also, I was looking at those round chrome things on the top outside of the headlight module. I understand that there are some LEDs that can go in there of $135+ a set. NOT ME!
So, I took a couple of the SuperBrightLEDs white 10mm Bolt units I had purchased some years ago and installed them in the chrome things. I connected them to my TricLED controller on a third channel. Nize!
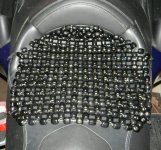
DSCN1360s.jpgDSCN1369s.jpgDSCN1372s.jpgI had also ordered on of the beaded seat cushions so I could feel like taxi driver.
 
I'm forced to move the mounting point for my camera. Still too much shake. I'm thinking that if I move the Ram Ball mount forward closer to where the wind deflector attaches to the Spyder, it may be more rigid?
DSCN1379s.jpgDSCN1375s.jpgAs you can see in the second photo, the camera platform is hanging out there. Too much leverage off the free end of the wind deflector. The anti-vibration only works on the camera in the photo mode, not video.

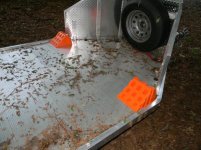
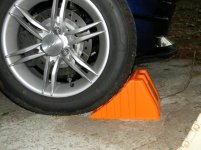
I also purchased some less expensive wheel chocks at Camping World to mount on the trailer. The others seen on this site are out of my budget at this time since I became semi-retired by my company's choice the first of February.
DSCN1383s.jpgDSCN1382s.jpg
 
I'm forced to move the mounting point for my camera. Still too much shake. I'm thinking that if I move the Ram Ball mount forward closer to where the wind deflector attaches to the Spyder, it may be more rigid?
As you can see in the second photo, the camera platform is hanging out there. Too much leverage off the free end of the wind deflector. The anti-vibration only works on the camera in the photo mode, not video.

I have experimented with various positions for mounting cams & other "stuff" and one thing I learned is: Dont Drill Any Holes ! because after a few rides you will find a better mounting place!

I never drove a Taxi so cant tell you about that, but I do love my BeadRider seat once it turns warm. It always gives you some fresh cool air where it counts, and if you get stiff on long rides, just give those beads a little side-to-side action for a nice massage!
 
Last edited:
I found that Harbour Freight had the Bad Boy air horn on sale a week or so ago, so I bought one.
$36
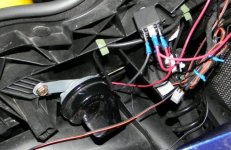
I installed the relay near the stock horn.
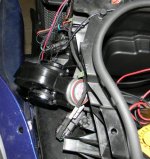
DSCN1504s.jpgThe Bad Boy, I mounted on the right side of the frunck under the tubberware.
DSCN1503s.jpgBoth horns work. The stock horn will work with the key off as normal. The Bad Boy only works with the ignition on. It is wired through the Fuze Box I got from TricLED with a 20 amp fuse. It works through the horn button, as it should. It's pretty loud and has the sound of a train.
 
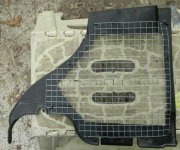
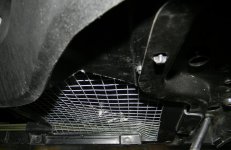
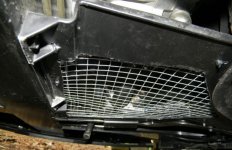
I did a re-do of the underbelly screen. Didn't like the way the aluminum mesh screen was looking. It was what I had at the time when I installed the radiator air deflector. This time I used galvanized 1/2" Hardware Cloth for the screen. It's tougher and more rigid than what was on there.
DSCN1524s.jpgDSCN1525s.jpgI attached the screen with small black zip ties. This is what it looks like installed from the underside.
DSCN1526s.jpgDSCN1529s.jpgI'm thinking plenty of air will get through but with some protection of the underbelly of the Spyder as well.
 
Last edited:
"Radiator Air Deflector" ? Are you referring to SpyderPops coverplates or have you done somthing more on routing the hot air ?
 
Back
Top