BajaRon
Well-known member
Every so often I get questioned about doing a Canister-Ectomy on the V-Twin, 998cc versions of the Spyder. So I thought I'd detail it here in the hopes that it will help someone. This process removes both the Fuel Vapor Canister and the problematic Purge Valve (one is remove, the other incapacitated.
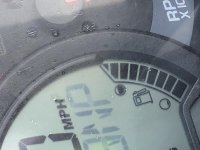
While the Evap-Fuel Vapor Canister issues were more prominent on the earlier models. 2008-2012, this general procedure will also work on the later models. Done correctly, this will eliminate all fuel smells and the potential fire hazard that these present when not functioning properly. Plus, it will eliminate any issues with filling your fuel tank all the way to the top. This can give you up to 30+ miles extended range on your 998 Spyder, depending on how you are filling it now. There is a small triangle at the top of your fuel gauge. Most have never seen it because most have never actually filled their fuel tank. It is interesting that BRP has the 'Full Mark' on the gauge and then tells you not to fill it all the way up.
Removing the vapor recovery canister system will also save you a little on maintenance costs.
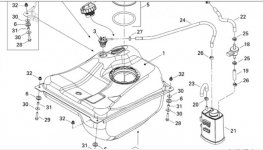
The diagram below is of the earlier 2008-2012 models. BRP made some minor modifications to this system on the 2013 and later models. But the major components are the same and the general Canister-Ectomy process applies. This is a simple and inexpensive modification.
Referring to the diagram below. Once you remove the fuel vapor recovery canister located on the right side of the Spyder, behind the Tupperware (#21), you are left with 2 hoses, (#19 & #24). Hose #23 is just a vent to outside air and goes away with the canister.
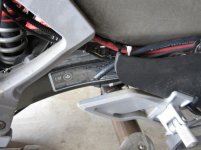
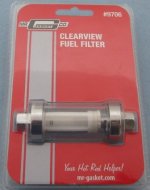
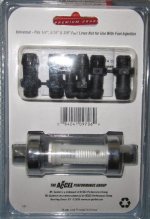
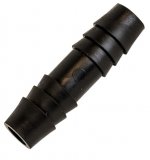
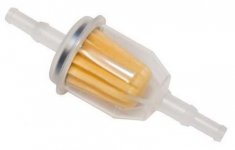
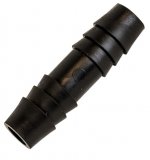
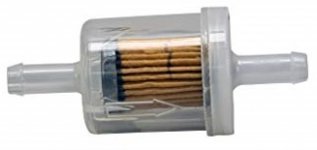
Taking care of Hose #24. This is your fuel tank vent hose, which is required. You need to route and zip tie this hose back along the right side frame to somewhere about mid rear fender. You want to route this vent hose (#3) upward from the fuel tank until it naturally begins to descend to the exit point. This will happen automatically if you follow the frame tube to the back. The existing hose is not long enough to get this far back so you will need to purchase an appropriately sized hose barb (Pictured Below) and another length of hose to extend it. These can be found at any auto parts or lawnmower shop. While you are there get a small fuel filter similar to the one pictured. I like the clear ones so you can see what is going on at the end of your vent hose, but virtually any version will do.
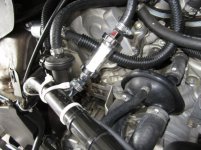
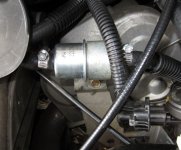
Insert the fuel filter at the end of the fuel tank vent hose you've routed to the rear of your Spyder. Mount it horizontally as pictured. This will keep any foreign substance from entering the vent hose and will also serve to give you indication if any liquid fuel is being pushed through the vent hose as it will collect at the bottom of this filter. This will tell you if you have installed the vent hose correctly. You can clamp these fittings if you like. But it is not necessary. I did not clamp any of mine. A good tight fit is more than sufficient.
Some have run this hose over the engine to the front of the Spyder, I am assuming with decent results. This may be a bit easier. However, I do not like the idea of running a fuel vapor hose over a hot engine to vent in front of the rider. If there are any fumes, or raw fuel, I would rather have it go out the back.
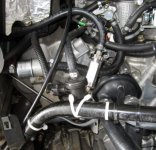
Taking care of Hose #19. This hose connects to your purge valve, (#18) and then to the intake side of your engine via hose (#22). There are a number of ways you can deal with this. I've found it easiest to simply put an appropriately sized, 1/2 long or so, bolt with some silicone sealer into hose (#19) leaving the rest of the system in place. But whatever you do, you will need to seal this system so no air can enter, either before or after the Purge Valve (#18). I recommend simply leaving the purge valve in and plugging the hose on the intake side. Do not leave this hose open no matter which way you intend to complete this portion of the removal process.
As always. You can hover you mouse pointer over a picture and it will enlarge for better detail.
While the Evap-Fuel Vapor Canister issues were more prominent on the earlier models. 2008-2012, this general procedure will also work on the later models. Done correctly, this will eliminate all fuel smells and the potential fire hazard that these present when not functioning properly. Plus, it will eliminate any issues with filling your fuel tank all the way to the top. This can give you up to 30+ miles extended range on your 998 Spyder, depending on how you are filling it now. There is a small triangle at the top of your fuel gauge. Most have never seen it because most have never actually filled their fuel tank. It is interesting that BRP has the 'Full Mark' on the gauge and then tells you not to fill it all the way up.
Removing the vapor recovery canister system will also save you a little on maintenance costs.
The diagram below is of the earlier 2008-2012 models. BRP made some minor modifications to this system on the 2013 and later models. But the major components are the same and the general Canister-Ectomy process applies. This is a simple and inexpensive modification.
Referring to the diagram below. Once you remove the fuel vapor recovery canister located on the right side of the Spyder, behind the Tupperware (#21), you are left with 2 hoses, (#19 & #24). Hose #23 is just a vent to outside air and goes away with the canister.
Taking care of Hose #24. This is your fuel tank vent hose, which is required. You need to route and zip tie this hose back along the right side frame to somewhere about mid rear fender. You want to route this vent hose (#3) upward from the fuel tank until it naturally begins to descend to the exit point. This will happen automatically if you follow the frame tube to the back. The existing hose is not long enough to get this far back so you will need to purchase an appropriately sized hose barb (Pictured Below) and another length of hose to extend it. These can be found at any auto parts or lawnmower shop. While you are there get a small fuel filter similar to the one pictured. I like the clear ones so you can see what is going on at the end of your vent hose, but virtually any version will do.
Insert the fuel filter at the end of the fuel tank vent hose you've routed to the rear of your Spyder. Mount it horizontally as pictured. This will keep any foreign substance from entering the vent hose and will also serve to give you indication if any liquid fuel is being pushed through the vent hose as it will collect at the bottom of this filter. This will tell you if you have installed the vent hose correctly. You can clamp these fittings if you like. But it is not necessary. I did not clamp any of mine. A good tight fit is more than sufficient.
Some have run this hose over the engine to the front of the Spyder, I am assuming with decent results. This may be a bit easier. However, I do not like the idea of running a fuel vapor hose over a hot engine to vent in front of the rider. If there are any fumes, or raw fuel, I would rather have it go out the back.


Taking care of Hose #19. This hose connects to your purge valve, (#18) and then to the intake side of your engine via hose (#22). There are a number of ways you can deal with this. I've found it easiest to simply put an appropriately sized, 1/2 long or so, bolt with some silicone sealer into hose (#19) leaving the rest of the system in place. But whatever you do, you will need to seal this system so no air can enter, either before or after the Purge Valve (#18). I recommend simply leaving the purge valve in and plugging the hose on the intake side. Do not leave this hose open no matter which way you intend to complete this portion of the removal process.
As always. You can hover you mouse pointer over a picture and it will enlarge for better detail.

Last edited:

