• There were many reasons for the change of the site software, the biggest was security. The age of the old software also meant no server updates for certain programs. There are many benefits to the new software, one of the biggest is the mobile functionality. Ill fix up some stuff in the coming days, we'll also try to get some of the old addons back or the data imported back into the site like the garage. To create a thread or to reply with a post is basically the same as it was in the prior software. The default style of the site is light colored, but i temporarily added a darker colored style, to change you can find a link at the bottom of the site.

BajaRon Shock Adjuster install

Screwed

That sounded good but I'm screwed too. I just bought a new 2014 RTL also. Thanks for thinking of me though. Are you going to put Elka's on the new machine?


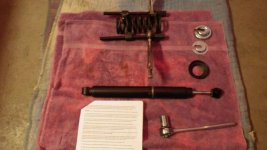
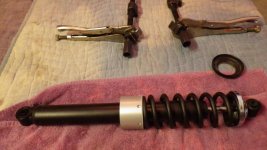
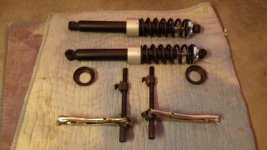
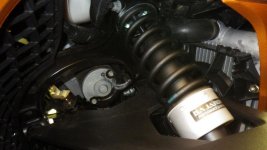
What exactly do the shock extensions do to improve the ride and sway? I'm always looking to improve the ride and handling but like to know why and how before writing the check. Secondly how long does this job take. How ever long it takes it will take me twice as long so I'm just wondering what to expect.[/QU Hello: Utah Old Geezer The elka shocks help a lot in cornnering, also they stop a lot of wandering in the wind, over all the make for a lot more enjoyable ride. What year and model do you have? I have a set of elka stage 1+3 I Kept off my 2012 RT, when I traded for a new 2014. They have 6000 miles on them, like new. Cost 799.00 I would sell for 600.00 Shipped anywhere in U.S. My Phone # is 636 357 6423 Thanks PS. I am 78years young, It took me less than 30 min. to take them off. Very easy Job, By the way I am selling because they will not work on 2014, one inch too short.
 
Hi all. Just finished installing suspension units. Noticed mentioned in earlier posts assistance was needed lifting wheel so button of shock could be refitted. I found by removing the wheel life all the sudden became so much easier. More room to move around and was a simple task refitting bottom fixing bolt.
 
What does it take to install Ron's adjusters? I've never taken the springs off before.

Floor jack, I assume? Any Tupperware removal? How difficult a job?

Any advice for us non-technical DIY'ers?
 
Last edited:
Next Mod????

Shock adjusters are the next mod. Not sure which one of the three choices I'll go with. Could there be much difference once dialed in???

Kaos
 
I stayed with Silver , and didn't add the decals...
They look like an excellent OEM piece, and the Missus never even noticed them! :ohyea::ohyea::ohyea:
 
Hello All,
We installed the shock adjusters last week and really like the way they improved the ride. Without even cranking them up it raised the front of the Spyder 3/4 of an inch. Meg and I will start cranking them up 1 turn at a time to see how much difference it will make. So far with these and the sway bar we both really enjoy the way the Spyder handles. Less sway and lean and did not compromise the smooth ride of the Spyder.

attachment.php
attachment.php
attachment.php
attachment.php


These are the sockets we used to change the shocks. The right one is a socket on a breaker bar. We used this instead of the offset wrench Ron mentions in his detailed instructions. It worked so well we placed the nut in the socket on the breaker bar and was able to get the nut back on the bolt by the radiator hose, and this without any sticky tape. That is the hardest part of the install, getting that nut back on with the radiator hose blocking your view. But the socket worked great and we had both back in less then a minute (and no four letter words were uttered!). Meg did have to lift the bottom of each wheel like the instructions state to get the bottom shock bolt back in.

Be cautious when releasing the spring compressors. I had no issues compressing the springs, but rushed the releasing of one spring after both retainers were back on the top of the shock. I was rewarded by the compressor sliding around to the other side of the shock and cocking the spring. Had to release both compressors and recompress the spring to straighten out the spring. You must use a wrench to hold the lower compressor from spinning off like the instructions state!

Do yourself a favor, get the compressors Ron had specially machined for the job. My McPherson shock spring compressors would not fit between the shock and the spring. The Spyder has tiny little springs (but can still kill you if you do not respect them while compressed).

All in all it was an easy job that anybody can tackle. They look cool and work great. We look forward to loading up the frunk for trips and not having to worry about the front end bottoming out.


Great pictures! Glad you like the Adjusters. The install isn't all that difficult. Just takes a bit of time. But it's something that you'll only need to do once. As you point out, the ease of adjustment to weight loading makes it really nice.

I would mention that you should not have gotten a 3/4" lift from just installing these adjusters. If you had them zeroed or at the lowest setting they should give you pretty much the same ride height as stock.

Lifting the Spyder and setting it back down will usually raise the front of the Spyder. And the shock coil spring/adjuster assembly will need to settle in after the install. I beleive this is what is giving you the 3/4" initial lift. Riding for a few miles will let everything settle in and you should then have about the same or just slightly more lift than stock.

Yes Ron, You are correct. After driving the suspension settled in. We just kept increasing the spring tension 1 turn at a time then test riding. We found 3 turns works for us (2 Up). When we drove to the Spyder Clutter event we had the frunk suitcase packed solid and never bottomed out driving on some pretty crappy roads on the way there.

At the event, it was noticeable that our Spyder was riding a little higher in the front when parked next to other Spyders. On some of the twisties, We noticed most Spyders could not corner as well and keep up with us. I think without the excessive body lean, it becomes easier to go around turns faster and safer. :ohyea:

Most people travel with their RT loaded. After all. that it what all that trunk space is for! If you measure the ground clearance at the nose of your Spyder empty and then again with it loaded you'll see that you lose quite a bit of the already low amount of ground clearance. Then you add 2 riders and you lose even more.

Just being able to maintain that original ride height when loaded is a real advantage. Handling does also improve as the coil springs are not overwhelmed.

I hope you get many great miles of enjoyment from your shock adjusters! :thumbup:
 
Just installed - front shock adjusters

The install was very easy and Ron's directions were "great" as normal. I also got a few hints from SpyderCruiser - very helpful - thanks! :bowdown:

I have not rode the bike with them installed other than to set them in and have an initial setting. Now the fun begins to tune them in.... :D:D:D

I think they are very well made and install was pretty easy. Biggest issue is the top shock bolts...tough area to reassemble. I did the right side really quickly, but the left side was an issue for me. So......I used Ron's directions about the nut to the backside and it worked well...saved me a lot of work!

I have a pic of the tools used - 15mm....I took SpyderCruiser's advice on the breaker bar with socket - worked great! I used a ratchet box end wrench as well. If you have the tools, makes the job go so much easier!! :thumbup:

BTW - Ron's coil spring compressors are well worth it - easy to use - worked well! :thumbup: HINT: I used vice grips to help stabilize the spring compressor when tightening - no problem - worked great and is a good way to keep your hands away from the coil!!

We have 20,000+ miles on our 2014 RT Limited - awesome bike - now onto the next 20,000!

Here's a few pics:
 

Attachments

  • IMGP1301.jpg
    IMGP1301.jpg
    40.3 KB · Views: 255
  • IMGP1303.jpg
    IMGP1303.jpg
    49.6 KB · Views: 237
  • IMGP1306.jpg
    IMGP1306.jpg
    41.8 KB · Views: 245
  • IMGP1310.jpg
    IMGP1310.jpg
    42 KB · Views: 155
  • IMGP1314.jpg
    IMGP1314.jpg
    39.5 KB · Views: 249
Last edited:
The install was very easy and Ron's directions were "great" as normal. I also got a few hints from SpyderCruiser - very helpful - thanks! :bowdown:

I have not rode the bike with them installed other than to set them in and have an initial setting. Now the fun begins to tune them in.... :D:D:D

I think they are very well made and install was pretty easy. Biggest issue is the top shock bolts...tough area to reassemble. I did the right side really quickly, but the left side was an issue for me. So......I used Ron's directions about the nut to the backside and it worked well...saved me a lot of work!

I have a pic of the tools used - 15mm....I took SpyderCruiser's advice on the breaker bar with socket - worked great! I used a ratchet box end wrench as well. If you have the tools, makes the job go so much easier!! :thumbup:

BTW - Ron's coil spring compressors are well worth it - easy to use - worked well! :thumbup: HINT: I used vice grips to help stabilize the spring compressor when tightening - no problem - worked great and is a good way to keep your hands away from the coil!!

We have 20,000+ miles on our 2014 RT Limited - awesome bike - now onto the next 20,000!

Here's a few pics:

Your welcome, You are going to Love the ride!:ohyea:
 
Finished the installation here too. First time I haven't had to remove a bunch of plastic to do the job.

Followed SpyderCruiser's recommendation to use a breaker bar and socket, with one slight modification. I placed two strips of electrical tape across from each other inside the socket just to make sure the nut didn't fall out. Otherwise, other than working mostly blind, installing the upper bolt was easier than removing it in the first place.

I also placed two layers of electrical tape on the inside of the spanner wrench at the handle end to prevent it from marring the surface of the adjuster.

The rest of the job was fairly straight forward.
 
Last edited:
Finished the installation here too. First time I haven't had to remove a bunch of plastic to do the job.

Followed SpyderCruiser's recommendation to use a breaker bar and socket, with one slight modification. I placed two strips of electrical tape across from each other inside the socket just to make sure the nut didn't fall out. Otherwise, other than working mostly blind, installing the upper bolt was easier than removing it in the first place.

I also placed two layers of electrical tape on the inside of the spanner wrench at the handle end to prevent it from marring the surface of the adjuster.

The rest of the job was fairly straight forward.

That's is a good trick with the electrical tape, forgot about that one. You are going to love the ride. :)
 
Back
Top