So what is the difference between this and say a spring rubber or spacer?
The results between coil spring spacers and adjustable pre-load devices are similar, but accomplished in a different way. There are advantages and disadvantages to any of the systems I've listed below.
These systems are designed to add compression (Pre-Load) to the coil spring making it act like a stronger spring. Springs are rated in the number of pounds required to compress or shorten the spring 1 inch. If you have a 200 lb. spring, for example, it will take 200 pounds of force for every inch it is compressed, 400 lbs. to compress it 2 inches and so on.
A Spyder has 2 of these springs on the front (2 wheels, 2 shocks, 2 springs) so you double the force needed to compress both springs 1 inch.
But on the Spyder, it's not that simple. Surely you didn't think this was going to be easy!

The additional kicker here is that the shocks on the Spyder are not vertical, but laid over at an angle. This means that 1" of travel on the shock translates to much more than 1" of travel (Up and Down) on your Spyder. For example. A vehicle with the shocks tilted at a 45 degree angle will allow 2 inches of vehicle movement (up or down) for every inch of shock movement.
As you know, the Spyder (especially the RT models) do not come with a great deal of road clearance to start with. Add a bump, a driveway entrance ramp, hard braking or turning (especially while braking), and you can be adding hundreds of pounds of down force to the front of your Spyder. Again, to compensate in this hypothetical situation, the front springs will need to be compressed an additional 1 inch for every 400 lbs. of additional weight. And, because the shocks are at an angle, this will translate into more than 1 inch of ground clearance loss. This is why it may seem easy to get front end contact with the road surface on bumps or a driveway entrance.
So, this is the
'WHY' of the question. And if you have not given up on me yet, here are some of the
'HOW' examples of aftermarket solutions and (I hope) the answer to your original question.
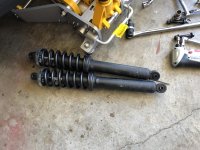
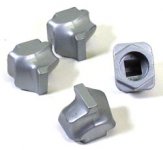
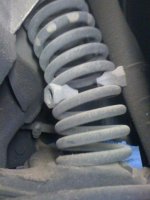
Twist In Knuckles provide additional lift by increasing the space between spring coils. These are installed as the name suggests. By twisting them in-between coils with a ratchet type wrench. This is most easily achieved by raising the Spyder until the wheel is off the ground giving you the biggest gap between the coils.
The coil or coils in contact with the knuckle are rendered inactive because they are no longer able to be compressed. This acts to increase compression on the remaining active coils and provides additional lift. Typically, you will add the number of knuckles required to maintain the desired ride height when your maximum load is applied. Adjustability is achieved by adding or removing knuckle(s). You must have the same number of knuckles, preferably placed in the same location, on each spring.
 Rubber Inserts
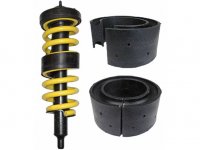
 work very similar to the twist in knuckles. They also separate and incapacitate 1 or more coils which increases compression and loading on the remaining active coils giving you additional lift. Unlike the twist in knuckles, rubber inserts spread the load on the contact coils over a much larger area. They can also be harder to install. Adjustability and amount of added lift are determined by the width of the insert and how many inserts you install. Again, you must use the same size and number of inserts on both shocks, preferably in the same location on the spring on both sides.
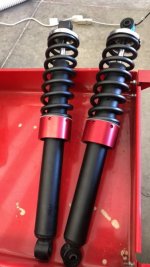
 Threaded Shock Pre-Load Adjusters
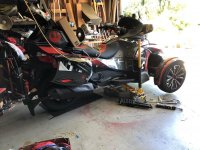
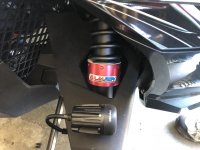
 are the product I carry. Though they look different than the example below, they work and function in the exact same way. Shock Pre-Load Adjusters provide a similar increase in carrying capacity as the Spring Inserts shown above. But this is accomplished in a different way.
Cam Type Pre-Load Adjusters. Originally, all Spyder models came with Cam Type adjusters. But BRP determined they were no longer needed in 2013 (though the upgrade Fox Podium shocks offered by BRP do have pre-load adjusters).
View attachment 163444
Cam Adjusters on the original Spyders were made of pot metal and could be broken if adjustment was made with the Spyder on the ground. It was recommended that you jack up the front of the Spyder until the wheels were off the ground before making any adjustments. This pretty much eliminated any convenience intended by the designers. BRP later changed these to a higher quality steel part, and the breakage problem was solved.
With Cam Adjusters you usually get 5 settings. And it can be difficult to get to the higher settings due to the increasing spring force you need to overcome. You need to have both cam adjusters set to the same detente on each side.
Threaded Adjusters are a much better way to go and are the industry standard for higher end shocks. These use a spanner wrench much like the Cam Adjusters. But because the increments of increase are much less than with a Cam Adjuster, threaded adjusters are much easier to manipulate. You do need to be sure each adjuster is turned the same amount in the same direction on both front shocks. Threaded adjusters are infinitely adjustable and settings are easily changed to fit the need. More compression when you are fully loaded, riding 2-up etc. And less compression when lightly loaded with no passenger.
View attachment 163442
There you have it! All in the biggest nutshell you every saw! Hope it helps.

