PW2013STL
Active member
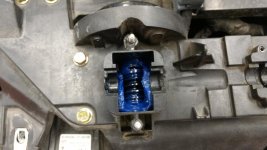
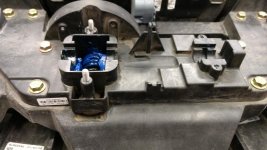
I dicided to powder coat the windshield brackets Black to better display my etched windshield , and since it will be appart to also replace the stock control arm with Ron's (Noboot) machined arm. Having read on here about all the problems with snapping the heads off the philips screws. That I needed to apply heat, or as Mike (Bluenight911) recommended use a impact screwdriver. Due to the low heat that my pencil iron puts out I went with the impact screwdriver. It worked fine on the lower screw, but on the upper one the head snapped off.
Since it was a clean flat break I proceeded to drill it out. Sadley that resulded in part of the screw body breaking off at an angle. I then dilled a hole next to the protuding part of the screw. My plan was to heat up the screw by appling heat from a punch that I heated with my torch to red hot and then grab the hot screw with my needle nose vice grips and turn the screw out. That did not work so I grabed my dremal with a very small grinding tip, and proceeded to grind the screw body flat again. Once I acheved that I tried drilling it out again. This was working well until the drill bit shapped off inside the screw. At this point I said to myself #%$#it and placed the dremal tip on the screw and held it there until smoke started to rise from the tip area.
Turn out that the screw got so hot it melted it's way deeper. This allowed me to cut off the head of a stainless 1/4" bolt and with the help of some JB weld make a stud. I put a small amount of JB weld into the hole with the bolt and then place the cover back on with a nut on the bold to keep it aligned. Once set I then fill up the hole with more JB weld. I also drilled and tapped the other side and made that a stud as well.
If I ever did another Spyder I would purchase a cheap plilips screwdriver and place it in the screw head and than heat up the screwdriver with a torch while appling turning force until I was able to remove the screw.
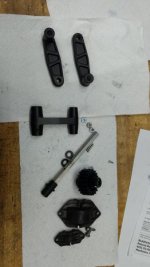
TIP - when putting on Rons arm make sure the side markd with "top" is facing the Spyder when assembled.
Since it was a clean flat break I proceeded to drill it out. Sadley that resulded in part of the screw body breaking off at an angle. I then dilled a hole next to the protuding part of the screw. My plan was to heat up the screw by appling heat from a punch that I heated with my torch to red hot and then grab the hot screw with my needle nose vice grips and turn the screw out. That did not work so I grabed my dremal with a very small grinding tip, and proceeded to grind the screw body flat again. Once I acheved that I tried drilling it out again. This was working well until the drill bit shapped off inside the screw. At this point I said to myself #%$#it and placed the dremal tip on the screw and held it there until smoke started to rise from the tip area.
Turn out that the screw got so hot it melted it's way deeper. This allowed me to cut off the head of a stainless 1/4" bolt and with the help of some JB weld make a stud. I put a small amount of JB weld into the hole with the bolt and then place the cover back on with a nut on the bold to keep it aligned. Once set I then fill up the hole with more JB weld. I also drilled and tapped the other side and made that a stud as well.
If I ever did another Spyder I would purchase a cheap plilips screwdriver and place it in the screw head and than heat up the screwdriver with a torch while appling turning force until I was able to remove the screw.
TIP - when putting on Rons arm make sure the side markd with "top" is facing the Spyder when assembled.