• There were many reasons for the change of the site software, the biggest was security. The age of the old software also meant no server updates for certain programs. There are many benefits to the new software, one of the biggest is the mobile functionality. Ill fix up some stuff in the coming days, we'll also try to get some of the old addons back or the data imported back into the site like the garage. To create a thread or to reply with a post is basically the same as it was in the prior software. The default style of the site is light colored, but i temporarily added a darker colored style, to change you can find a link at the bottom of the site.

Adding aPower Port

ca8920

New member
I decided to add a power port to the left panel of the F3. Upon looking through the forum posts, I found a couple of reference to the addition, but no photos. Sooooo, for you that like to get in there and play with things here are some pics. It's really easy once you know what to look for.

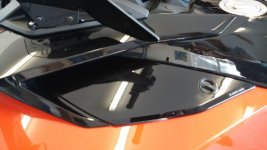
Left Panel:

attachment.php


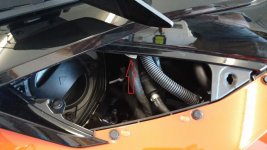
Opening the left panel, you will find several bundles of wires. As it turns out the bundle that I thought I was going to use, was not the correct bundle. In one of the forum posts I read a statement that there were three after market wire bundles for customer accessories and they were labeled for the Customer. When I opened the left panel and started looking around in earnest, I found the wire bundle I thought I was going to use, did not have any labels. The forum post I'd read stated Can Am did a pretty good job of hiding the bundle in the left panel so I got out my flashlight and had a look see. At the top of the panel, tucked, in under a wire bundle, I found the wires labeled for customer accessories. I've added a red arrow so they're easier to see.


attachment.php


This customer accessory wire bundle is wrapped in black clothe tape and tucked up nice and tight, zip tied in place to a larger wire bundle. I was able to pull one end of the wire bundle loose but had to cut a zip tie for full access. After getting the wires loose, I removed the black clothe tape with a utility knife, careful cost me a bandaged finger tip, exposing the wires.

attachment.php


I had ordered a Car, Boat, Motorcycle 12v USB outlet port off or Amazon. This is the one I ordered, but there are tons of them out there in differing configurations.

http://www.amazon.com/gp/product/B00W3W6AMU?psc=1&redirect=true&ref_=oh_aui_detailpage_o06_s00

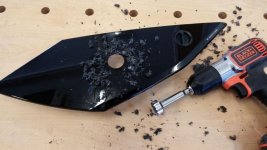
After finding the wires, mounting the outlet was simple. I marked the mounting location with a sharpie then drilled a 1-1/8" hole in the panel with a Forstner bit. BTW, I tested the fit of the hole on a piece of cardboard before I actually drilled the panel. Measure twice or something like that.

attachment.php


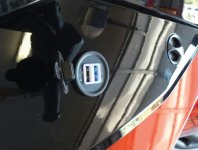
After cutting the hole, it was a simple matter to fit everything together and crimp the wire connecters on the wires. One bit of advice, look at the power port for the + and - . I looked at the posts, one brass and one silver. Having done some house wiring in the past, I naturally thought the hot wire went to the brass post and the neutral went to the silver post. I ended up wiring it backwards. I guess they don't adhere to the US wiring standards in China because when I actually looked at the power port, I found the silver post was labeled + . Of course the power port didn't come with instructions, but what do you want for $10.00.

End result, it works just great. I started the engine, plugged my phone in and it started charging immediately.

attachment.php


Happy Camper :doorag: :spyder2:
 

Attachments

  • Wires.jpg
    Wires.jpg
    47.7 KB · Views: 847
  • Works.jpg
    Works.jpg
    46.6 KB · Views: 850
  • Left Panel.jpg
    Left Panel.jpg
    37.5 KB · Views: 863
  • Drilled Hole.jpg
    Drilled Hole.jpg
    44.2 KB · Views: 838
  • Wires Exposed.jpg
    Wires Exposed.jpg
    38.4 KB · Views: 863
OUCH...!

DRILLING HOLES, isn't that a mortal sin or something.....?

here's my solution to adding USB Ports.... a CROSS-MEMBER between the windshield supports.
attachment.php
attachment.php

jmho of course....
dp
 

Attachments

  • 20150309_153119.jpg
    20150309_153119.jpg
    40.4 KB · Views: 813
  • 20150309_153254.jpg
    20150309_153254.jpg
    30.8 KB · Views: 810
Thats great. Pictures help a ton. For now I just did it the old way. I use my battery charger tender and plug a USB converter and run it out the back of the frunk and up through the handlebars and to a ram mount. Since the F3 is so open it is easy and quick to do. If I need to charge the battery I just take the USB converter off.
 
Proud of you !

You found the correct bundle, even though you had very little information to go on. You had the balls to drill into your beautiful motorcycle and 99 percent of Can Am owners have never had the anus clenching experience of drilling your precious bike. So, be proud of yourself. Two thumbs up.
 
Living in a country that sees some rain I needed something that was really 100% waterproof...
That's what I came up with...


uploadfromtaptalk1437887962384.jpguploadfromtaptalk1437887975975.jpg
 
Great write-up and pictures! The only thing I would add to it is to make sure the location of the outlet in the panel has clearance on the backside. Don't want it sitting on top of the stuff right below the panel.


Sent from my iPhone using Tapatalk
 
OUTSTANDING, and yes, I am shouting. :yes:

Great job, gotta love Forstner bits.

I decided to add a power port to the left panel of the F3. Upon looking through the forum posts, I found a couple of reference to the addition, but no photos. Sooooo, for you that like to get in there and play with things here are some pics. It's really easy once you know what to look for.

Left Panel:

attachment.php


Opening the left panel, you will find several bundles of wires. As it turns out the bundle that I thought I was going to use, was not the correct bundle. In one of the forum posts I read a statement that there were three after market wire bundles for customer accessories and they were labeled for the Customer. When I opened the left panel and started looking around in earnest, I found the wire bundle I thought I was going to use, did not have any labels. The forum post I'd read stated Can Am did a pretty good job of hiding the bundle in the left panel so I got out my flashlight and had a look see. At the top of the panel, tucked, in under a wire bundle, I found the wires labeled for customer accessories. I've added a red arrow so they're easier to see.


attachment.php


This customer accessory wire bundle is wrapped in black clothe tape and tucked up nice and tight, zip tied in place to a larger wire bundle. I was able to pull one end of the wire bundle loose but had to cut a zip tie for full access. After getting the wires loose, I removed the black clothe tape with a utility knife, careful cost me a bandaged finger tip, exposing the wires.

attachment.php


I had ordered a Car, Boat, Motorcycle 12v USB outlet port off or Amazon. This is the one I ordered, but there are tons of them out there in differing configurations.

http://www.amazon.com/gp/product/B00W3W6AMU?psc=1&redirect=true&ref_=oh_aui_detailpage_o06_s00

After finding the wires, mounting the outlet was simple. I marked the mounting location with a sharpie then drilled a 1-1/8" hole in the panel with a Forstner bit. BTW, I tested the fit of the hole on a piece of cardboard before I actually drilled the panel. Measure twice or something like that.

attachment.php


After cutting the hole, it was a simple matter to fit everything together and crimp the wire connecters on the wires. One bit of advice, look at the power port for the + and - . I looked at the posts, one brass and one silver. Having done some house wiring in the past, I naturally thought the hot wire went to the brass post and the neutral went to the silver post. I ended up wiring it backwards. I guess they don't adhere to the US wiring standards in China because when I actually looked at the power port, I found the silver post was labeled + . Of course the power port didn't come with instructions, but what do you want for $10.00.

End result, it works just great. I started the engine, plugged my phone in and it started charging immediately.

attachment.php


Happy Camper :doorag: :spyder2:
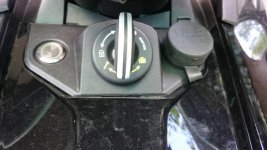
 
Good job!

Good job, I did the same thing on mine. Very easy process and it works like a champ!

I decided to add a power port to the left panel of the F3. Upon looking through the forum posts, I found a couple of reference to the addition, but no photos. Sooooo, for you that like to get in there and play with things here are some pics. It's really easy once you know what to look for.

Left Panel:

attachment.php


Opening the left panel, you will find several bundles of wires. As it turns out the bundle that I thought I was going to use, was not the correct bundle. In one of the forum posts I read a statement that there were three after market wire bundles for customer accessories and they were labeled for the Customer. When I opened the left panel and started looking around in earnest, I found the wire bundle I thought I was going to use, did not have any labels. The forum post I'd read stated Can Am did a pretty good job of hiding the bundle in the left panel so I got out my flashlight and had a look see. At the top of the panel, tucked, in under a wire bundle, I found the wires labeled for customer accessories. I've added a red arrow so they're easier to see.


attachment.php


This customer accessory wire bundle is wrapped in black clothe tape and tucked up nice and tight, zip tied in place to a larger wire bundle. I was able to pull one end of the wire bundle loose but had to cut a zip tie for full access. After getting the wires loose, I removed the black clothe tape with a utility knife, careful cost me a bandaged finger tip, exposing the wires.

attachment.php


I had ordered a Car, Boat, Motorcycle 12v USB outlet port off or Amazon. This is the one I ordered, but there are tons of them out there in differing configurations.

http://www.amazon.com/gp/product/B00W3W6AMU?psc=1&redirect=true&ref_=oh_aui_detailpage_o06_s00

After finding the wires, mounting the outlet was simple. I marked the mounting location with a sharpie then drilled a 1-1/8" hole in the panel with a Forstner bit. BTW, I tested the fit of the hole on a piece of cardboard before I actually drilled the panel. Measure twice or something like that.

attachment.php


After cutting the hole, it was a simple matter to fit everything together and crimp the wire connecters on the wires. One bit of advice, look at the power port for the + and - . I looked at the posts, one brass and one silver. Having done some house wiring in the past, I naturally thought the hot wire went to the brass post and the neutral went to the silver post. I ended up wiring it backwards. I guess they don't adhere to the US wiring standards in China because when I actually looked at the power port, I found the silver post was labeled + . Of course the power port didn't come with instructions, but what do you want for $10.00.

End result, it works just great. I started the engine, plugged my phone in and it started charging immediately.

attachment.php


Happy Camper :doorag: :spyder2:
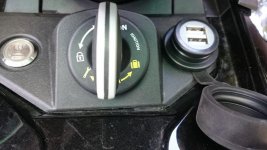
 
looks great, Kinda did the same thing only I put a 12V marine lighter in that spot and did the usb under the rear seat from BRP
then run a short jumper cord out the side with two plugins . I use one for my phone and the other for Sena charging on long trips.
This works great and keeps things dry in the rain. My phone goes in the t bag strapped to the rear seat and it has a rain cover. Then everything
works with the GPS and head set that are water proof Jim
 
I sure was happy to find this post. I was digging around in there knowing I was about to really screw things up. Once I saw the tag I was good to go.


Thanks,
Tommy
 
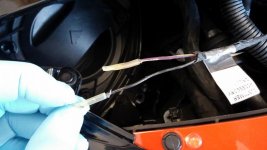
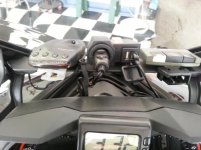
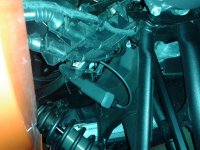
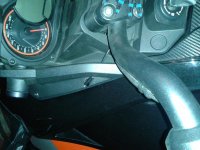
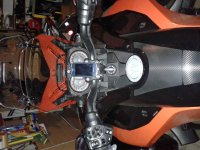
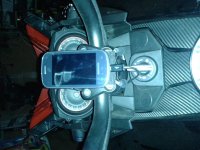
I just put one of these on the end of my battery tender and plugged my phone charger to it and fed it up through the steering wheel. The F3 is so open it was easy to do. I did not want to drill a hole through my panel if I did not have to. If I need to put it on tender I just unplug the USB charger.


$_35.JPG


Can you take pictures showing this process step by step? ;) Also what does the end product look like when it's fed up through the steering?
 
here is what it looks like. I run the battery tender out of the back of the frunk connect the usb converter and then feed my phone charger cord down through the steering wheel. When I don’t have my phone charging I just tuck the cord under the railing. my ram mount is actually turned upside down and squeezed onto the handlebar center piece. Sorry dont know why they came out sideways
attachment.php
attachment.php
attachment.php
attachment.php
 

Attachments

  • spyder powerport 1.jpg
    spyder powerport 1.jpg
    71.6 KB · Views: 330
  • spyder powerport 2.jpg
    spyder powerport 2.jpg
    66.4 KB · Views: 332
  • spyder powerport 3.jpg
    spyder powerport 3.jpg
    72.6 KB · Views: 332
  • spyder powerport 4.jpg
    spyder powerport 4.jpg
    69.7 KB · Views: 330
Back
Top