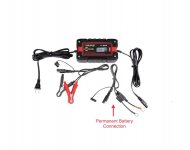
I used a Viking 4 amp Battery Charger/Maintainer from Harbor Freight.
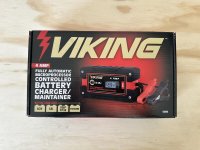
The included cable noted below is the one used for a permanent install. The other end allows for quick connect and disconnect of the charger/maintainer.
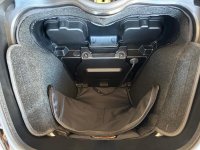
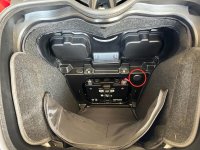
Open the frunk and unzip the interior lining to expose the battery access panel. The picture below already has the pigtail installed because I didn’t take a picture before I started.
View attachment 208036
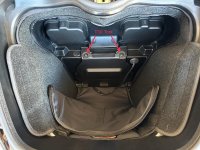
Unscrew the two T30 Torx screws allowing you to remove the battery access panel.
View attachment 208037
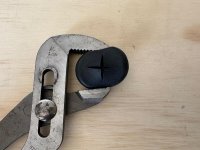
After pulling out the rubber plug, use a utility knife to cut a “plus” in the center of the plug.
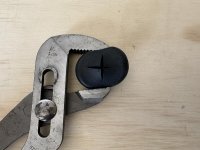
Route the pigtail (quick connect end) from the battery compartment area through the hole into the frunk compartment. Slide the quick connect through the “plus” in the rubber plug and reinstall the plug.
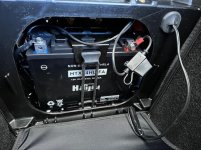
My battery uses either a 10mm or Phillips head screwdriver for connection at the battery terminals. Remove the negative terminal screw and disconnect the negative cable. Be careful not to drop the screw inside the battery compartment. Recovering the screw could be a challenge and prolong the install process. Remove the positive terminal screw (being careful not to drop) and connect the positive lead of the pigtail with the positive cable. Reinstall positive terminal screw. Connect the negative lead of the pigtail with the negative cable and reinstall the negative terminal screw.
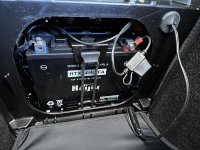
Reinstall the battery access panel and tighten the two T30 Torx screws.
Zip up the frunk interior lining and you’re done. Easy access to the quick connect when you want to use your battery charger/maintainer. It’s inside the frunk protected from the elements and still separated from your frunk cargo.
View attachment 208039

The included cable noted below is the one used for a permanent install. The other end allows for quick connect and disconnect of the charger/maintainer.

Open the frunk and unzip the interior lining to expose the battery access panel. The picture below already has the pigtail installed because I didn’t take a picture before I started.
View attachment 208036
Unscrew the two T30 Torx screws allowing you to remove the battery access panel.
View attachment 208037
After pulling out the rubber plug, use a utility knife to cut a “plus” in the center of the plug.


Route the pigtail (quick connect end) from the battery compartment area through the hole into the frunk compartment. Slide the quick connect through the “plus” in the rubber plug and reinstall the plug.
My battery uses either a 10mm or Phillips head screwdriver for connection at the battery terminals. Remove the negative terminal screw and disconnect the negative cable. Be careful not to drop the screw inside the battery compartment. Recovering the screw could be a challenge and prolong the install process. Remove the positive terminal screw (being careful not to drop) and connect the positive lead of the pigtail with the positive cable. Reinstall positive terminal screw. Connect the negative lead of the pigtail with the negative cable and reinstall the negative terminal screw.

Reinstall the battery access panel and tighten the two T30 Torx screws.
Zip up the frunk interior lining and you’re done. Easy access to the quick connect when you want to use your battery charger/maintainer. It’s inside the frunk protected from the elements and still separated from your frunk cargo.
View attachment 208039
Last edited by a moderator:

