• There were many reasons for the change of the site software, the biggest was security. The age of the old software also meant no server updates for certain programs. There are many benefits to the new software, one of the biggest is the mobile functionality. Ill fix up some stuff in the coming days, we'll also try to get some of the old addons back or the data imported back into the site like the garage. To create a thread or to reply with a post is basically the same as it was in the prior software. The default style of the site is light colored, but i temporarily added a darker colored style, to change you can find a link at the bottom of the site.

2008 Spyder GS SM5 Restoration

The plan this weekend was to get the spyder running. First task was to get the fuel pump into the fuel tank. What a hard thing to do! You have to devise a way to compress the fuel pump into the tank enough to put on the ring that holds the pump down. The fat oring that comes with the installation kit makes it extremely difficult. I ended up using a scissor jack placed between the fuel pump and my upper cabinets in the garage. Worked like a charm! Only thought of this after about an hour trying to push the fuel pump into the tank. Sorry no pictures of that setup, I was just to irritated to grab one. Main thing is that I got the pump in. I also installed the fuel tank into the spyder without any further problems.
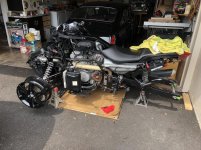
2018-04-01 14.32.27.jpg

Next was to perform a canistorectomy. The previous owner started to do it, but didn't finish. I bought that metal fuel filter and 4 feet of 5/16" fuel hose. Finished it up in a lickitysplit.
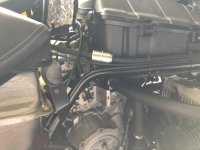
2018-04-01 14.34.58.jpg

I found the fiberglass heat wrap that was hiding in one of my cabinets so I decided to wrap the header that runs along the left side of the spyder. I didn't have enough stainless steel tie straps, so I ordered some.
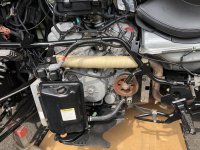
2018-04-01 14.32.36.jpg

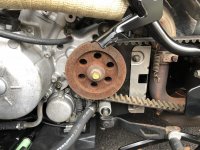
I also took a closer picture of the pulley and the surface rust. I rubbed my finger over it and no red dust came off of it.
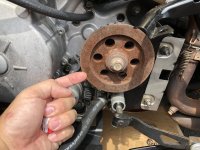
2018-04-01 14.32.56.jpg

Lastly, I installed a new seat cover. I really didn't like the diamond pattern upholstery so I took it off. The original vinyl under the upholstered cover was in decent shape, but I decided not to run it like that cause it wasn't up to my standards. Here is the new cover installed. Just need some time for the wrinkles to go away.
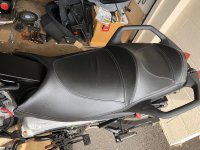
2018-04-01 14.33.22.jpg

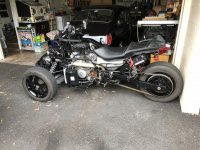
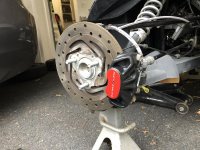
I also picked up the wheel from powder coat on Friday afternoon. I had to send back two of the wheels because they missed the inside corners, which were pretty visible. I should've taken pictures of it, but forgot. You can see a picture of the good rim in the first picture of this post.

On Sunday morning, my goal was accomplished. I filled the fuel tank with about 1.5 gallons of gas and started her up. On the first crank she fired up and came to life! No misfire, temps were good, everything seemed to work fine. Then a check engine light came on. I'll have to pull up that code to see what it is. The spyder did however run very nice. Very smooth and responsive. I think I forgot to tighten the O2 sensor, so I hope that wasn't the reason why the check engine light came on. The brake failure message came on, but that was to be expected since I didn't have any brake fluid in the system at the time of startup. Still waiting for the caliper rebuild that i'll be doing soon. Turns out, the calipers are the same as the rear caliper on a riot or revolt ATV. However, I think it only replaces the right caliper since they use one caliper in the back.
 
Last edited:
Good stuff S/S. You need to retorque that drive pulley bolt as it has no X marked on it, which was supposed to be done as the result of a service bulletin to explain pulley/shaft failure due to insufficient torque applied at factory. Do it to 110ftlb and it'll be good to go forever (unlike the F3).
 
Got the rims back and put the tires on. The belt was next to be installed. With the wheels off the ground, I set the belt tension to about 120lbs as measured on the dayco belt tension measurement tool. With the spyder on the ground, the tension reads about 160lbs. Is that correct? Upon recommendation by Freddy, I torqued the front pulley bolt to 110 and put an X on it using a yellow grease pencil. I pulled the codes and found that it was due to a disconnected oxygen sensor. I tightened up the oxygen sensor and made sure the connection at the plug was tight. Turned the engine back on and viola, check engine light gone. Also installed the bar risers and handles back onto the spyder. So much easier to turn the spyder now, before I was just using a towel over the powder coated top panel. :roflblack: The stainless steel zip ties also came in so those were installed over the ends of the header wrap. Once I finish the brake calipers within the next week or so, i'll be test riding the spyder. Crossing my fingers!:2thumbs:

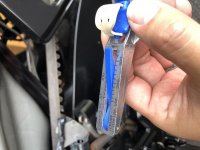
Picture showing the Dayco belt tension measurement tool with the 160lb reading.
2018-04-07 16.48.29.jpg

Restored wheels all satin black. Should contrast well with the burnt orange paint scheme that I'll be painting.
2018-04-07 16.41.09.jpg

Little hard to see the grease pencil X on the pulley bolt.
2018-04-07 16.46.49.jpg

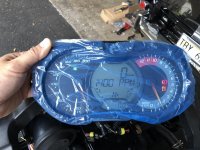
No Check Engine Light on anymore! Don't mind the blue protective sticker. I had to buy a new case for the gauges since the original ones looked like it was melted, burnt, and all foggy.
2018-04-07 17.04.57.jpg
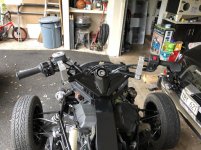
View of the bar risers and handle bars installed. I have to do something about the clutch master/reservoir. My gotta make it look nice OCD is kicking in. It looks so ugly, but it works well.:gaah:
2018-04-07 16.41.30.jpg
 
It'll be so clean & pristine you won't want to go out in the rain. Great job. ( although I'm not too enamoured of the risers)
 
Not sure if it's been mentioned but check out threads for 'oil catch can' for the airbox, where oil eventually accumulates then leaks over the engine making a mess. There are a couple of solutions. :cheers:
 
Oldgoat - Those risers came with the bike. The previous owner cut up the OEM handle bars to install those so there was no way for me to reverse the add-on without spending money to buy new handle bars. BOOOOOO

Freddy - I did read a bunch of threads on that issue. I'm waiting for some 11mm hose to come in so that I can install my oil filtration device that was recommended by one of the threads. Not sure if you can see in the pictures, but i'm missing the hose that goes from the valve cover to the airbox. I disconnected it to try and install the device, but the hose I had was the wrong size. No one in Hawaii has the 11mm hose in stock so I had to order it from ebay.
 
I started disassembly of the brake calipers and found the seals and the pistons to be in great shape! No scratches or rust on the piston and the seals look brand new. I gotta say that the front calipers sucked to disassemble. The pistons were a pain in the ass to get out, especially on the side where the yellow plugs are at. You need a special tool to remove those yellow anodized plugs to get to the piston themselves. Luckily I was able to remove all pistons with some creativity.

Got my small blast cabinet setup and blasted the brake calipers. They cleaned up real nice with the garnet media. Now I just have to paint them, which i'll be doing either tonight or the weekend. Once these are on, i'll be able to bleed the brakes and do a test run.

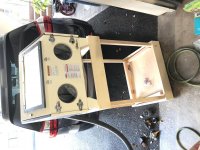
Bought this blast cabinet cheap on Amazon with free shipping to Hawaii! Made a wooden stand/shelf with leftover wood in an afternoon and started blasting the next day.
2018-04-10 18.31.15.jpg

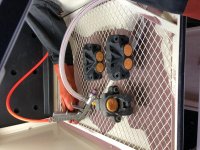
Brake calipers all masked up and ready to be blasted. Don't worry, I plugged up the bleed screw and brake hose holes before blasting.
2018-04-10 18.25.20.jpg
 
Sorry I haven't updated in a while, but have been frustrated with bleeding the brake system. So far, I still have a very soft pedal that goes almost all the way to its limit. The last inch or so of stroke has a very firm pedal. Next thing i'm going to try is pressure bleeding the brakes. Hopefully this forces out any air in the system. Going to build the contraption as shown in this link:

http://faculty.ccp.edu/faculty/dreed/Campingart/jettatech/bleeder/index.htm

Its a good thing I have extra brake master cylinder reservoir caps that I can use for this build.

I'll grab pics of the calipers as finished and me bleeding them. Hopefully it works!
 
A vacuum pump bleeder can make bleeding the brakes easier. Also if you have air in the abs module, you will need to have it hooked to a computer with BUDS on it to bleed that system.
 
Finally got the brakes bled, have a nice firm pedal, and got rid of the "Brake Failure" message, all without using buds. I tried using a vacuum bleeder, but that didn't work out so well. I used the pressure bleeder setup that I made from the link I previously posted and it worked great! In order to fully bleed the front calipers, you really have to take the calipers off and move them up on the disc so that the bleeder is at the very highest point. Even with the pressure bleeder, I couldn't get a firm pedal until I did this.

I test rode the spyder, finally, and it stops great from 20mph. I didn't want to take it out on the street yet since there's a cop that is always pulling over people speeding on the main drag. After i'm done with painting and registering the trike, i'll go faster and try to activate the abs. Then i'll bleed it one more time to see if any air comes out.

I'm also almost ready to shoot some primer on all the panels that will be getting color paint. I'd say i'm about a month or so from being complete with the build. Getting there!

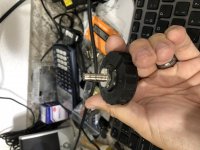
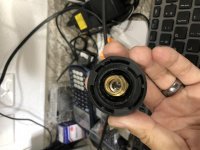
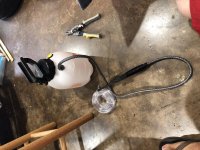
When you make this cap, make sure you use some epoxy to create a nice seal inside the cap. There is a breather channel inside the cap that must be filled with the epoxy. I used the rubber seal that is in the cap and cut out the middle so that the brake fluid can flow. You can see it in the second picture.
2018-04-28 10.26.13.jpg

2018-04-28 10.25.58.jpg

2018-04-28 10.26.26.jpg

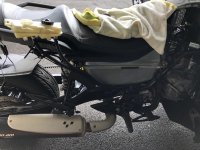
This picture shows how I elevated the brake fluid reservoir to remove the slight kink in the lines going to the master cylinder.
2018-04-28 15.54.08.jpg

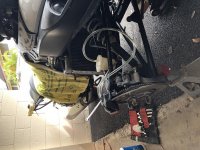
This one shows the caliper moved further up on the brake disc so that the bleed screw is at the highest point of the caliper.
2018-04-28 15.53.48.jpg
 
I just noticed yesterday that while riding the spyder, the headlights weren't on. They did turn on before, but now nothing. I can hear the headlight relay turn on, but don't know what else to check other than the connections and the blubs, which I have already done. Any recommendations on what else to check? Is there some secret menu setting on the cluster that I may have missed?
 
Tough one

I just noticed yesterday that while riding the spyder, the headlights weren't on. They did turn on before, but now nothing. I can hear the headlight relay turn on, but don't know what else to check other than the connections and the blubs, which I have already done. Any recommendations on what else to check? Is there some secret menu setting on the cluster that I may have missed?

Looking at wiring diagram it appears that if the relay clicks you should be good. Have you pulled the relay and tested for +12V on the switched contacts? I don't know if there is a diagram on the relay showing what the pinout is. I'd start there and work your way through the wiring.

Do all the other lights come on when you turn the key? How about the high beam flapper thing, do you get the relay click for that too? I would assume the wiring goes through the same branch of the harness.
 
Thanks for your input. I did not test the relay inputs. I'll give that a go. The high beam flapper thing is working because I hear a much louder click from the headlight when I push the high beam button. I don't have the turn signals plugged in yet, but I guess I can easily check those. The tail light does turn on when the bike is on and the brake light comes on when I push the brakes. Hopefully its just a problem with the relay...
 
Back
Top