Now i'm working on my brake system and need to go through my calipers. Does anyone have any experience with rebuilding the caliper? Where do I buy the seals? What special tool is needed to remove the yellow anodized pieces from the back of the caliper? Do those yellow anodized pieces need to be removed to rebuild it? Any information would be helpful since I did not see any information in the service manual.
-
There were many reasons for the change of the site software, the biggest was security. The age of the old software also meant no server updates for certain programs. There are many benefits to the new software, one of the biggest is the mobile functionality. Ill fix up some stuff in the coming days, we'll also try to get some of the old addons back or the data imported back into the site like the garage. To create a thread or to reply with a post is basically the same as it was in the prior software. The default style of the site is light colored, but i temporarily added a darker colored style, to change you can find a link at the bottom of the site.
You are using an out of date browser. It may not display this or other websites correctly.
You should upgrade or use an alternative browser.
You should upgrade or use an alternative browser.
2008 Spyder GS SM5 Restoration
- Thread starter supersuk
- Start date
Finally able to update something. I picked up all of the powder coated parts, minus the wheels, today. I didn't have any time to take pictures of everything yet, but will be posting it tomorrow. I'm hoping to have everything assembled again by the end of next weekend. I haven't been working on the body panels yet since i've been working on some other stuff. Just wanted to let everyone know that this project isn't dead and i'm not dead...yet.
Here are some pictures of the parts after I brought them home from the powder coater. Sure looks pretty. I only opened up the parts that will be assembled soon so more pictures of all the parts will be shown as I install them. In total, I was able to pick up 41 parts. I'm still waiting for the rims and one front fender brace. I really like how the textured parts came out. In hindsight, I should've made the rider and passenger foot rest assemblies textured instead of semi-gloss black.
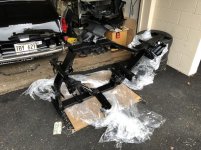
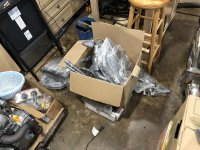
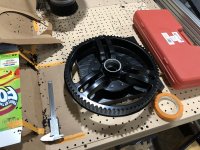
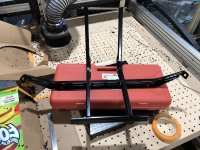


This 5 pictures per post sucks... Last night I was able to start the assembly of the brake system and front suspension. These components were really easy to install since I kept them in large sub assemblies that would be ready to install. I purchased new stainless brake lines since the existing was badly corroded on all steel parts. The Arms, spindles, and rotors literally took me 10 minutes per side to install. Next on the list for tomorrow is the swingarm and electrical wiring install. I think these two components will take me the longest. I don't have access to a press so i'll have to find a way to install the swingarm bearings without damaging them. I do have a large C-clamp that could be used for this, but we'll see if it can be used. As for the wiring harness, I foresee days of work installing it. Definitely not going to be a fun weekend...
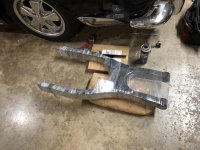


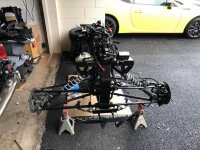
This weekend I was able to assemble almost every mechanical and electrical things on the spyder. I wish I took pictures of the engine installation process, but it was super easy and literally took about 15 minutes. Used my friends engine hoist to install it easily. Before installing the engine, I made sure to check the valve clearances on the engine and replaced the valve cover gaskets. Sucks that you need all kinds of special tools just to do this type of maintenance.
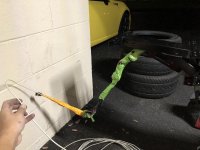
I had thought the wiring harness was going to be tough to pull through the frame because of its size and the sheer number of connectors, but after removing some of the connectors and taping up the harness, it was easy to pull through. Of course I had to use a solid core copper fishing wire to help pull it. Now i'm just waiting for the wheels to be finished and my lazy ass to start on the bodywork. Cleaning, sanding, and prepping all of these plastic panels suck! Onto the pictures.
Pulling wiring harness through the frame.
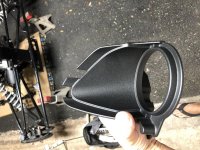
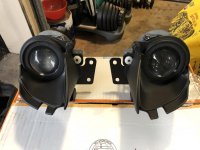
Installing the projector lights
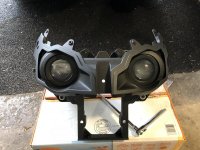
Small bits and pieces installed
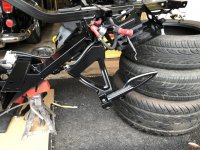
The foot pegs were all frozen and could be retracted. Also didn't like the silver, so the only thing to do is rebuild them and powder coat it semi-gloss black.
I had thought the wiring harness was going to be tough to pull through the frame because of its size and the sheer number of connectors, but after removing some of the connectors and taping up the harness, it was easy to pull through. Of course I had to use a solid core copper fishing wire to help pull it. Now i'm just waiting for the wheels to be finished and my lazy ass to start on the bodywork. Cleaning, sanding, and prepping all of these plastic panels suck! Onto the pictures.
Pulling wiring harness through the frame.

Installing the projector lights


Small bits and pieces installed

The foot pegs were all frozen and could be retracted. Also didn't like the silver, so the only thing to do is rebuild them and powder coat it semi-gloss black.

Last edited:
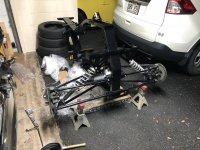
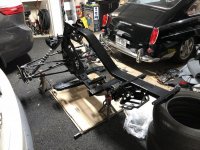
Starting to position the wiring harness back to where its supposed to be to prepare for the engine installation
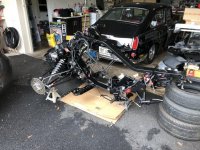
Trunk, headlights, and fog lights installed.
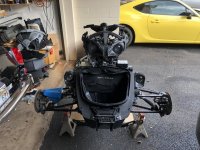
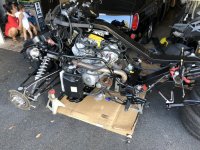
Engine installed. I'll be installing the header wrap on the left side header as recommended by spyderlover members. I just have to find the wrap that I have stored somewhere in the garage. hahaha

Trunk, headlights, and fog lights installed.

Engine installed. I'll be installing the header wrap on the left side header as recommended by spyderlover members. I just have to find the wrap that I have stored somewhere in the garage. hahaha

Last edited:
Supersuk, Excellent write up so far, for those of us substantially less mechanically inclined it is great following your adventure, please do keep the updates coming.
Looking forward to what your new creation will finally be. Curious, if you're pulling the rear swing arm, would you just clean and repaint it, or would you powdercoat it?
Agree with this. Mad respect from a guy that can barely tell a screwdriver from a wrench! No pride in that comment either!
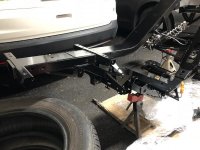
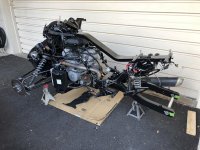
Glad to keep ya'll entertained! If you guys want to see anything in particular, let me know and i'll get some pics. The swing arm went on last night. I should've installed the swing arm before installing the rider foot pegs. There are access holes in the foot pegs to get to the bolts and nuts, but it just would've been easier. The exhaust was a little difficult to install, but nothing a rubber mallet can't do! Just had to hammer the y-pipe onto the headers because it was so damn tight. Those goldwing exhaust gaskets should give me a nice seal. Its going to be a little while before I start to install more stuff because i'm waiting for the wheels to be powder coated.

Last edited:
JerryB
New member
Hi supersuk,
Re: If you guys want to see anything in particular, let me know and i'll get some pics.
I would like to see you relocate that rear jack stand. That is not the best place place for it. Move it slightly forward to where the frame of the swing arm is & you will be OK.
Jerry Baumchen
Re: If you guys want to see anything in particular, let me know and i'll get some pics.
I would like to see you relocate that rear jack stand. That is not the best place place for it. Move it slightly forward to where the frame of the swing arm is & you will be OK.
Jerry Baumchen
Big Arm
New member
.....:lecturef_smilie:......Not Goldwing......Install Honda 18392-MAM-000 gaskets on both sides
JerryB - The jack stand is directly under the shock mounting point. Shouldn't be a problem there since there isn't much load. Can't be more than 150-200lbs of down force. There's no side load and i'm not worried about anything bending there due to down forces. If there was a large side load then i'd be worried, but since there can't be any side load (unless someone pushes it really hard), not concerned.
BigArm - I did get the part number that you referenced. The forum post that I was looking at said those were from a goldwing.
cptjam - I can remove it, but I don't want to because if I remove that bolt, i'll have to replace it. Not concerned about the surface rust because there is no pitting. I can easily just put on a coat of KBS rust seal to prevent any further corrosion. It sticks well to the surface rust because it gives the paint something to hold onto.
DGoeBel - Right now its so clean, you can wipe your finger all around and not have any grease or oil on it. However, because its stored outside, there is some dust. Nothing an air compressor can't handle.
Last night I rummaged through all the parts I had a tried to look for something to install. I found the rear seat handle assembly and installed it. This one is a new piece because the old one was all faded and scratched up. Just wouldn't have looked nice once everything was painted and/or cleaned up. Also put on the front skid pad and the belly pans right behind the radiator and oil cooler. I remember someone said that I didn't need to install the belly pans, but I figure since the factory put it there, then it was put there for a reason. Its been on for 30k miles, why not 70k more. :dontknow:
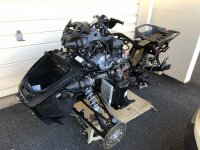

Last night I rummaged through all the parts I had a tried to look for something to install. I found the rear seat handle assembly and installed it. This one is a new piece because the old one was all faded and scratched up. Just wouldn't have looked nice once everything was painted and/or cleaned up. Also put on the front skid pad and the belly pans right behind the radiator and oil cooler. I remember someone said that I didn't need to install the belly pans, but I figure since the factory put it there, then it was put there for a reason. Its been on for 30k miles, why not 70k more. :dontknow:

Similar threads
- Replies
- 5
- Views
- 1K
- Replies
- 7
- Views
- 2K
- Replies
- 51
- Views
- 6K
- Replies
- 3
- Views
- 516
