OK, here's the details. First, you have to disassemble the right handlebar controls:
1) Remove the tiny piece of rubber covering the "blank" where the cruise control switch is supposed to be. Not sure how to do it since mine fell off on it's own. I suppose you just pull on it.
2) Remove the silver Torx 10 bolt that was behind the rubber boot. You can now pry the plastic switch blank off of the white 2-sided tape. You will notice the clear plastic LED indicators are hidden under the double-sided tape, so all the LEDs for the Cruise Control system are intact too!
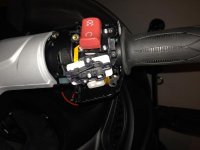
DISCLAIMER: I have a 2014 RS. I can not vouch for the earlier years. If you do not see the dummy switch inside that looks like the below picture after you remove the Blank, then you might not want to proceed further.
3) Remove the four black bolts in the rear of the assembly with a Hex/Allen #3 wrench. The middle interior bolt goes into metal and is important in that it prevents the entire assembly from rotating with the throttle, so the factory used some loctite, so when all is done, it's probably a good idea to reapply loctite.
4) After removing the rear black plastic cover, you will see two gold bolts w/ washers. Removed those with a Hex #3. This separates the front assembly from the handlebar.
5) Looking into the interior of the front assembly, remove the five BLACK Torx 10 bolts. Do not remove the SILVER Torx 10 bolts, it is not necessary. There is also another Torx 8 bolt on the outside of the plastic shell which needs to be removed. After removing all of these, the front plastic cover will separate from the interior electric module.
6) Undo the three silver Torx 10 bolts that mount the black plastic dummy switch to the white rubber circuit board.
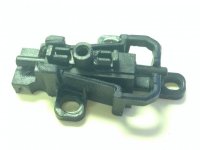
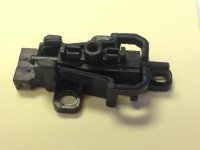
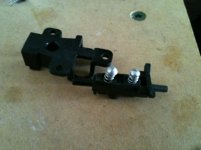
This is how the dummy switch assembly should look after removal:
View attachment 90222
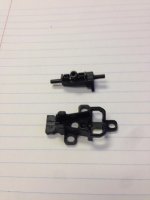
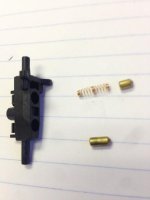
Now carefully pry each shaft end out of the base to separate the 2 pieces. Remember, be careful. From what I currently understand, you can not buy ANY of these components separately, they only sell you the entire handlebar assembly, which is over $200 for non-cruise & over $400 for cruise.
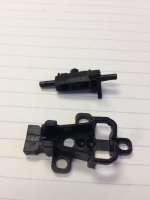
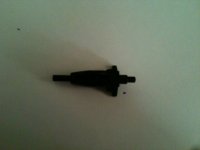
Here's what they look like separately. From what I can tell, only the top piece is slightly modified from the real cruise control switches in the RS-S+ models.
View attachment 90223View attachment 90224
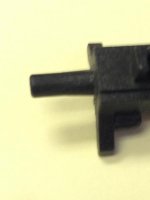
Now the major change by the factory is that they thickened the base part of the right shaft preventing the switch from being able to slide to the right to activate the cruise control. I was too excited when I started this project, so I don't have any before pictures of the dummy switch. All pictures I am showing you are after I shaved the shaft down. I used a box cutter and slowly shaved down the shaft. It's actually fairly easy to do. I don't normally have a ton of patience for these things, but I did take a few minutes to shave a little bit at a time. Too much and it's game over. Get it as smooth as possible so the switch glides and rotates easily in the base. Here's a close-up of my handy work:
View attachment 90227
Now, when you put the dummy switch back in it's mount, it should freely slide left to right and when it's in the right-most position (cruise control activate), it should be able to rotate up and down for the Accel/Resume & Decel/Set buttons.
Cruise Control Off:
View attachment 90222
Cruise Control On:
View attachment 90228
