TheMariner
Well-known member
Hi Everyone,
Part 1.
OK, it was time I looked at replacing the Fuel Filter on my 2017 Spyder F3-S. Prior reading alerted me to the fact it's not an easy item to replace because of where it's tucked-in just below the handlebar riser on the RHS of the Spyder... you have to remove all the plastic panels (except for the Frunk) as well as the seats, mirrors and the Instrument Cluster Panel to uncover the filter. Even the panels on the LHS of the Spyder have to come off so you have access to (2) screws at the top of the Fuel Tank cover.
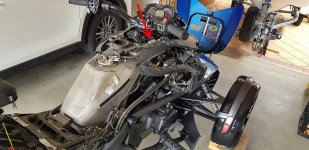
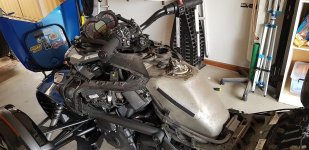
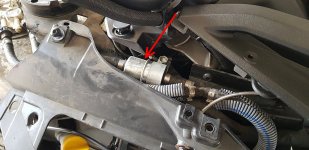
Now, the rearmost ends of the Upper Panels are clipped to the Fuel Tank Cover using hidden clips. These are only plastic clips so treat them with extreme care or else you'll break them. Watch this short video on YouTube for help on releasing those clips:
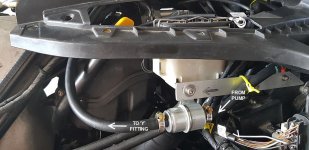
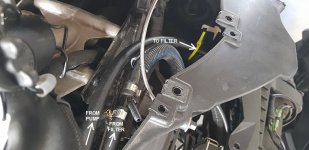
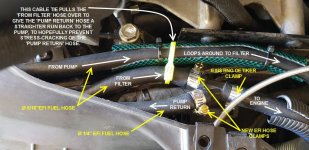
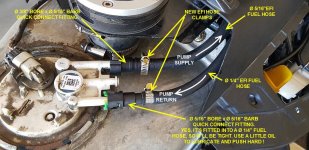
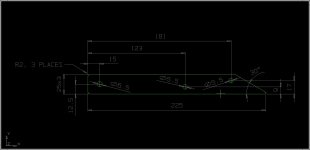
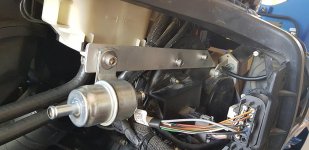
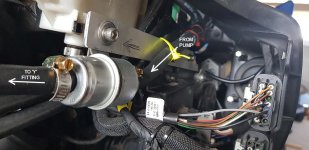
It was at this point I decided there was no way I was going to fit a maintenance item back into the same impossible location, so I started looking to where else I could fit it, so I made a bracket from 25x3 Aluminium flat and mounted the Filter alongside and just below the Brake Fluid Reservoir. I had to get creative with the new Fuel Hoses (the return hose needed replacing anyway, coz the end had started to stress-crack), and rather than write a wordy explanation, I'll let these marked-up pictures tell the story, with Part 2 in the next post:
Part 1.
OK, it was time I looked at replacing the Fuel Filter on my 2017 Spyder F3-S. Prior reading alerted me to the fact it's not an easy item to replace because of where it's tucked-in just below the handlebar riser on the RHS of the Spyder... you have to remove all the plastic panels (except for the Frunk) as well as the seats, mirrors and the Instrument Cluster Panel to uncover the filter. Even the panels on the LHS of the Spyder have to come off so you have access to (2) screws at the top of the Fuel Tank cover.


Now, the rearmost ends of the Upper Panels are clipped to the Fuel Tank Cover using hidden clips. These are only plastic clips so treat them with extreme care or else you'll break them. Watch this short video on YouTube for help on releasing those clips:
It was at this point I decided there was no way I was going to fit a maintenance item back into the same impossible location, so I started looking to where else I could fit it, so I made a bracket from 25x3 Aluminium flat and mounted the Filter alongside and just below the Brake Fluid Reservoir. I had to get creative with the new Fuel Hoses (the return hose needed replacing anyway, coz the end had started to stress-crack), and rather than write a wordy explanation, I'll let these marked-up pictures tell the story, with Part 2 in the next post:


Last edited:

