• There were many reasons for the change of the site software, the biggest was security. The age of the old software also meant no server updates for certain programs. There are many benefits to the new software, one of the biggest is the mobile functionality. Ill fix up some stuff in the coming days, we'll also try to get some of the old addons back or the data imported back into the site like the garage. To create a thread or to reply with a post is basically the same as it was in the prior software. The default style of the site is light colored, but i temporarily added a darker colored style, to change you can find a link at the bottom of the site.

XKGlow LEDs

Flamewinger

New member
I got the 6 pods and 2 strips and haven't got a clue how to get the pods into the front air intakes.

Any ideas, suggestions or videos on how to install colored LED's on an RT?

Thanks
 
The LED's

I got the 6 pods and 2 strips and haven't got a clue how to get the pods into the front air intakes.

Any ideas, suggestions or videos on how to install colored LED's on an RT?

Thanks
I would try and assist - could you post PICs of them ...........Mike :thumbup:
 
Try this

On his site...click lighting...click on your item...click see details and under product discription there are full installation app and mounting instructions that you can click on...:dontknow:didn't go there but did you..?
 
You know where you the lights the question is more how much Tupperware you going to remove to mount:dontknow:. The instructions are accurate enough have you testested the lights & controller? https://www.dropbox.com/s/2cye6674t14h6gp/KS-MOTO-NEW.pdf?dl=0 the rest is just removing tupperware & or grills, make sure to clean surfaces properly & let dry:lecturef_smilie: don't know if you will have to remove the frunk, should be avoidable may need something to help snake the wire around it.
 
Last edited:
I had them on my STL intakes. You need to go to the xk glow website and get different length extensions and Ys... to daisy chain them where ever you want to. You have to sit down and think up a plan first to design what you want to do. There are endless ways to do it.You have to be creative as to where you want the lights and how to run the wire to hide it. .some places you may even need to drill holes to have just the right place for a zip tie. Its sort of like wiring your house on a smaller scale. Caution though, your basic kit is very insufficient. Sit back and think about where you want to light up and then figure out how to git it done. Then order what you need to get it done. I pulled the whole setup off my ST and have it in a box.Im going to install them on my wifes Harley soon.
 
The Phone app has a store built right in to it. It is a good project for the winter time when you can tinker with it.
On my intake I think I had a Y that went into it and just used the scotch double sided tape to stick it where it looked the best. You dont want to see the light source, just the glow from it. Keep in mind where the connections are to make regular maintenance not complicated and away from moving parts.
 
Last edited:
That stuff they give to wrap the connections was no good. Go to an autoparts store and ask for the good electrical tape for those kinds of connections. Try to keep all conections as waterproof as you can.
 
The instructions show a diagram for basic motorcycles. My main question was how to get a pod inside the front air intakes. I will see about extensions. Thanks AY4B. We're in for some serious rain next weekend so I hope to use the time to figure this out.
 
The instructions show a diagram for basic motorcycles. My main question was how to get a pod inside the front air intakes. I will see about extensions. Thanks AY4B. We're in for some serious rain next weekend so I hope to use the time to figure this out.

There are many ways to do this. You just need the extra pods and the correct ones to daisy chain. A spyder needs longer length pod wires to cover the larger area than a motorcycle. The XK glow system has 2 zones. I used one zone for under lighting that basically made a loop around the back including my rear wheel well and back around the other side. The second zone I used for around the engine and upper front A frame well which at some point went into the intake openings from behind. My system was not really that complicated or large. The head components came off the battery and were taped in at the frunk and back out to the lights. Their store has various size pacs that have all kinds of odds and ends with extra lights. Have fun!
Another word of caution, having the system ready is a slow drain on the battery. Take steps to not leave it on for long periods or you may wake up to a dead battery.
 
Last edited:
Way to get LEDs into front air intakes on RT

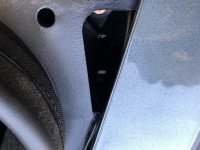
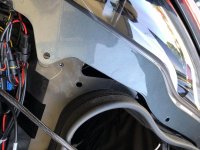
What I tried was view a video on how to replace fog light bulbs and found out how to partially remove the panel surrounding the fog lights. When I was able to move it aside I found I could drop a cables pod right down to the top inside of the intake and, with a long small screw drive I could move it so the VHB tape stuck. Made sure not to stick it to the radiator. I had to remove the paper and hope the it wouldn’t stick to anything. I also dangled the pod so it was facing backwards so I could flip it up to stick to roof of intake.

Panel moved aside
EA63BE14-B859-4C31-89E7-EFF885673D47.jpg

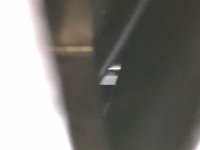
See that light? That’s the radiator and close up of light where I dangled the pod
FCCB0578-ED44-46A0-971E-F3A795072F01.jpg 4EDFAA22-65F8-4951-9D09-79E749E8B317.jpg
 
Back
Top