Yfactor
New member
From what Ron has hinted; do you really think that he'd coat them in GREEN? :shocked:
YES or YELLOW
From what Ron has hinted; do you really think that he'd coat them in GREEN? :shocked:
YES or YELLOW
") :roflblack:
:roflblack: ray: just fine for ME:yes:
Unboxed mine just while ago and it is... the prettiest shade of... and perfectly matches... BLACK!
 hyea:hyea:hyea:hyea:
Ron, here is a question for you. I have a full size Handy lift as well as a smaller J&S jack. Which would be best for the install? Does the install go better with weight on the tires or better with the suspension hanging unweighted?
I think the Handy Lift will be easier. I've done it both ways. Being able to stand up is a plus. You don't need to take weight off the wheels as the only thing that will affect is access to the sway bar ends which are easily accessed either way.
If you have enough room to work between the bottom of the Spyder and the lift you're good to go.
Ron
i have read directions prior to doing the install and do I understand correctly that the install can be done by removing the lower frunk bolts? Does this mean that none of the bodywork or bodywork fasteners need to be removed or losened to pull out the frunk enough to get in? Correct?

Rn
i have the frunk emptied, skid plate removed and the two bottom frunk bolts removed. The most I can get the frunk to move forward is 1 inch. Is there something I'm missing? It moves 1 inch and then the whole front, suspension and all starts to raise. It looks as though the foglights may be the issue.
Larry
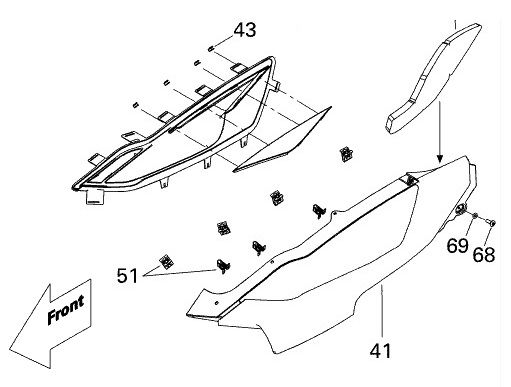
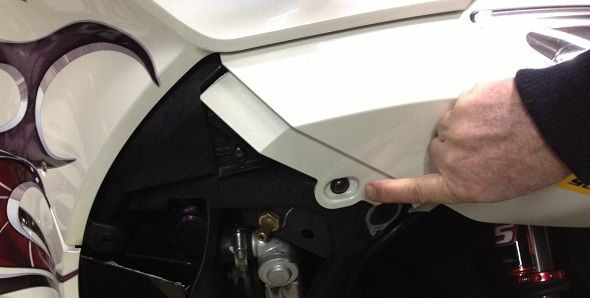
Seems there was a step that I failed to include. You'll need to pull the 2, easy access pop-off panels (Right and Left side). This exposes the large bolt (#63 below) that fastens the long tupperware piece that holds the fog lights to the frame at the back. This is what is keeping you from moving the Frunk.
I know cjackg recommends loosening the 4 bolts that hold the frunk at the back. This may work but I don't think it is necessary. I believe that removing the pop-off panels and remove this bolt on each side will be easier. I will post a picture here shortly. (Picture posted)
Should that be screw #68 in the drawing?
Carl