• There were many reasons for the change of the site software, the biggest was security. The age of the old software also meant no server updates for certain programs. There are many benefits to the new software, one of the biggest is the mobile functionality. Ill fix up some stuff in the coming days, we'll also try to get some of the old addons back or the data imported back into the site like the garage. To create a thread or to reply with a post is basically the same as it was in the prior software. The default style of the site is light colored, but i temporarily added a darker colored style, to change you can find a link at the bottom of the site.

Trying Gel Insert for Seat

Myoutdoors

New member
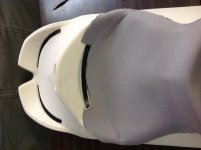
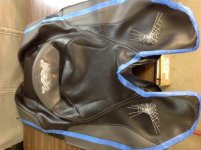
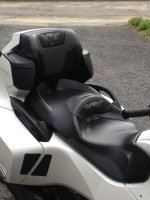
Like a few of you, I was not pleased with my RT Seat... My derrière isn't padded enough I guess! Lol. Anyway, I was just about to purchase a new Ultimate Seat and someone suggested I try their Gel insert first. The insert was under $100 shipped to my house so I'm in the process of installing it now. I'll post pics as I go. I'm not sure if this has been shown here yet since I'm a newbie, but here we go.
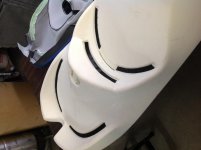
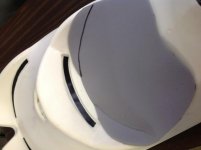
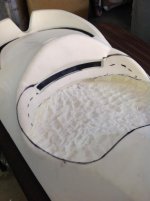
the original seat

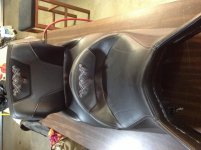
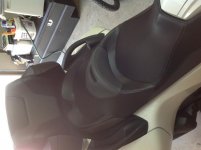
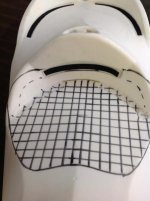
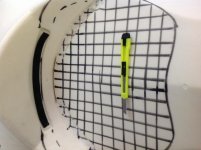
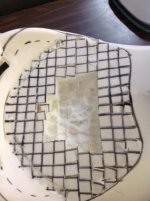
marking the edges with tape and marker

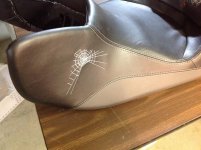
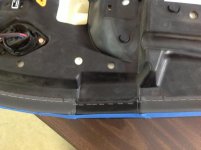
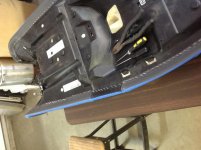
Removing the zillion staples
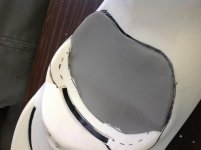
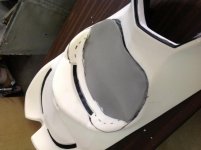
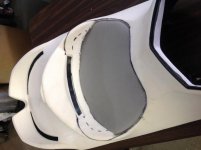
 

Attachments

  • image.jpg
    image.jpg
    40.1 KB · Views: 250
  • image.jpg
    image.jpg
    49.8 KB · Views: 246
  • image.jpg
    image.jpg
    60.4 KB · Views: 254
image.jpgSeat covers off...you can see the Velcro in key areas that need to be reapplied later.
 

Attachments

  • image.jpg
    image.jpg
    37.9 KB · Views: 159
Time to outline the Gel Pad. The grid pattern is just a guide to cut out with the razor knife.
 

Attachments

  • image.jpg
    image.jpg
    43.1 KB · Views: 133
  • image.jpg
    image.jpg
    32.1 KB · Views: 122
  • image.jpg
    image.jpg
    30.1 KB · Views: 127
I used the disposable adjustable razors so I can adjust the depth of the cut to the thickness of the Gel Pad.

Once I got all the foam cubes out, I smoothed it out with my Dremel attachment
 

Attachments

  • image.jpg
    image.jpg
    47.2 KB · Views: 119
  • image.jpg
    image.jpg
    34.5 KB · Views: 117
  • image.jpg
    image.jpg
    24.2 KB · Views: 131
You have a job at my shop anytime

I know anyone can do it, this is the best way to get a comfortable seat
with out breaking the bank
Good work and keep posting the pictures
Dave

I used the disposable adjustable razors so I can adjust the depth of the cut to the thickness of the Gel Pad.

Once I got all the foam cubes out, I smoothed it out with my Dremel attachment
 
Fitting in the gel pad....I just shaved a little more off
 

Attachments

  • image.jpg
    image.jpg
    39.5 KB · Views: 122
  • image.jpg
    image.jpg
    39.4 KB · Views: 103
  • image.jpg
    image.jpg
    42.5 KB · Views: 114
Final foam liner to smooth everything out...next is reapplying the original seat cover. Doing a little custom embroidery first!
 

Attachments

  • image.jpg
    image.jpg
    34.4 KB · Views: 122
Thanks Dave, everything is going well. The gel pad fits perfectly...have you done this before? Lol! I ended up grabbing a bostich air stapler to make life easier when reapplying the seat cover.
 
DO IT YOURSELF

I have been installing Gel into seats for over 20 years it was hard to get in the early days
it was used mostly in hospitals to help patients to not get bed sores, because it conforms to your
shape in this case it conforms to your BUTT.... you should notice a huge change in comfort.
Craig has posted better pictures than I have and I want to thank him for it.
If you have a seat you are not happy with and you want to have a GEL seat and not pay $$$$$$$$$
for it give this a try, I stock the gel that is made just for Motorcycle/Spyder seats shipped most anyplace
in the US except Alaska and Hawaii where the shipping is higher it's under $100.00 with everything you need
to do this job yourself. YOU CAN DO IT...:thumbup::thumbup::thumbup::thumbup::thumbup:
IMG_1477.jpg


Thanks Dave, everything is going well. The gel pad fits perfectly...have you done this before? Lol! I ended up grabbing a bostich air stapler to make life easier when reapplying the seat cover.
 
Last edited:
Finally done...seat covers back on and stapled...added a little custom embroidery. Tomorrow it'll be back on the Spyder for the actual comfort test.
 

Attachments

  • image.jpg
    image.jpg
    64.1 KB · Views: 136
  • image.jpg
    image.jpg
    65.8 KB · Views: 149
  • image.jpg
    image.jpg
    62.4 KB · Views: 140
Back
Top